Introduction
Whether you sell blocks of 10 or 20 sessions, tracking who's paid and how many they have left can get messy fast. Session blocks in Foundations are designed to fix just that, keeping payments, session counts, and history in one place so you always know exactly where every client stands.
In this article we'll cover:
- What session blocks are
- Why session blocks beat pay-per-session
- The life-cycle of a session block
- How to create a session block
- How to count a session towards a block
- Some FAQs
1. What exactly is a session block?
A session block is a prepaid bundle of sessions you sell to a client. In Foundations each block is a tidy record that keeps three things in sync:
- Money – the payment that funded the block.
- Usage – how many sessions the client has paid for and how many they've used.
- History – every session that gets ticked off against the block.
Because all three live in one place, you always know who has credit, how much is left, and when to remind them it's time to top up.
2. Why session blocks beat pay-per-session
A Comparison
| Pay-per-session | Session block |
|---|---|
| Have to issue a separate invoice for every session | Money collected up-front when client pays a single invoice |
| Less visibility on future income | Sale is recognised instantly |
| Harder to encourage commitment | Clients feel invested and more likely to complete the program |
3. The life-cycle of a session block
A session block is always in one of the following states:
- Draft – You've created the block but haven't invoiced the client yet.
- Pending – The invoice has been sent; you're waiting for payment.
- Active – Payment received, session credits unlocked. Every time you schedule a session and link it to the block, Foundations automatically decreases the number of sessions remaining.
- Completed – All session credits have been used up.
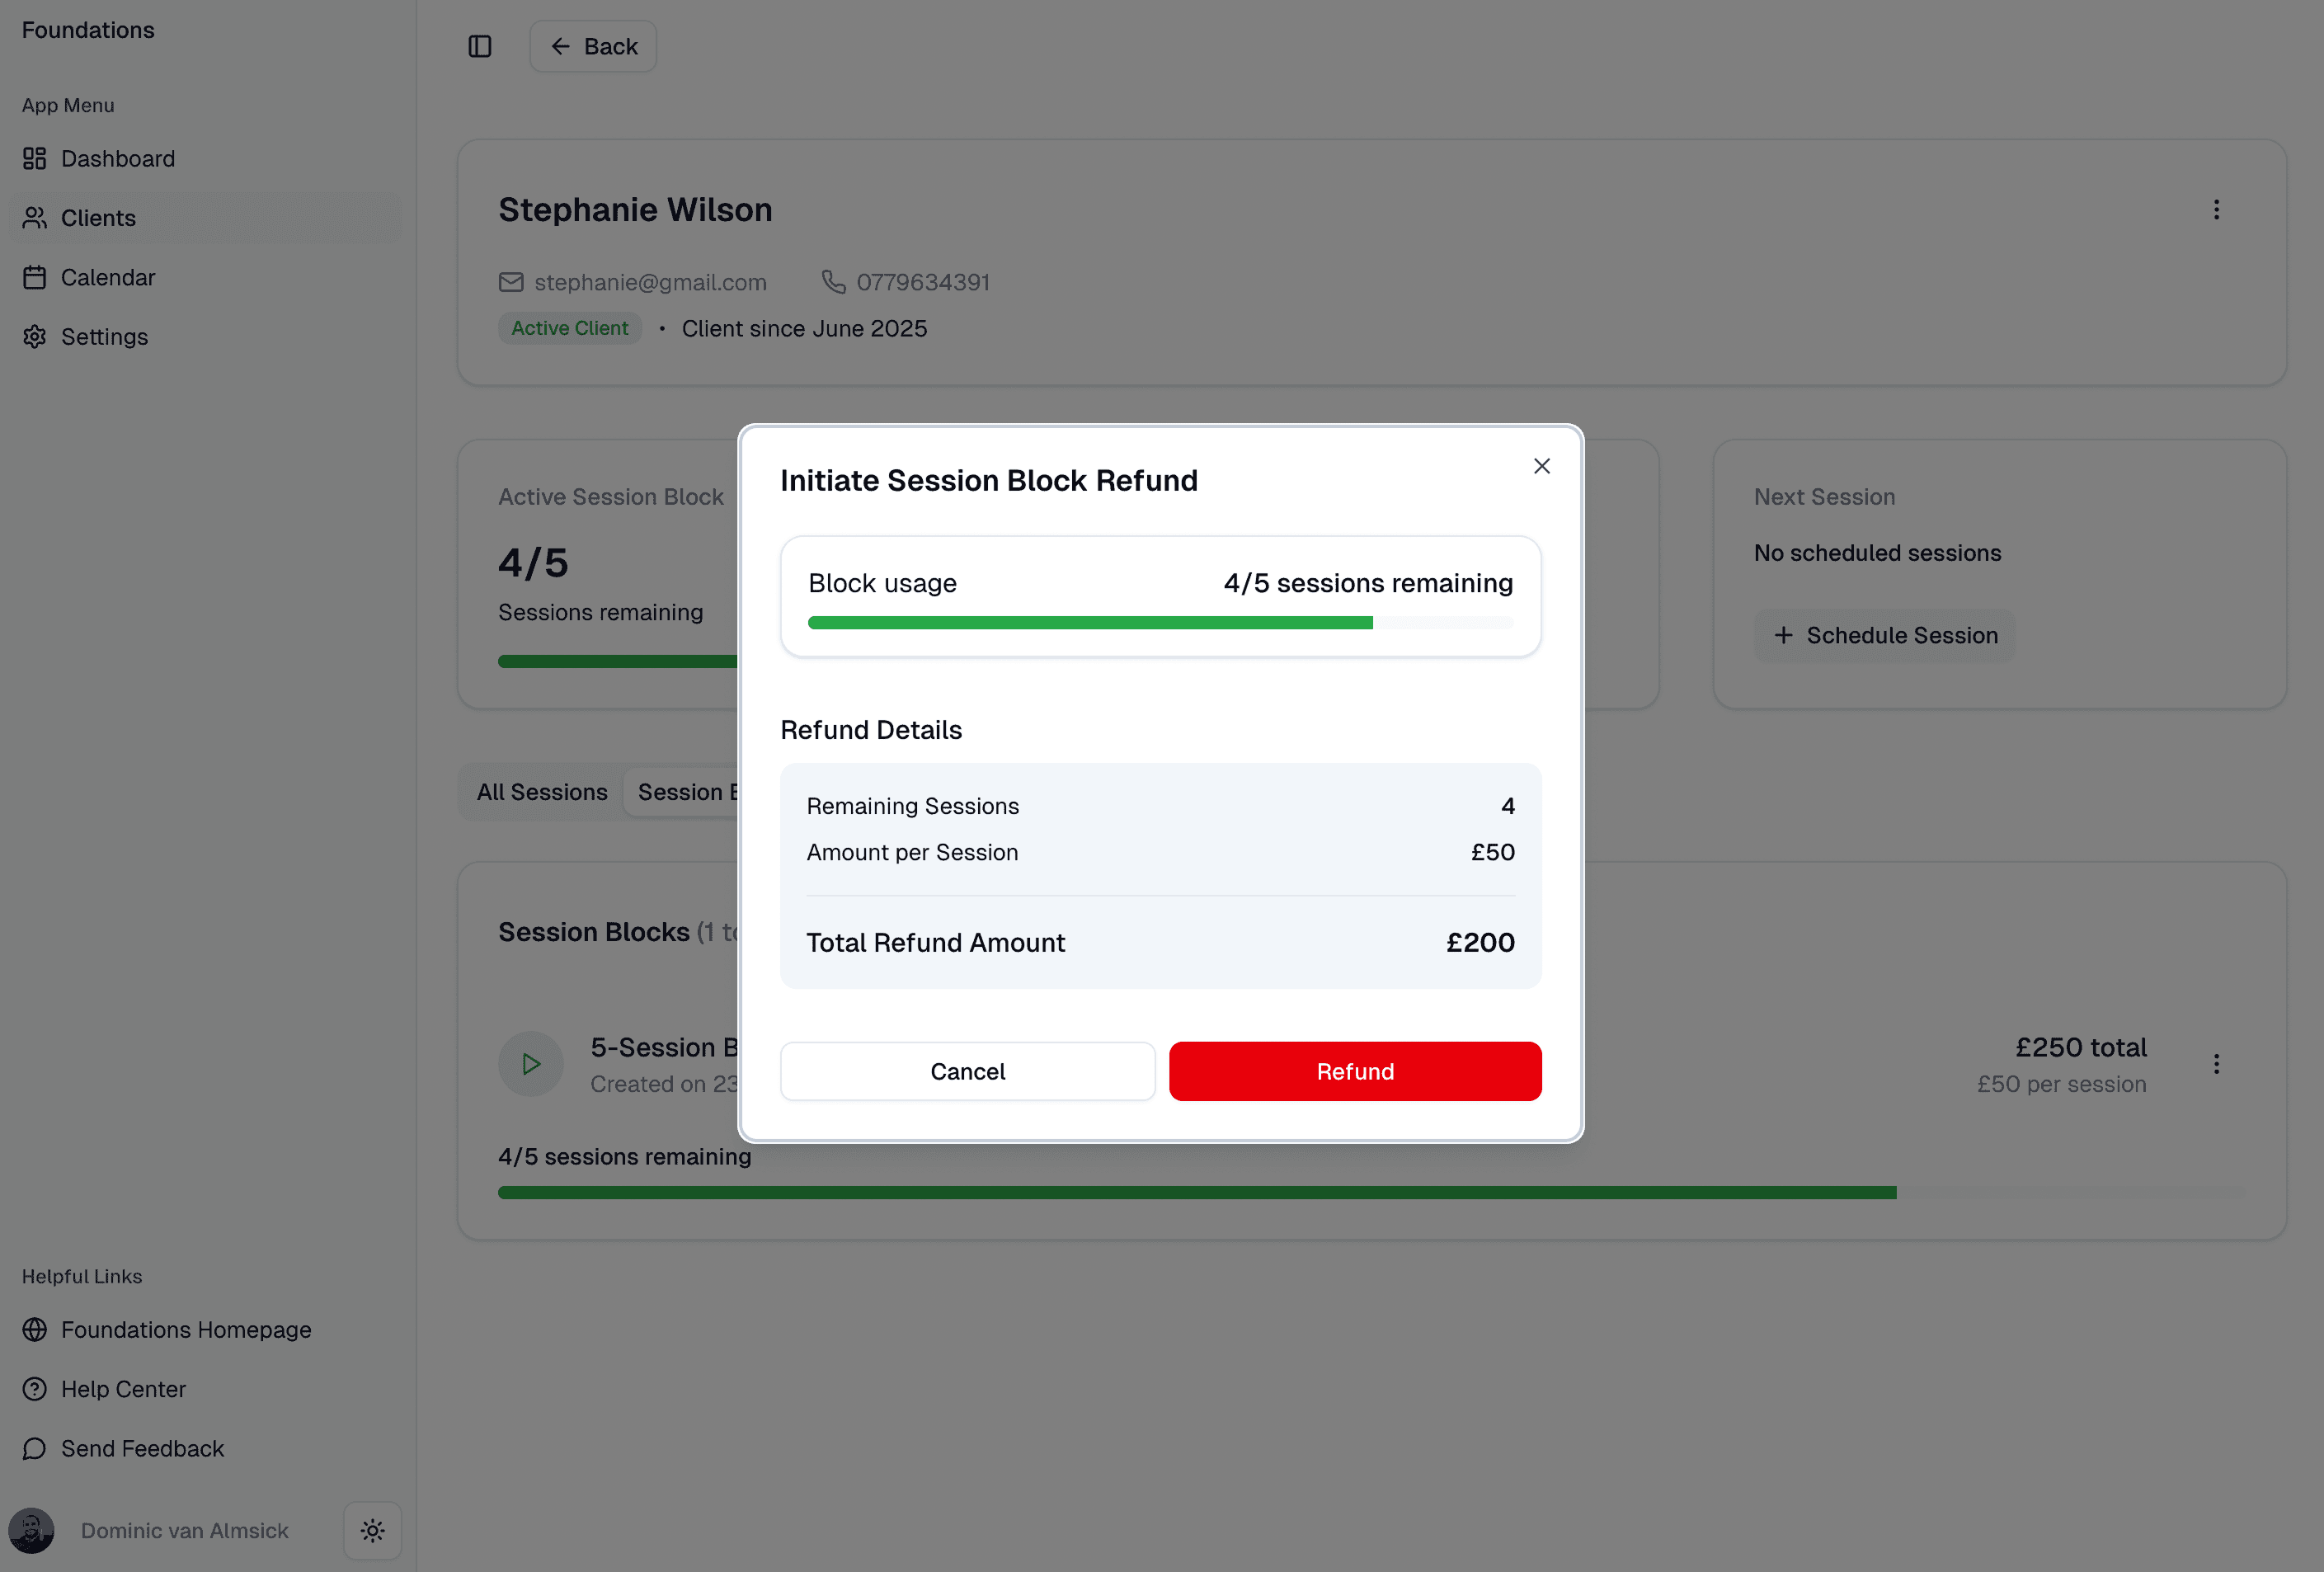
- Cancelled – You mark the block as cancelled and have the option to refund any unused sessions. The refund amount is calculated based on the average price per session multiplied by the number of sessions remaining.
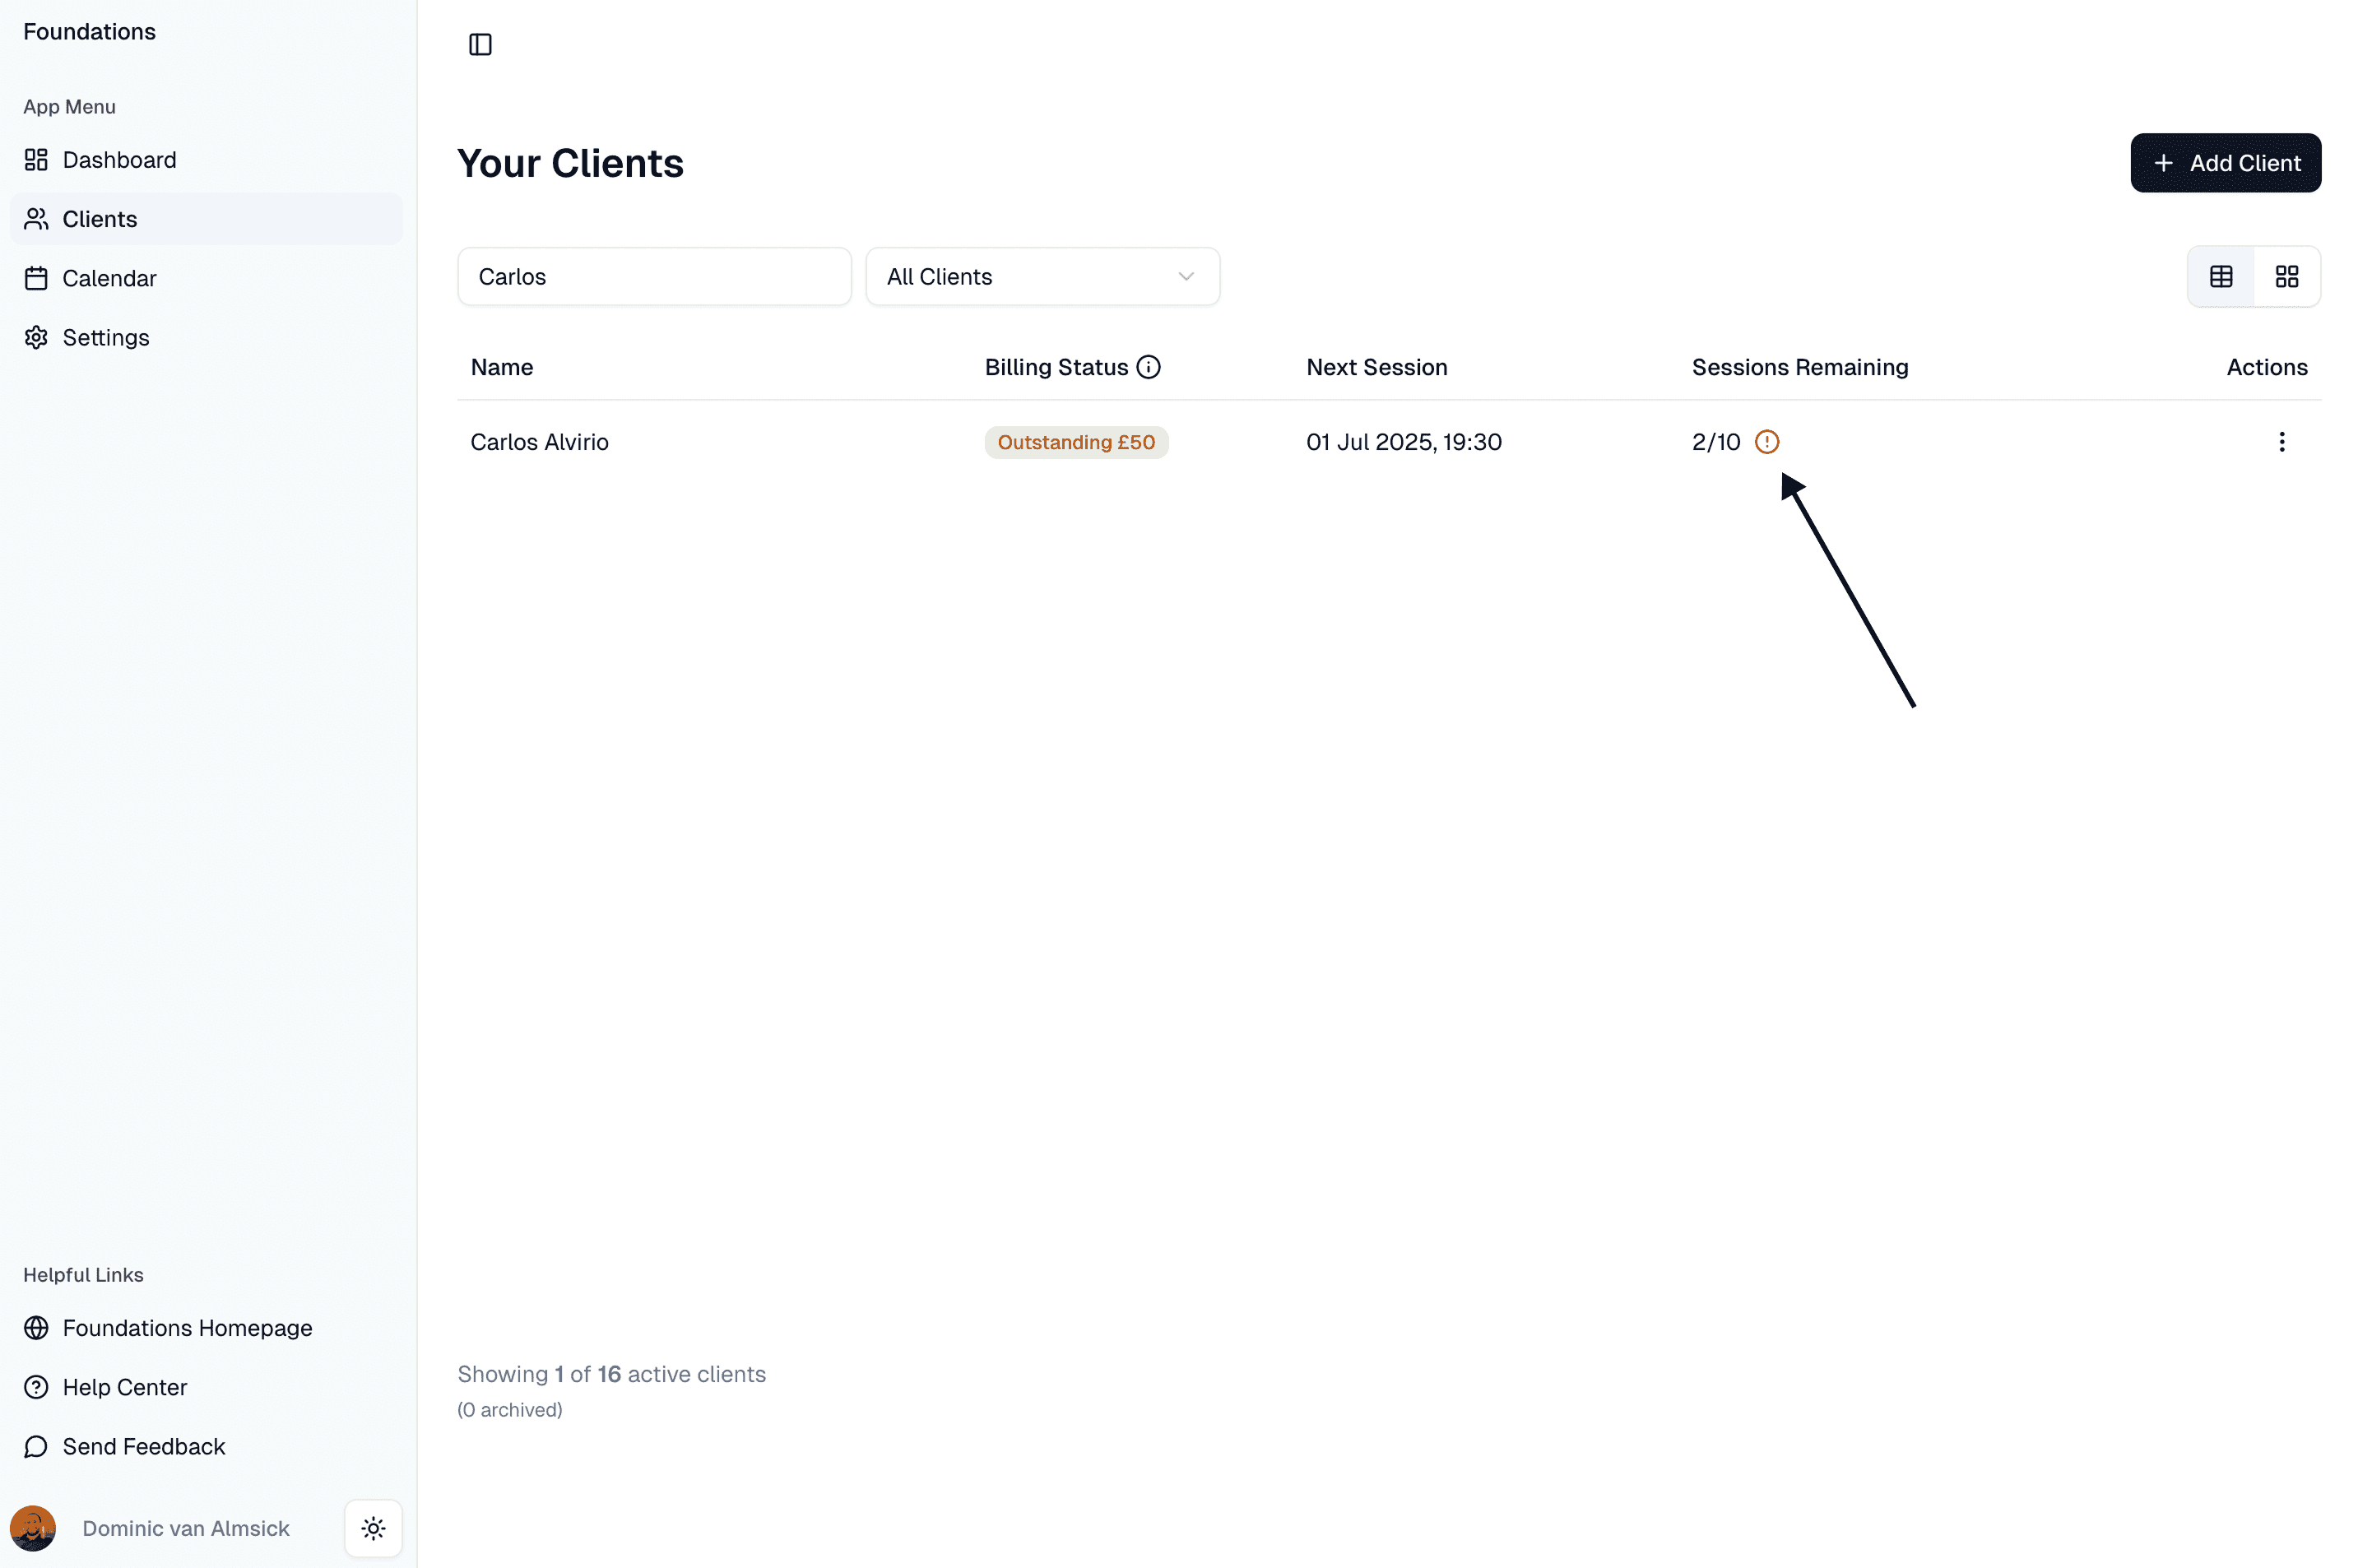
Automatic reminders: When a client has 20% of their block remaining, a visual indicator appears in the clients table in the Sessions Remaining column for that client.
4. How to create a session block
Foundations keeps things simple: each client can only have one active block at a time. Here's how to create one:
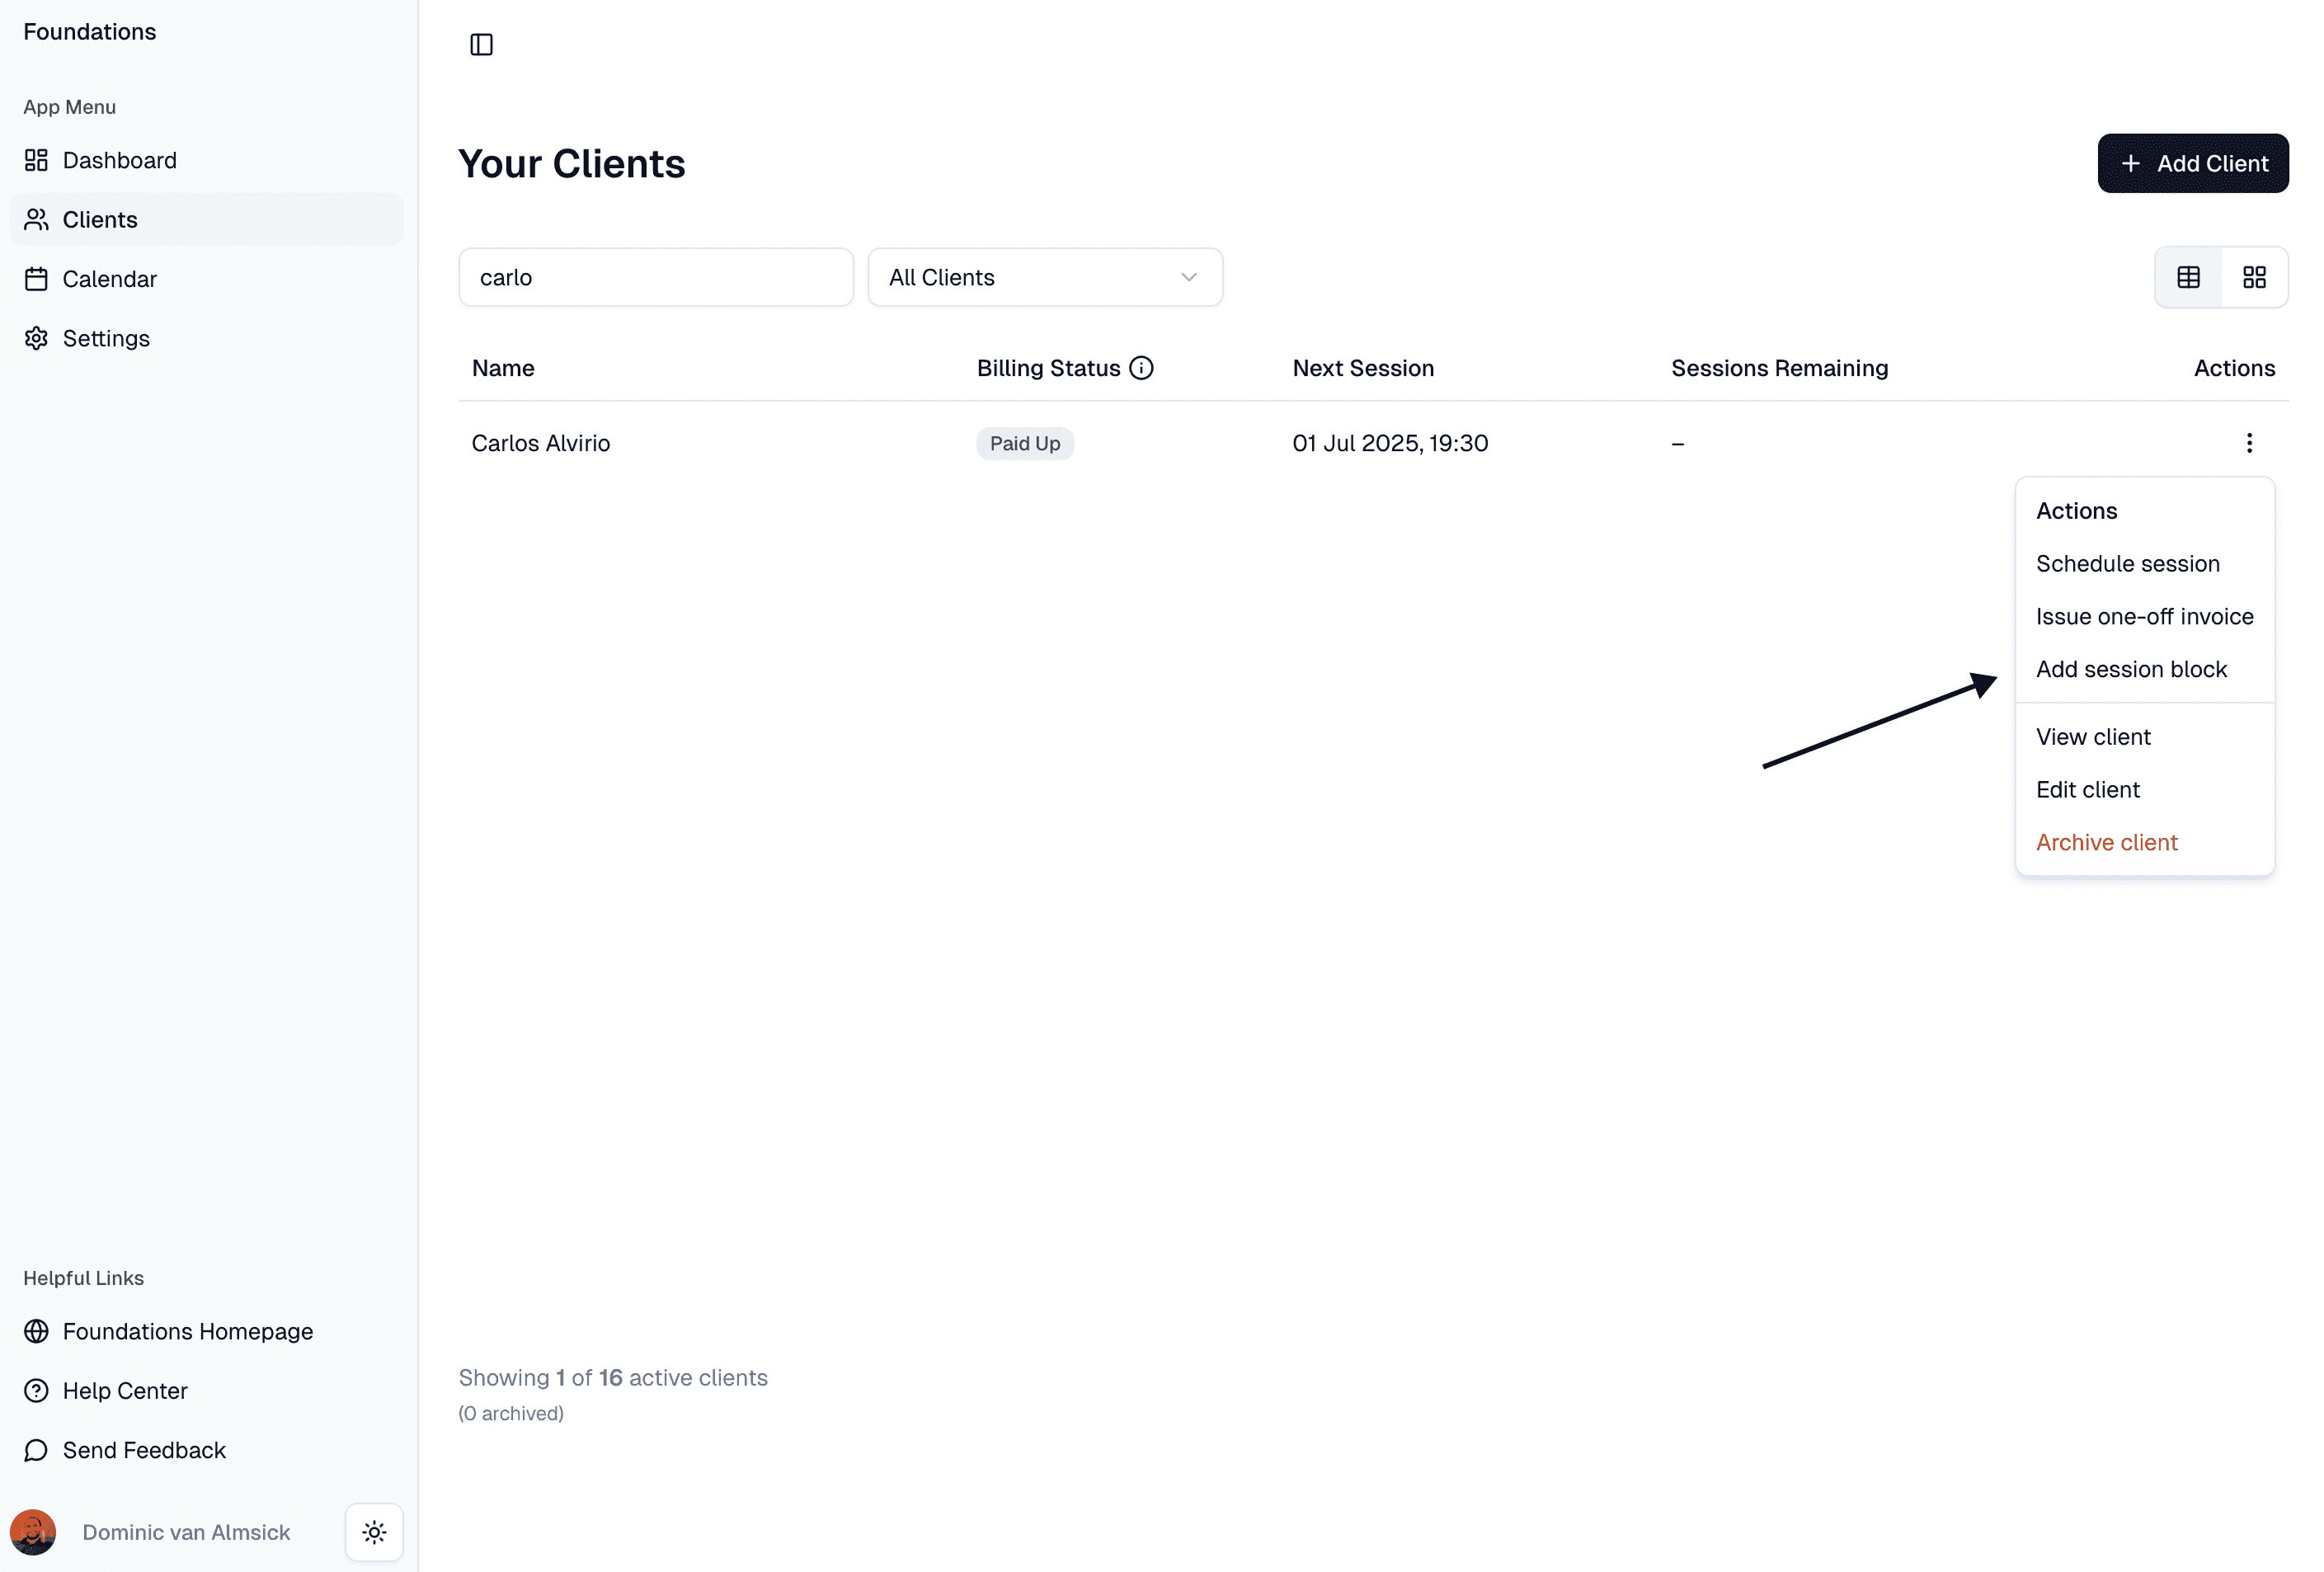
- In the clients table, click the three dots in the Actions column for your client to launch the dropdown menu, and click Add session block.
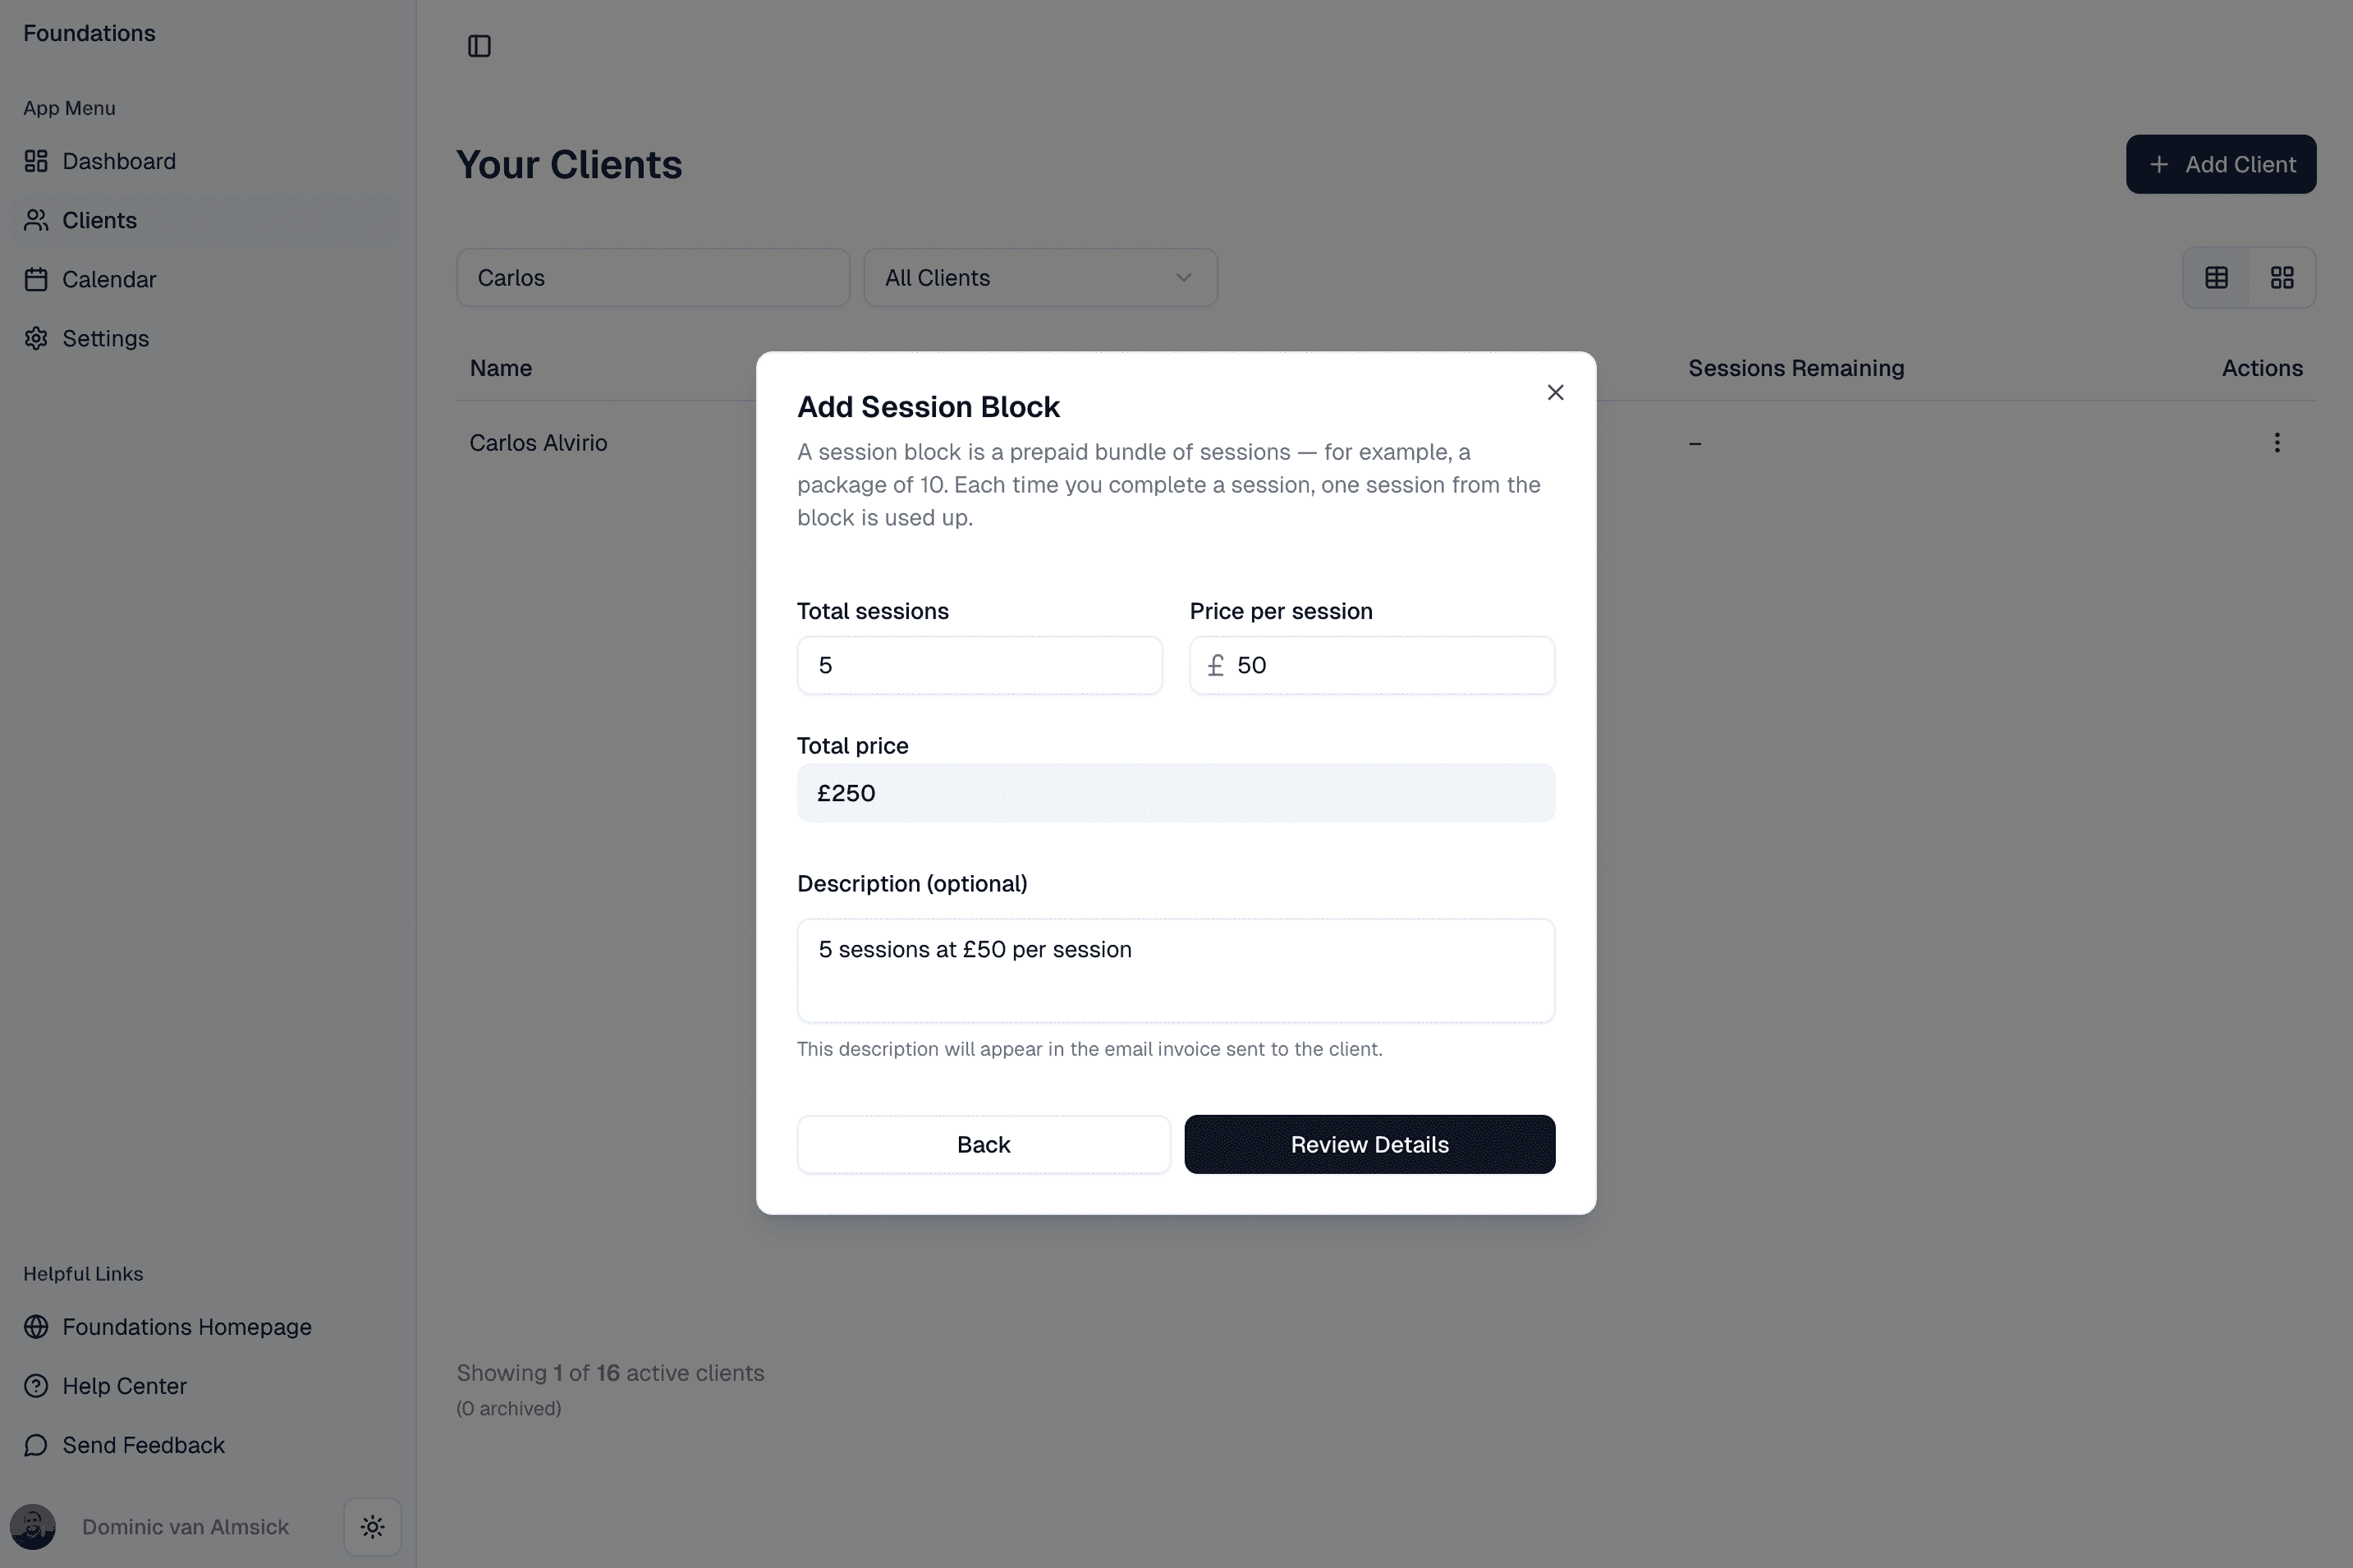
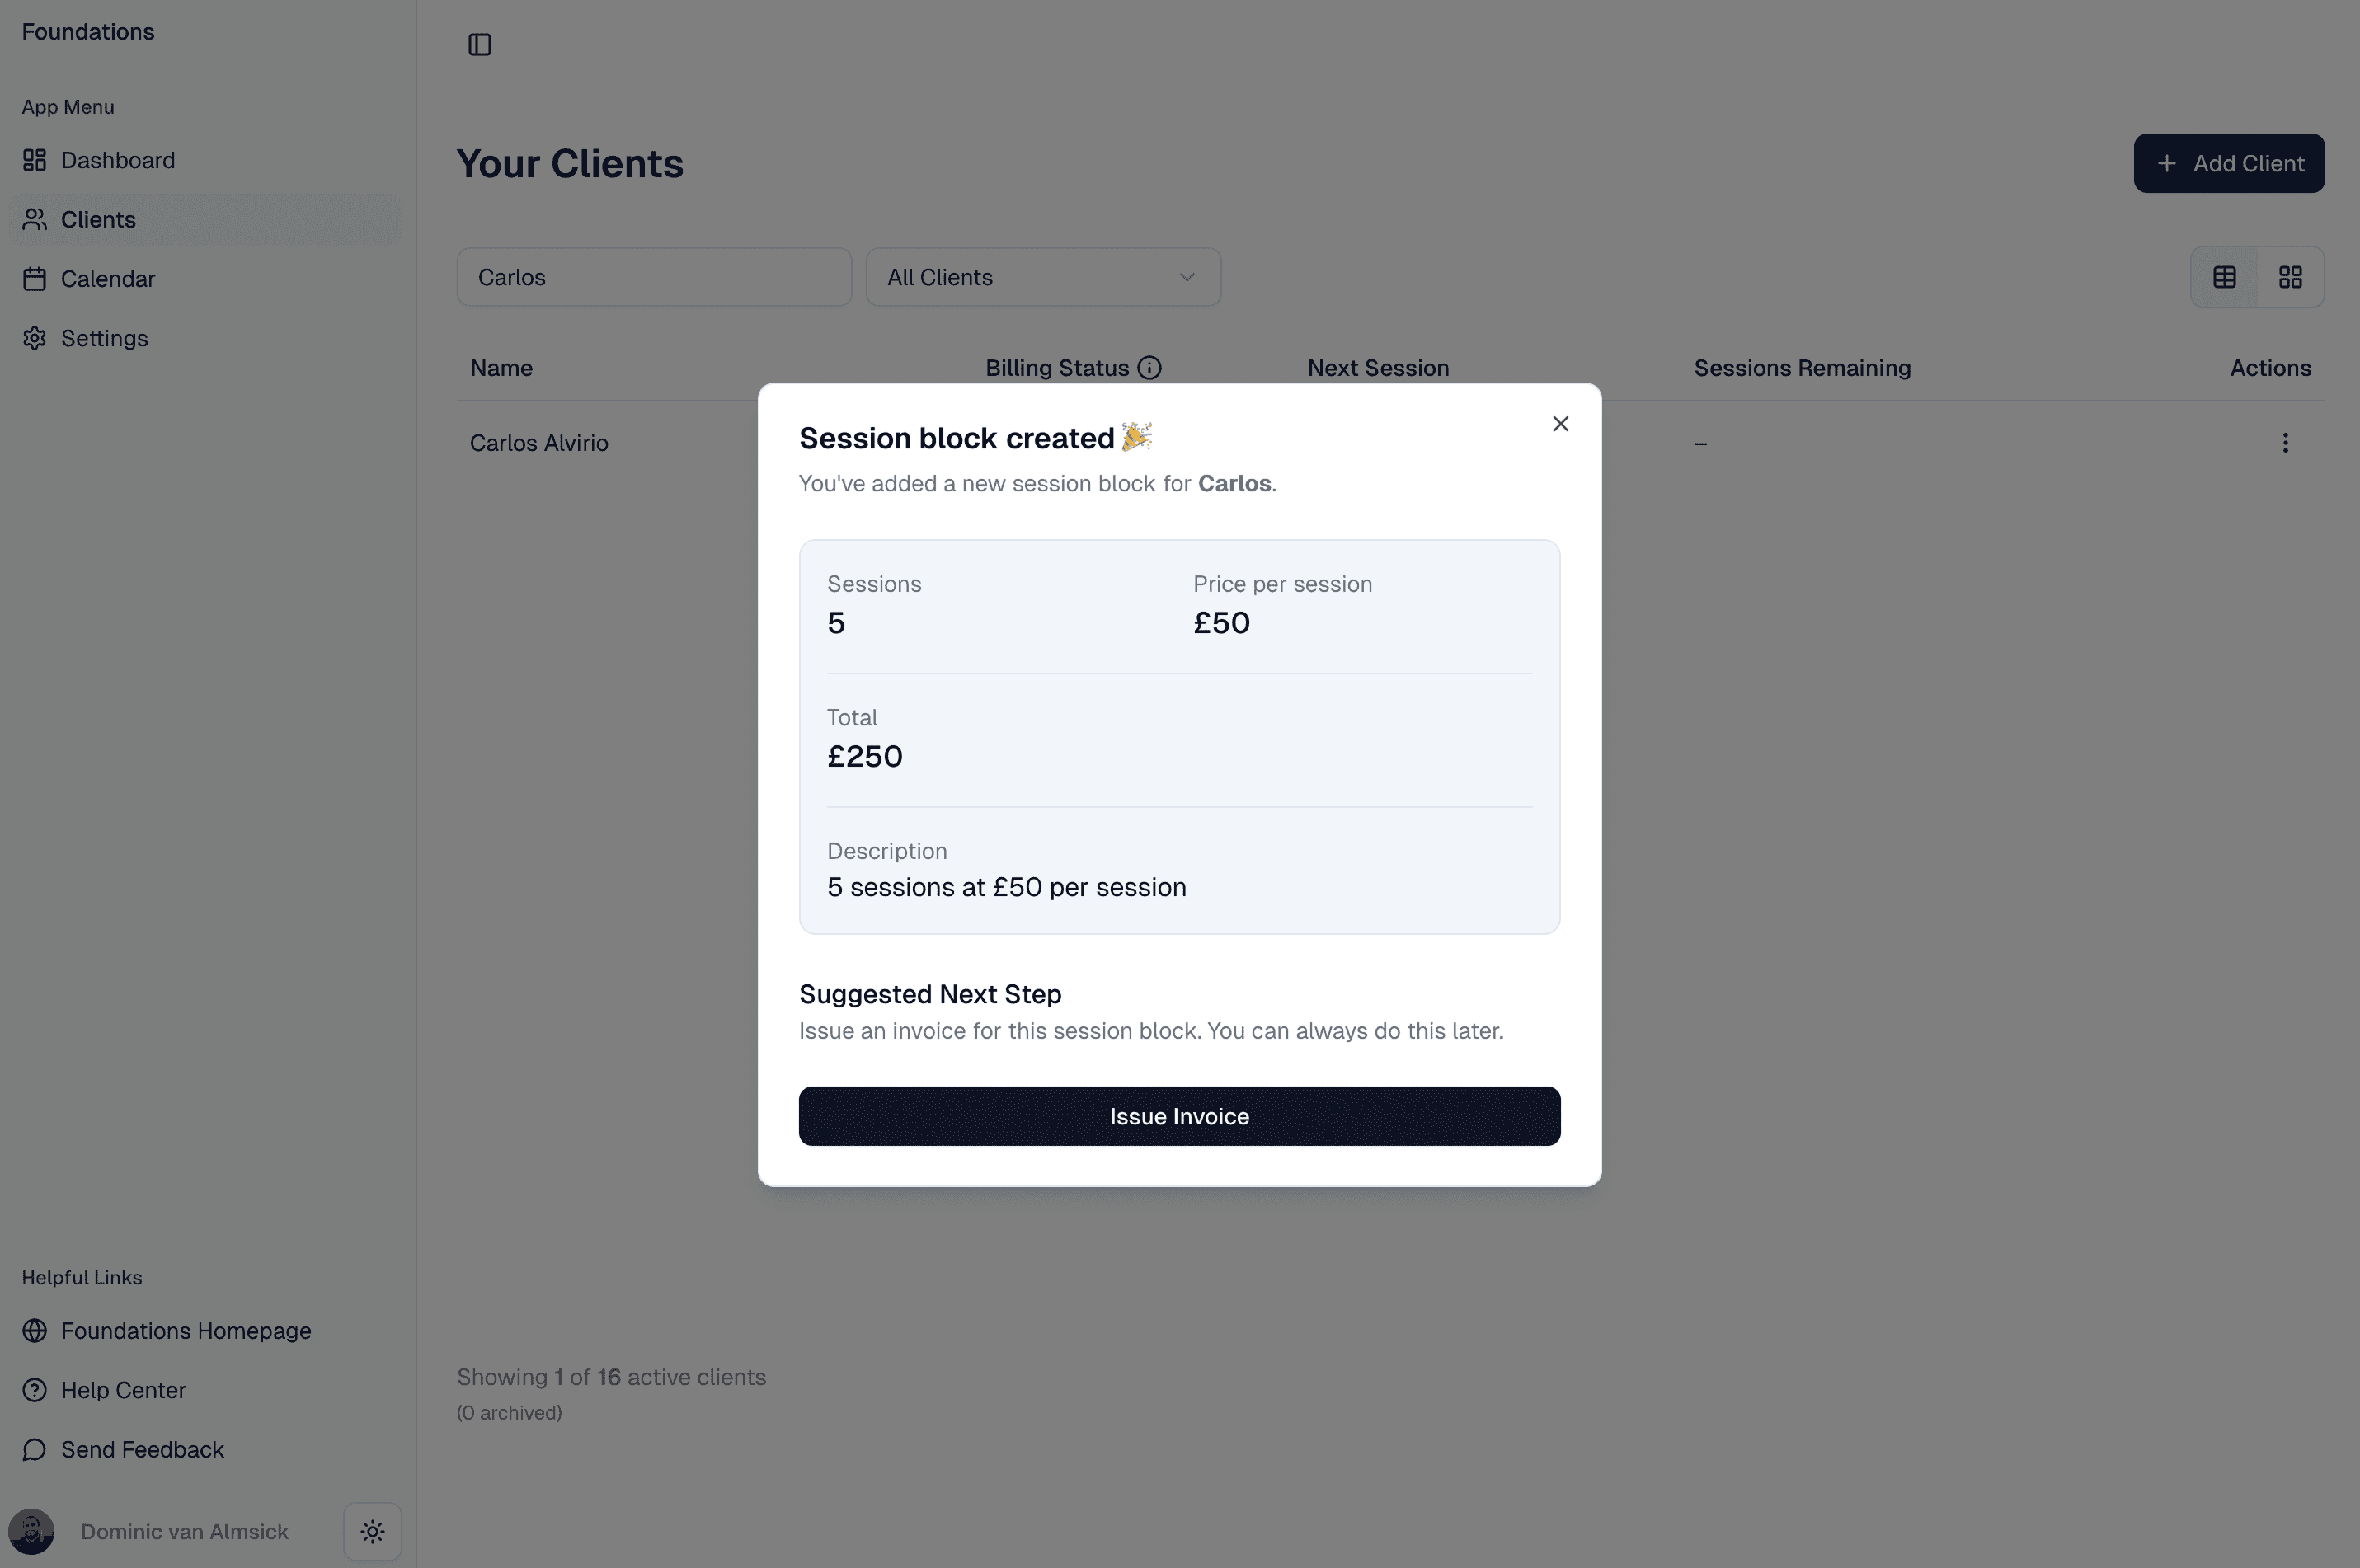
- Enter the number of sessions to include in the block, and the price you would like to charge for each session. The total price is calculated for you. You can add a description, which will appear in the invoice.
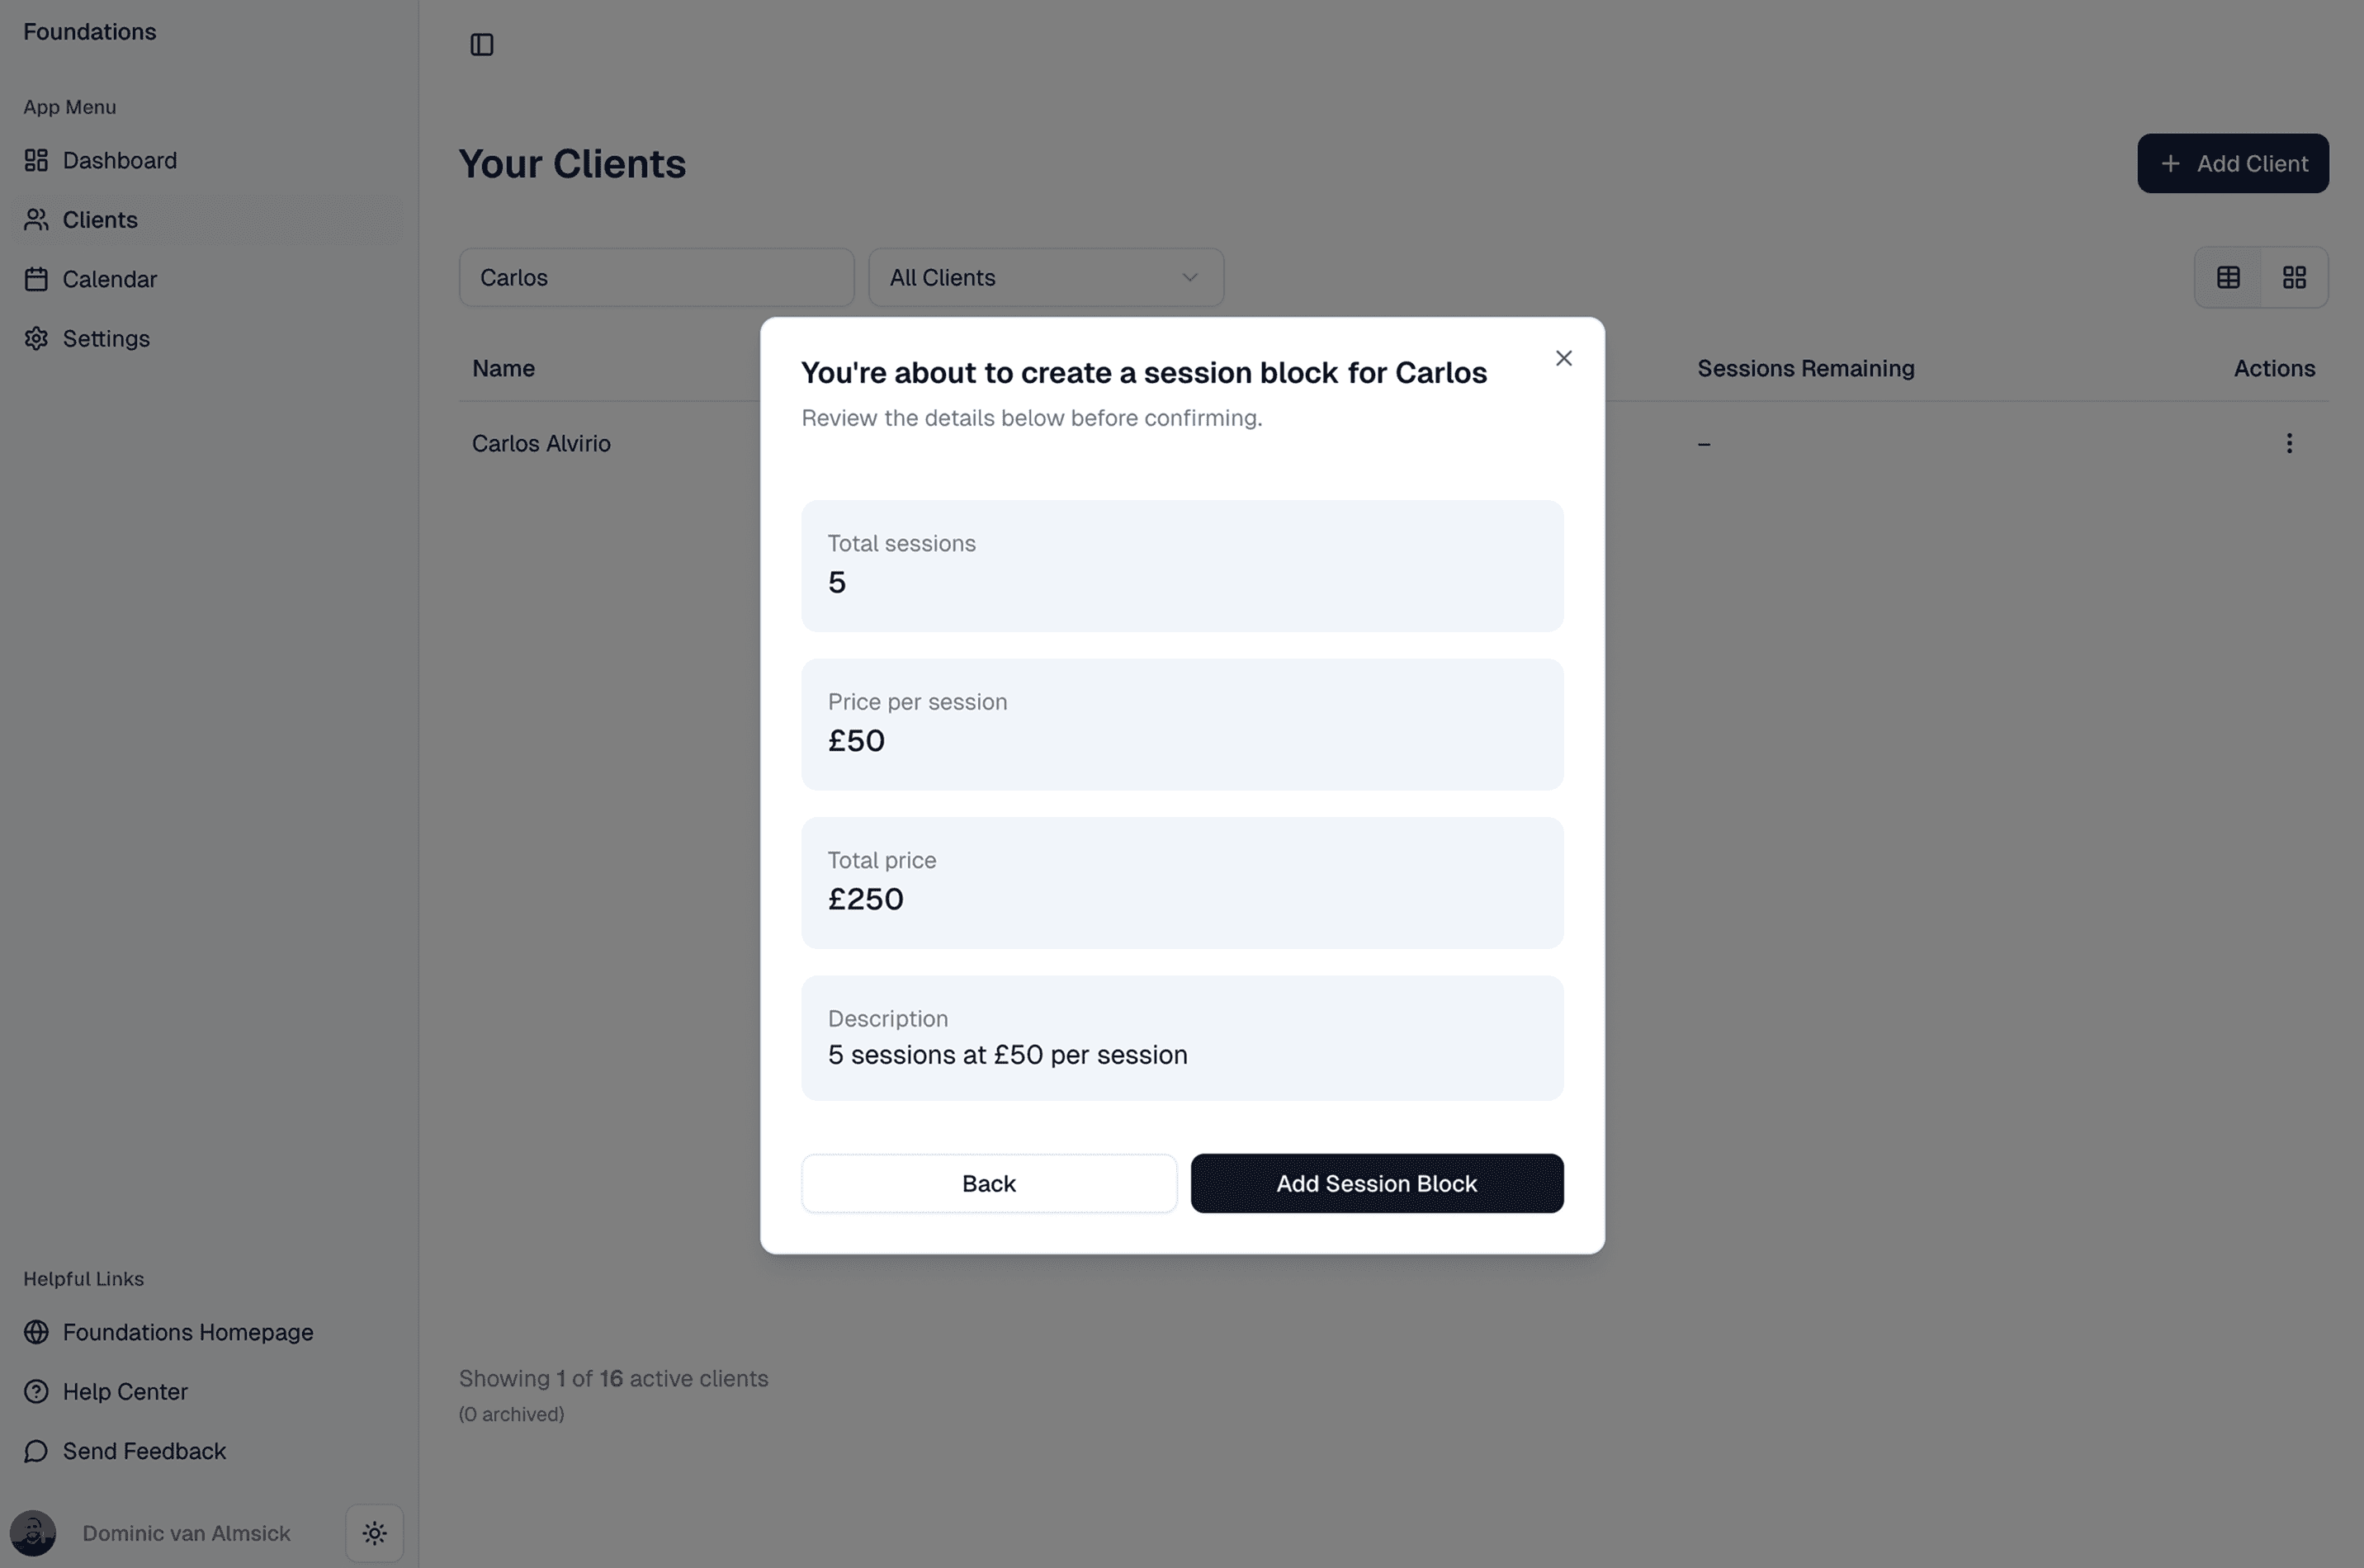
- After you click Review Details, you'll see the details for the block you're about to create. Once you're happy, click Add Session Block.
- You'll then see a confirmation screen, along with the suggested next step to issue an invoice.
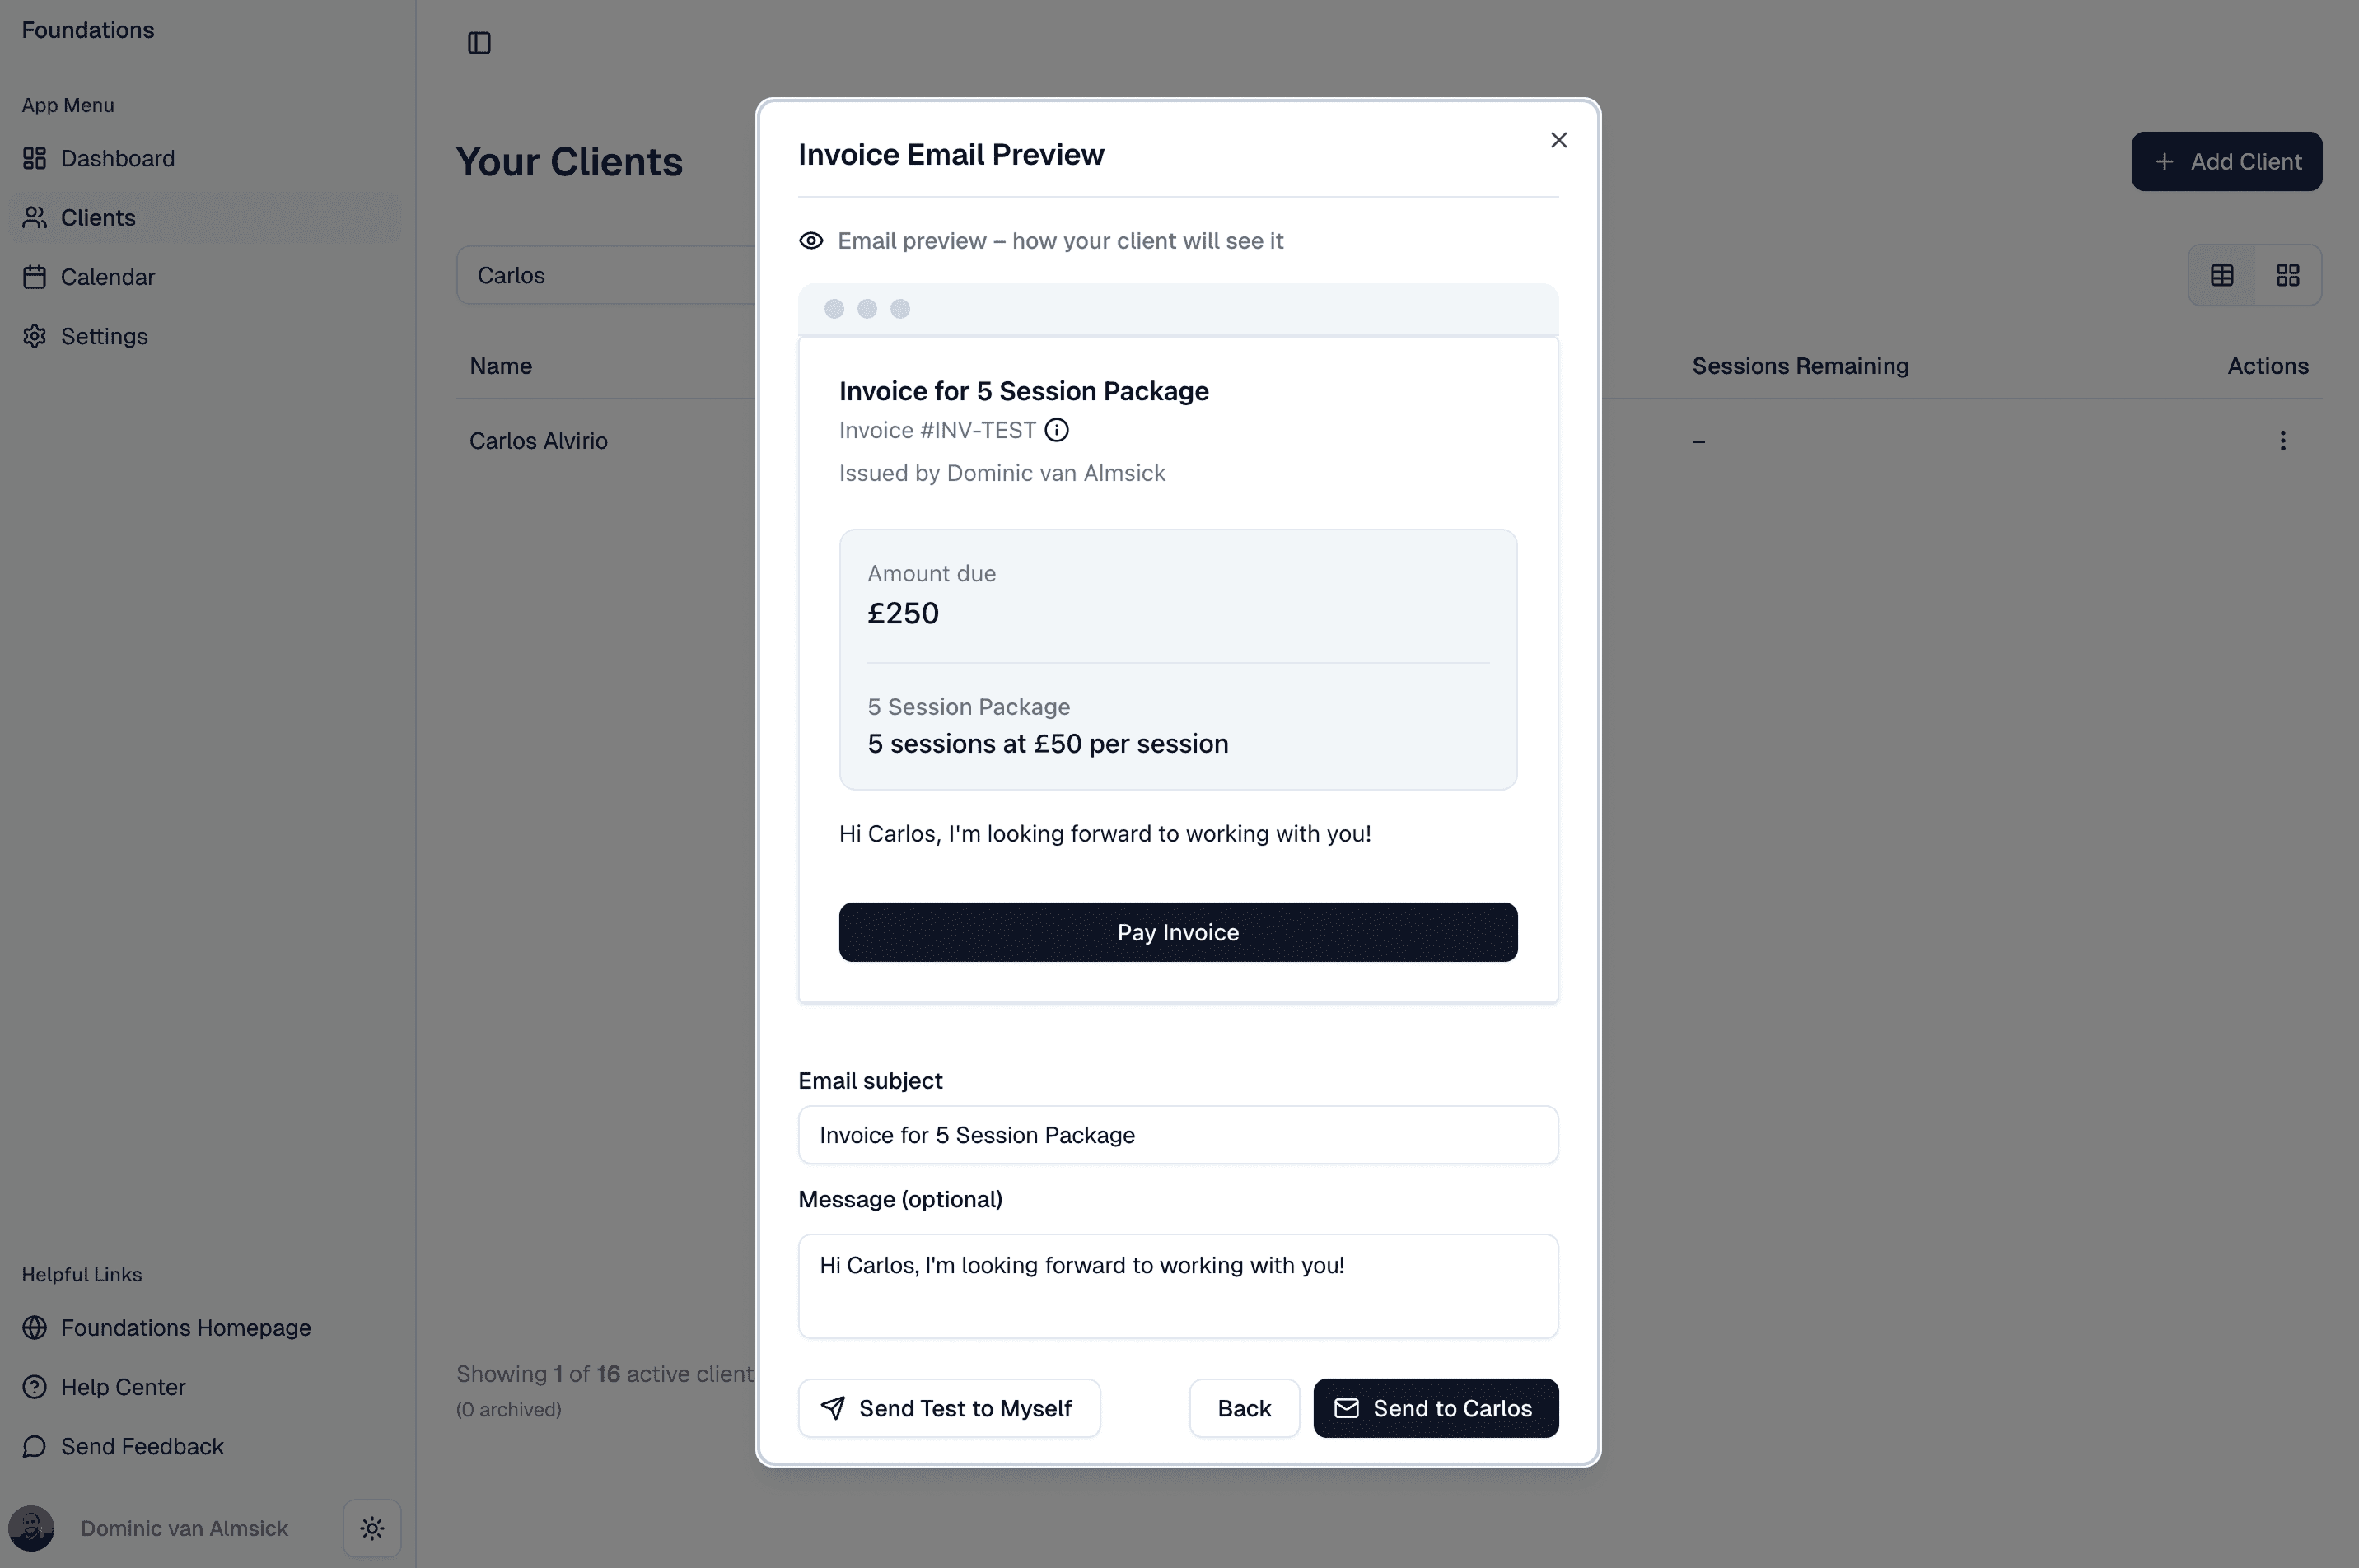
- After clicking Issue Invoice, you'll see a preview of the email your client will receive. You can edit the email subject and add a message. You can also click Send Test to Myself if you'd like to preview the email before sending it to your client. Once you're ready, click Send to….
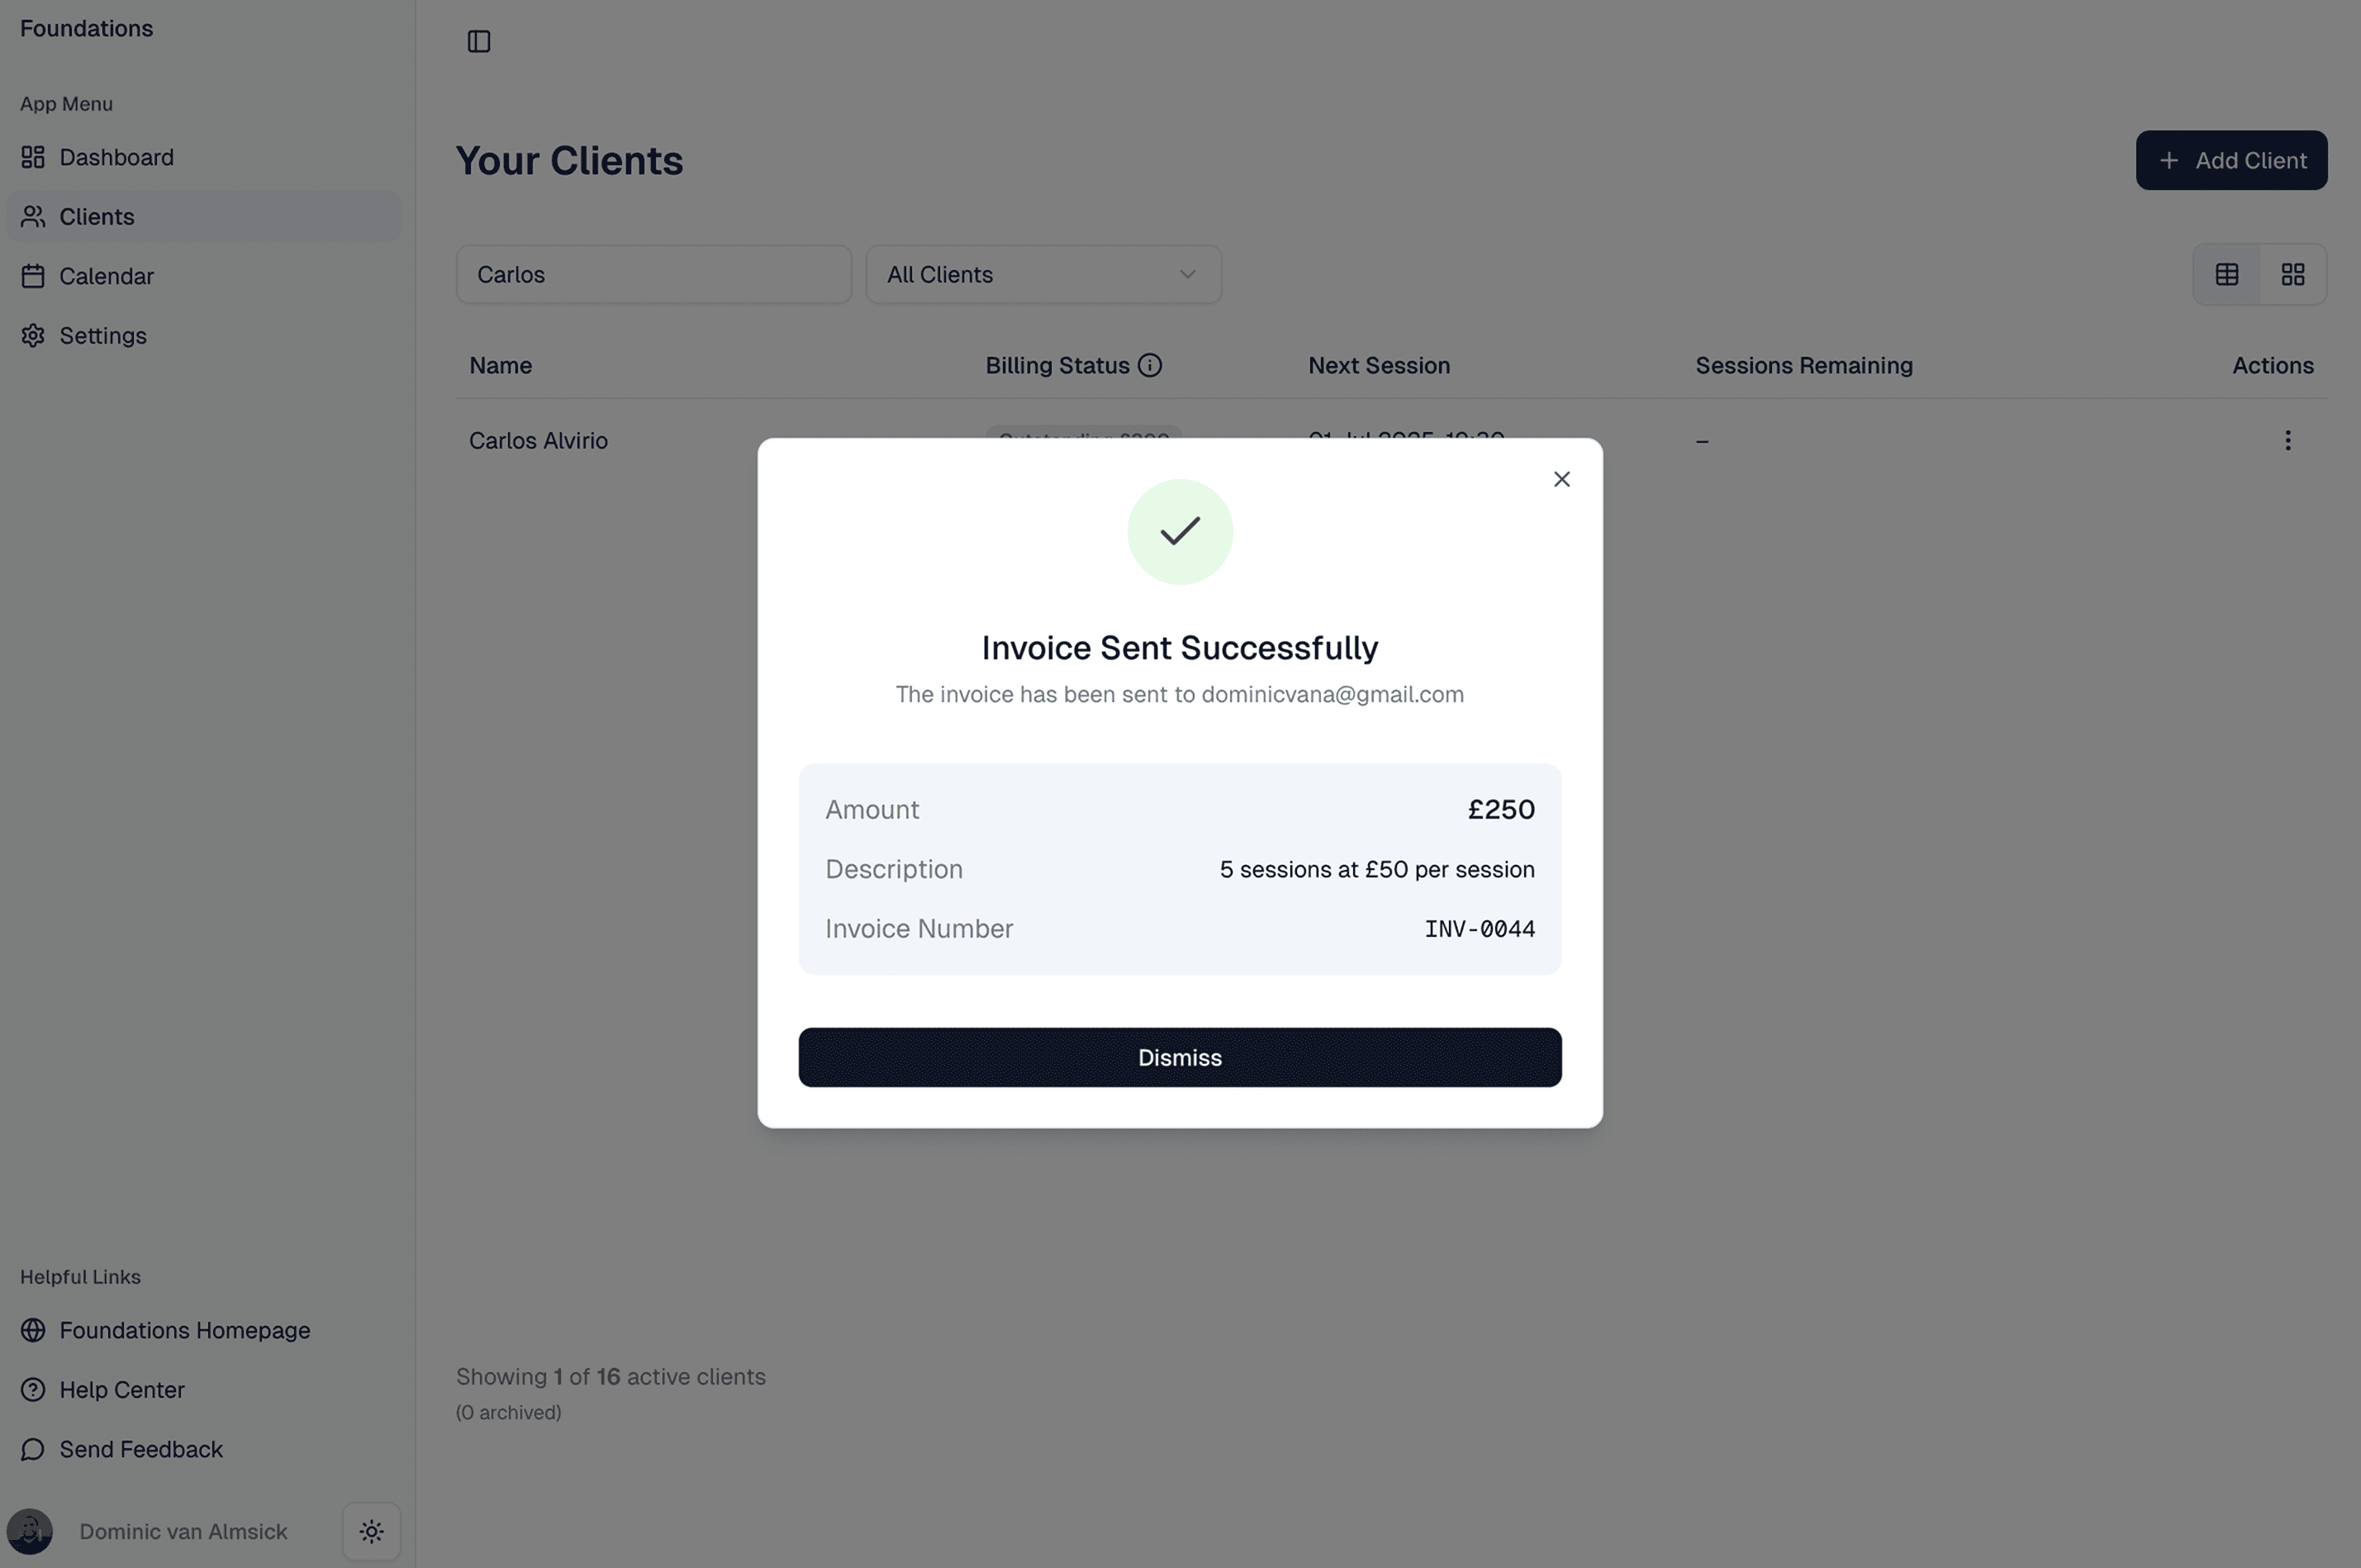
- Finally, you'll see a confirmation that the invoice has been sent successfully.
And that's it – you've created a session block and sent an invoice for it.
In the clients table, you'll see your client's billing status has changed to Outstanding. If you hover over the badge you'll see the details of the invoice you just sent.
Once your client pays, the badge turns green, and you're ready to start booking sessions for the block.
5. How to count a session towards a block
- From the dropdown menu in the clients table, click Schedule session.
- Fill in the details for the session.
- In the Session block field, use the dropdown and select the block.
- Click Schedule.
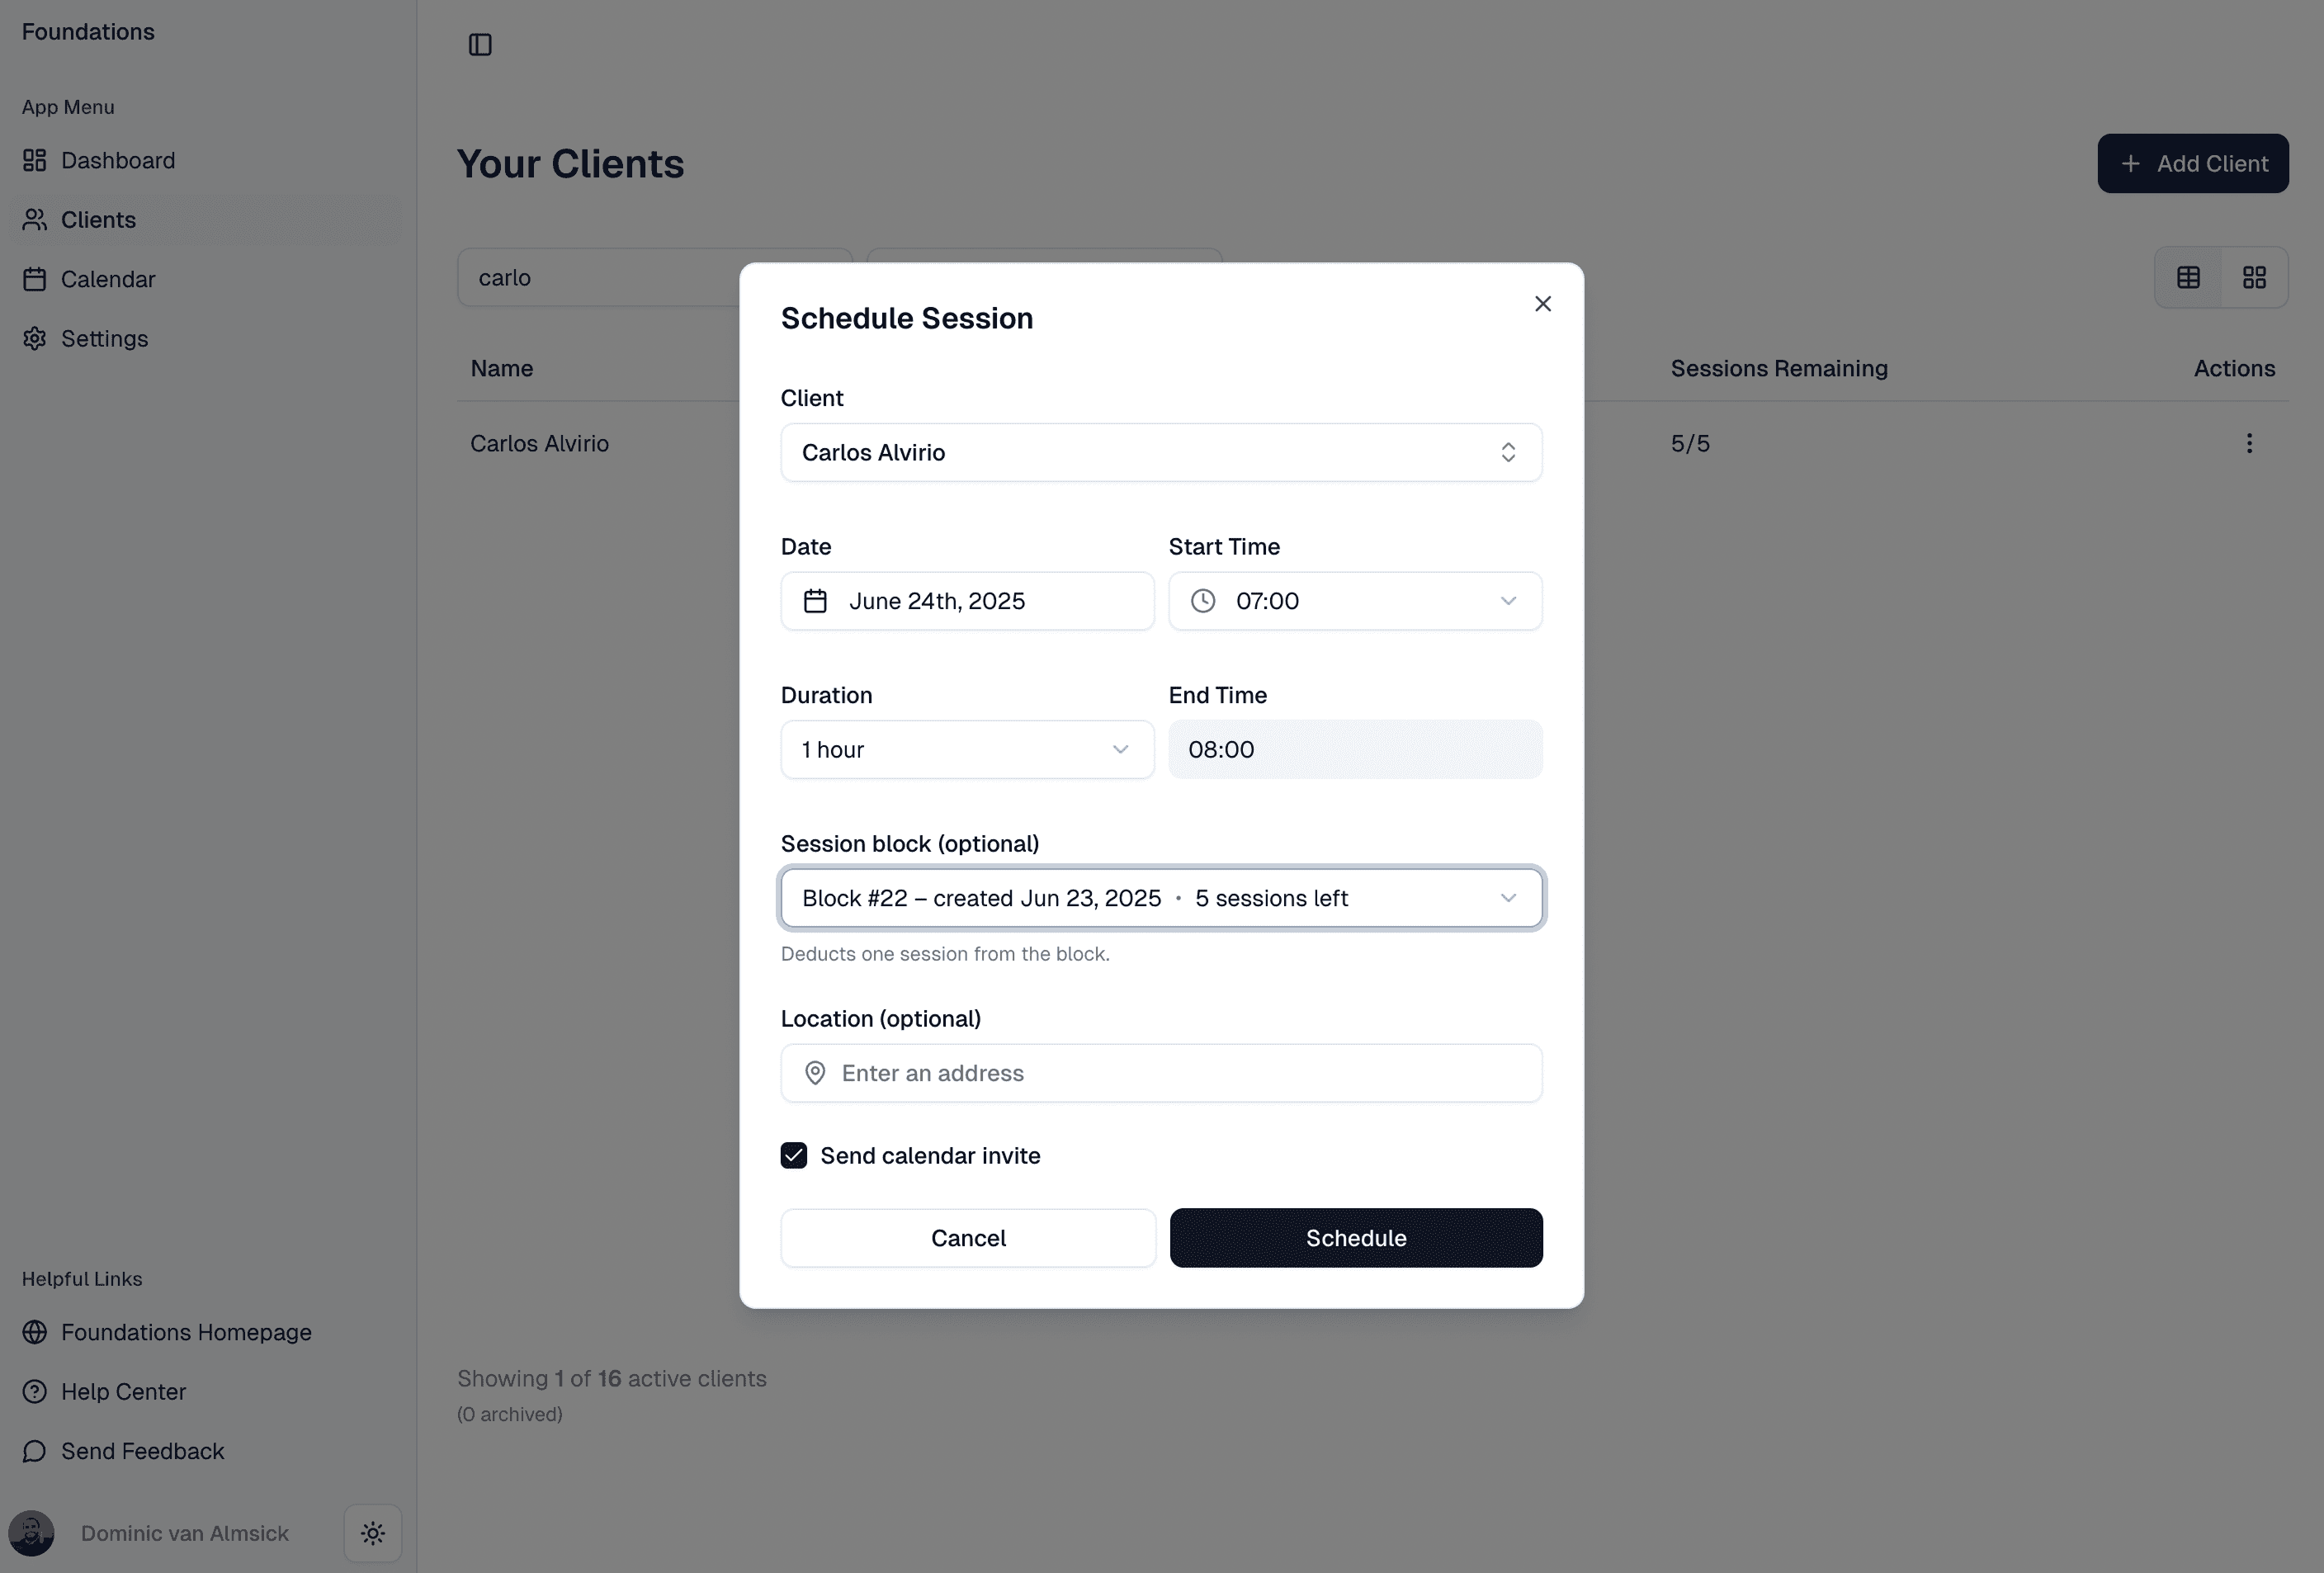
And that's it. Foundations has automatically decreased the sessions remaining in the block.
6. FAQs
What if a client cancels late?
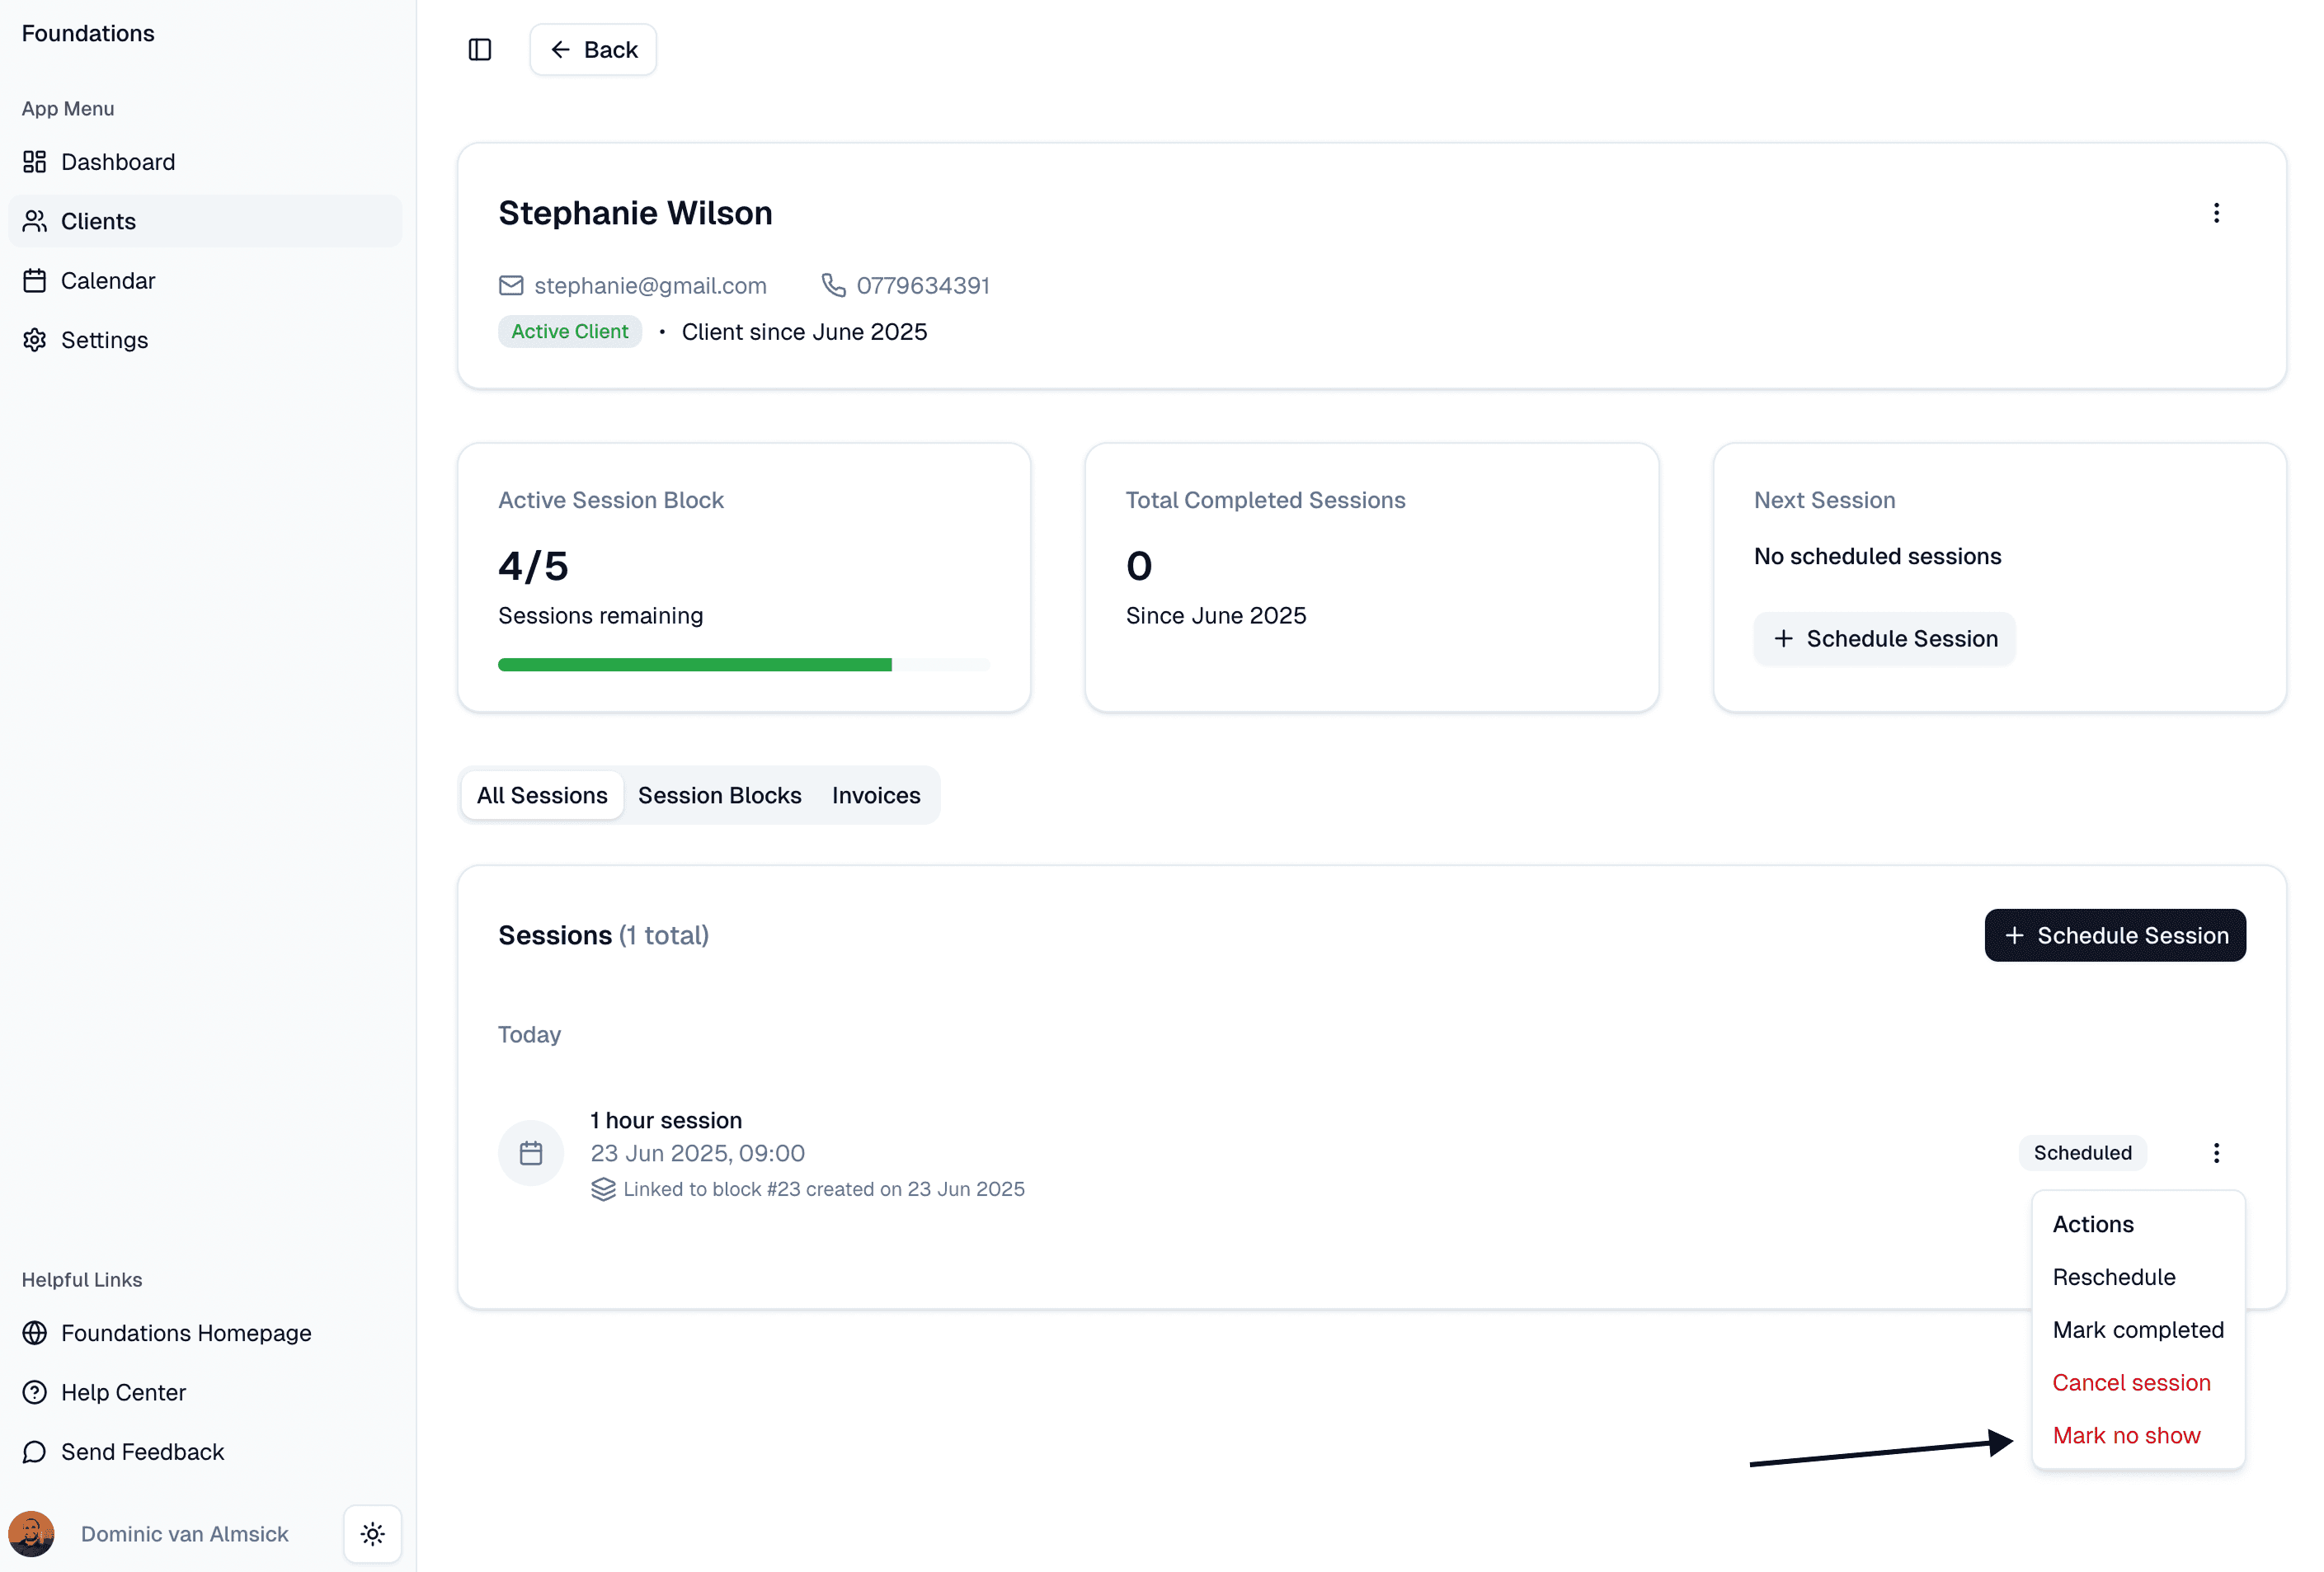
Change the session's status to No Show. It will still burn one credit. You can do this from several places, for example from the client profile. Use the dropdown menu for a session and click Mark no show.
Can I part-refund a block?
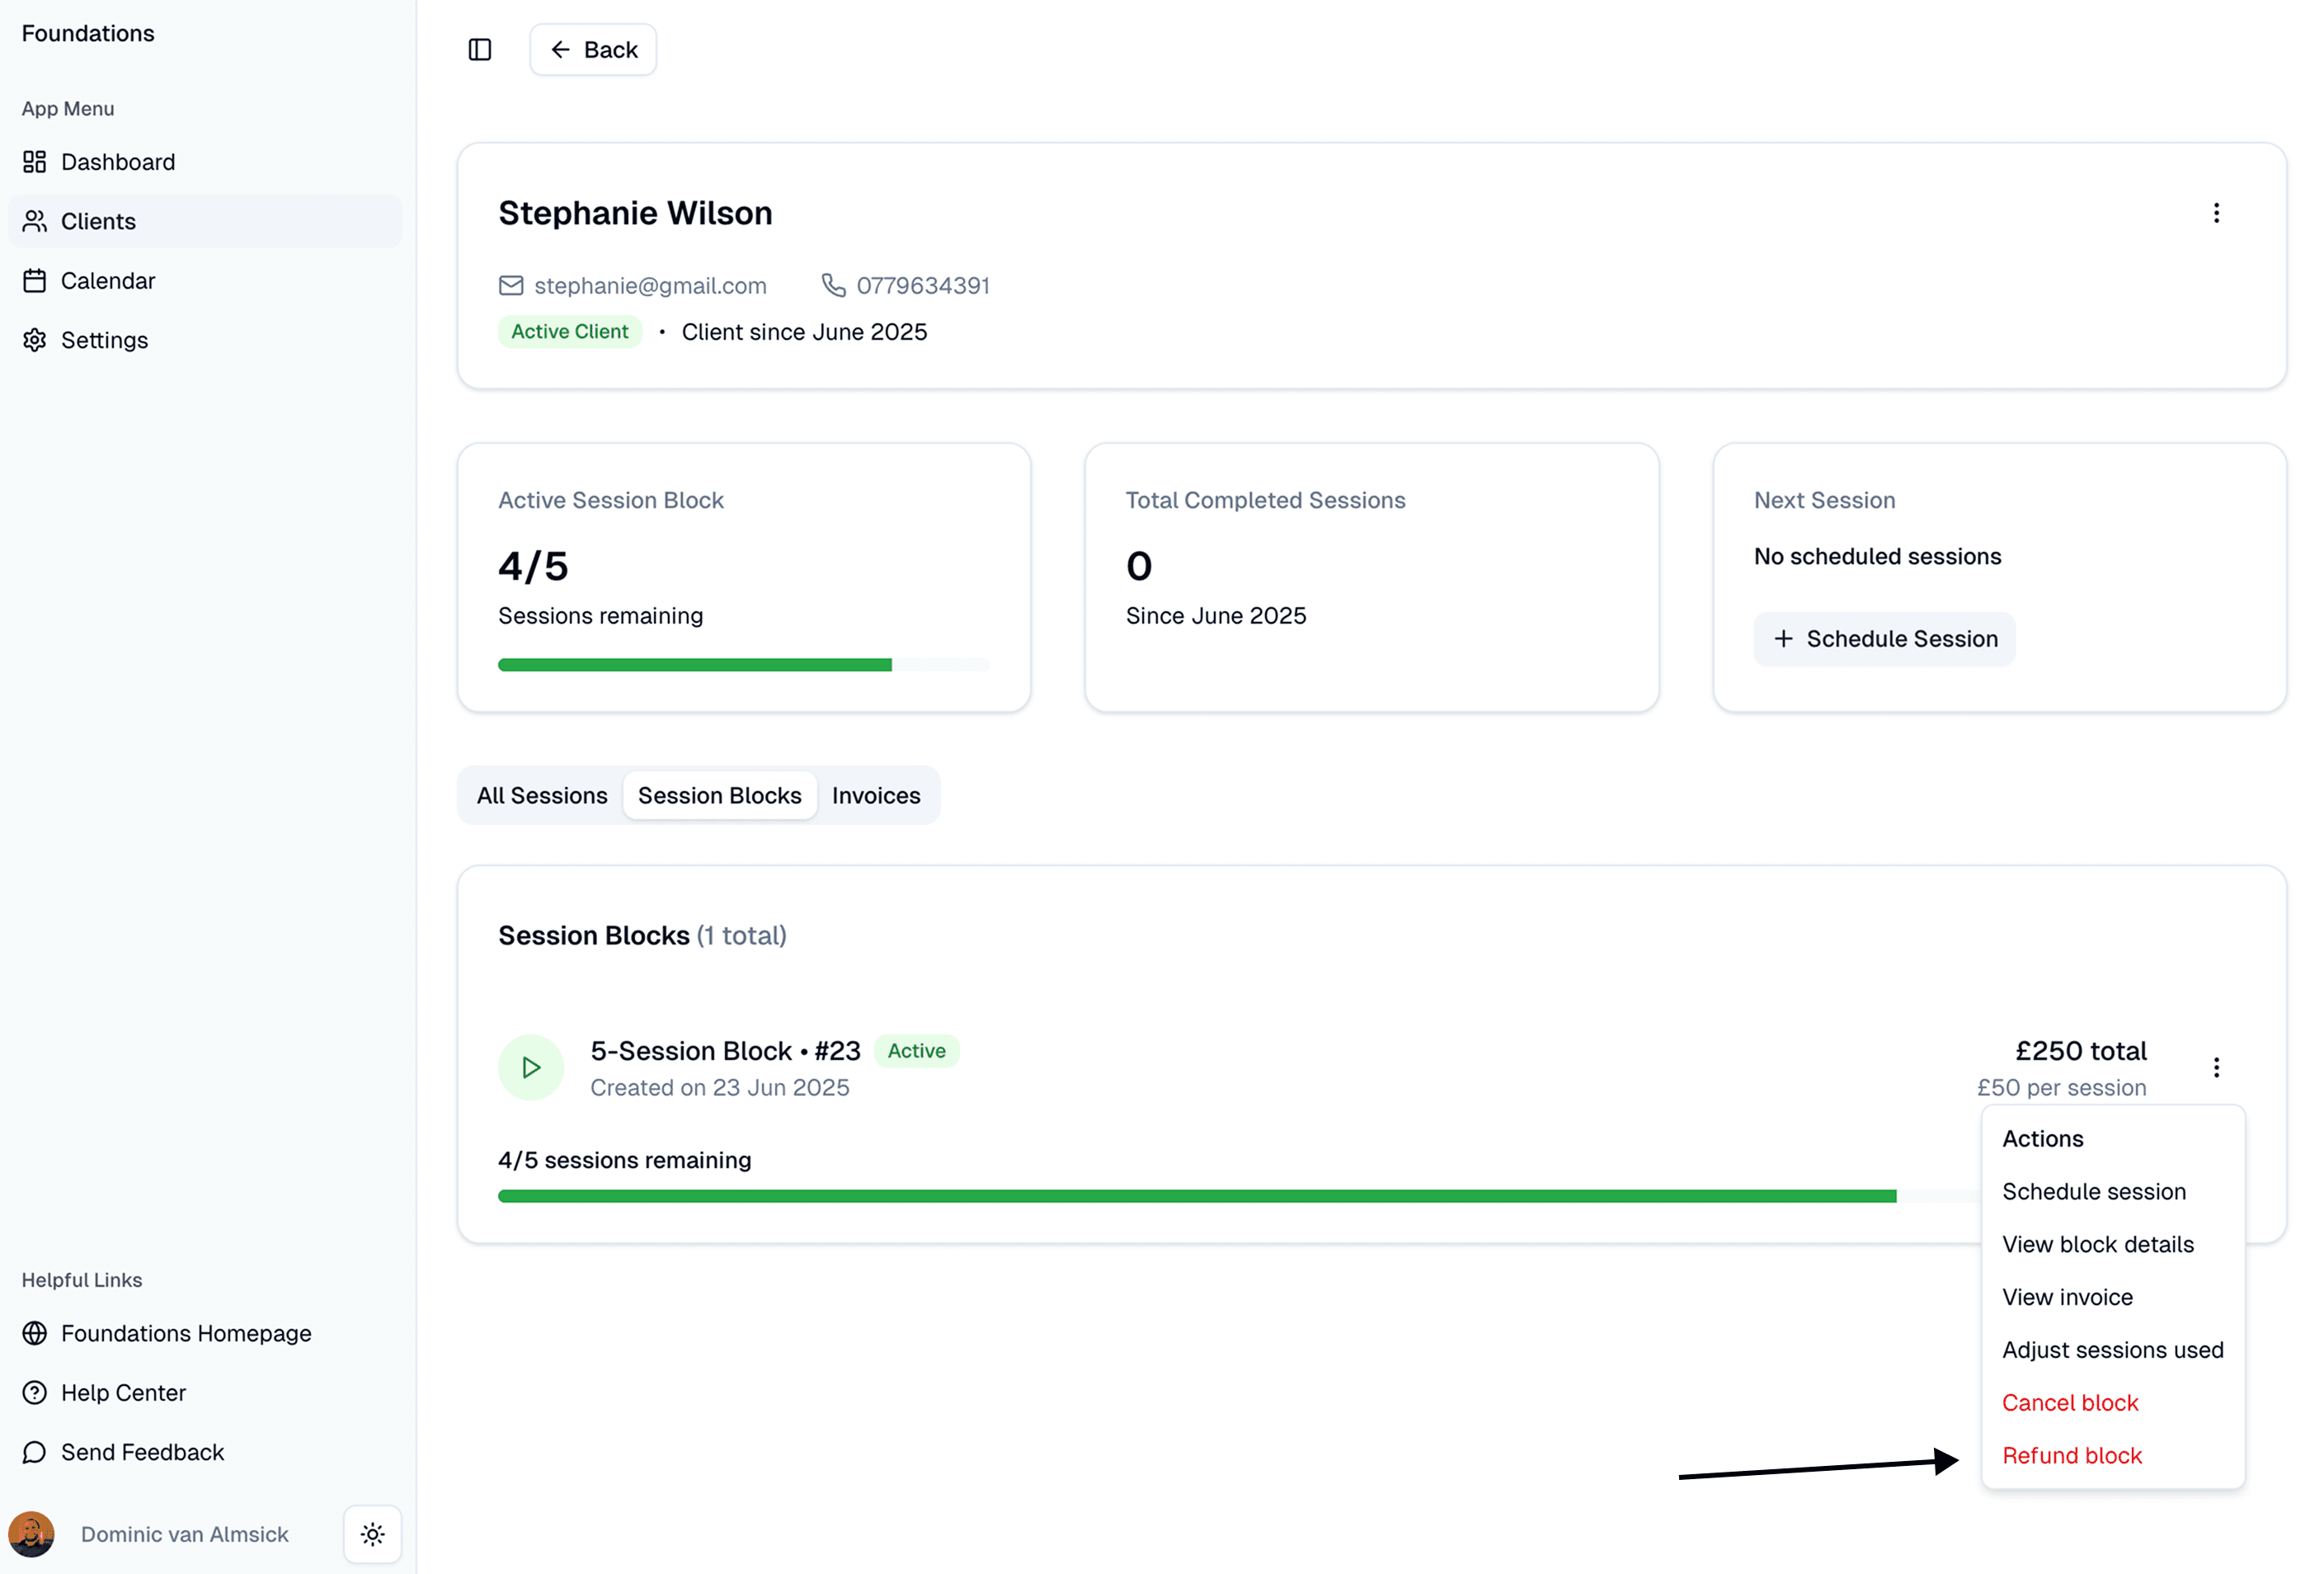
Yes. If you refund a block that has unused sessions, the remaining sessions get refunded automatically. You can do this from the client profile. Use the dropdown menu for a block and click Refund block.
This opens a dialog giving you a breakdown of the refund amount and the number of sessions remaining.
Can you have different session lengths inside one block?
Yes. Credits are just the number of sessions, so a 45-minute and a 60-minute session both consume one credit.
What if I forget to link a session to a block when I schedule it?
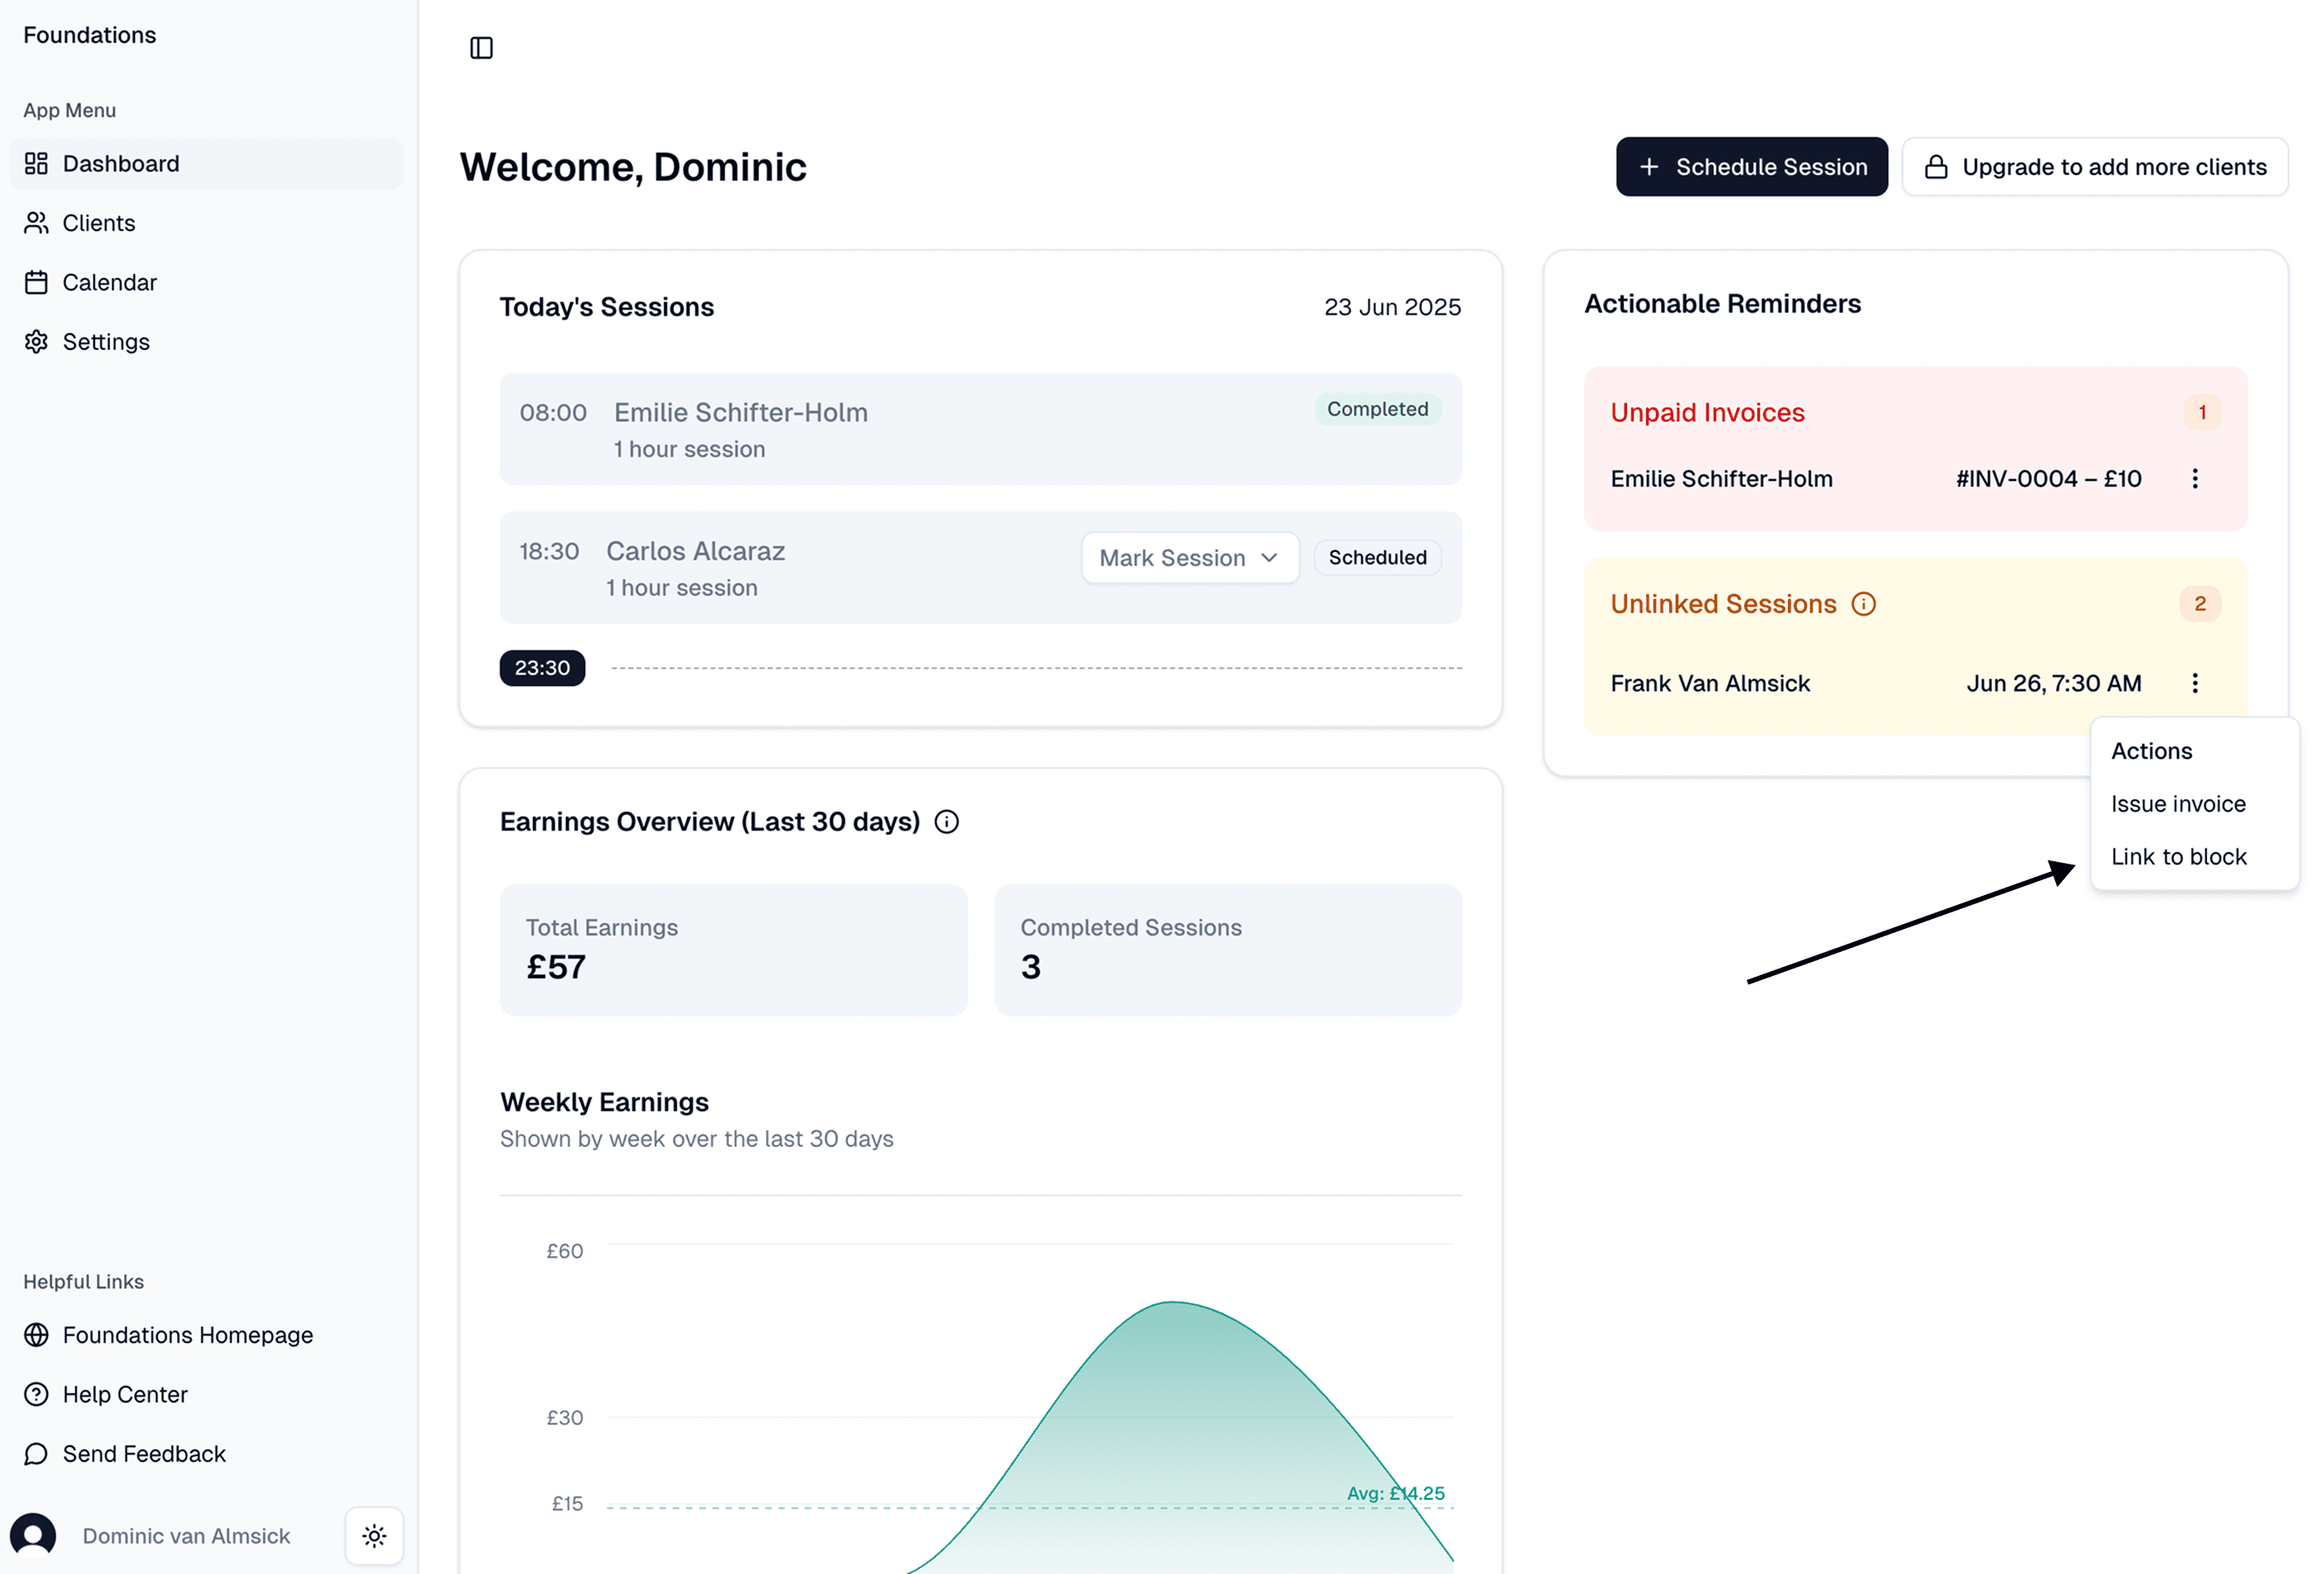
No problem. If you go to the dashboard page, you'll see a section titled Actionable Reminders. Any unlinked sessions will appear here. In Foundations, an unlinked session refers to a session that is not linked to an invoice or a session block. You can resolve it in one click by either issuing an invoice or linking the session to a block.
Session blocks help you stay organised, get paid up front, and keep every session accounted for. Try creating your first block and experience the improved workflow for yourself.