Introduction
Welcome to Foundations. This guide will walk you through the essential steps to get up and running, from creating an account to scheduling your first session.
We will cover how to:
- Create a Foundations account
- Set up payments so you can invoice clients
- Add your first client
- Schedule a session and issue an invoice for it
1. Create a Foundations Account
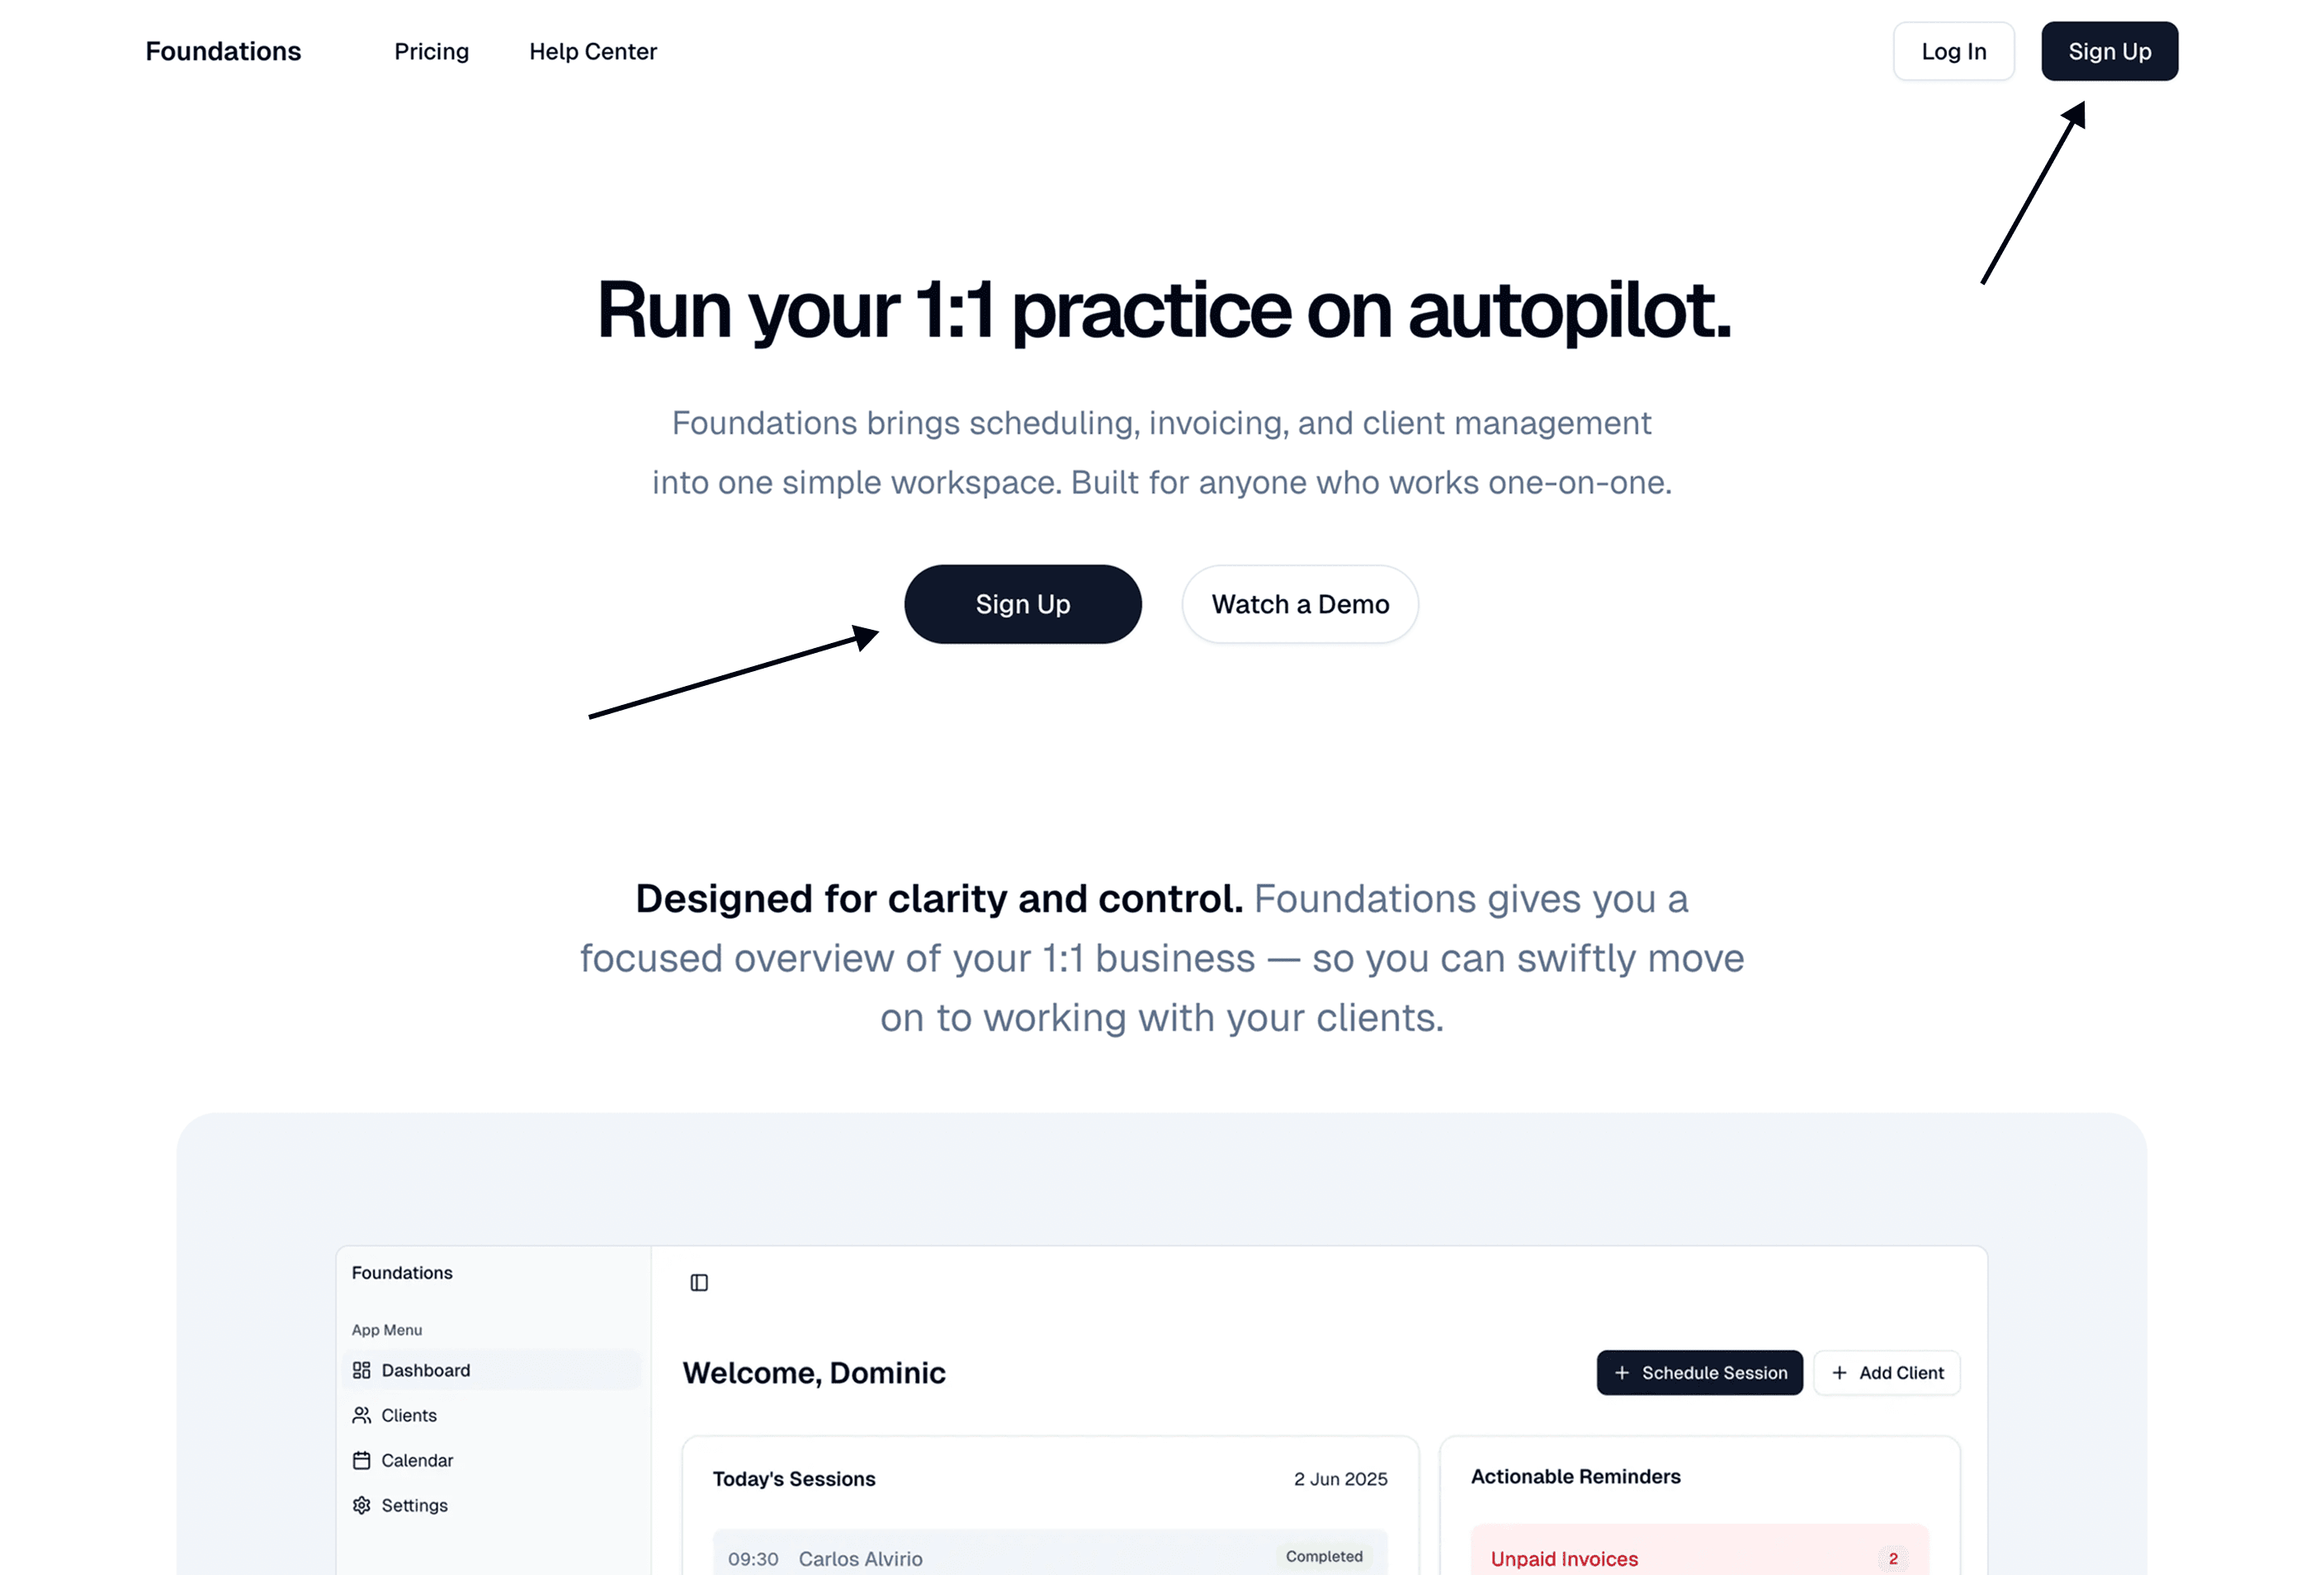
You can sign up for a Foundations account from the top of our homepage by clicking either of the Sign Up buttons.
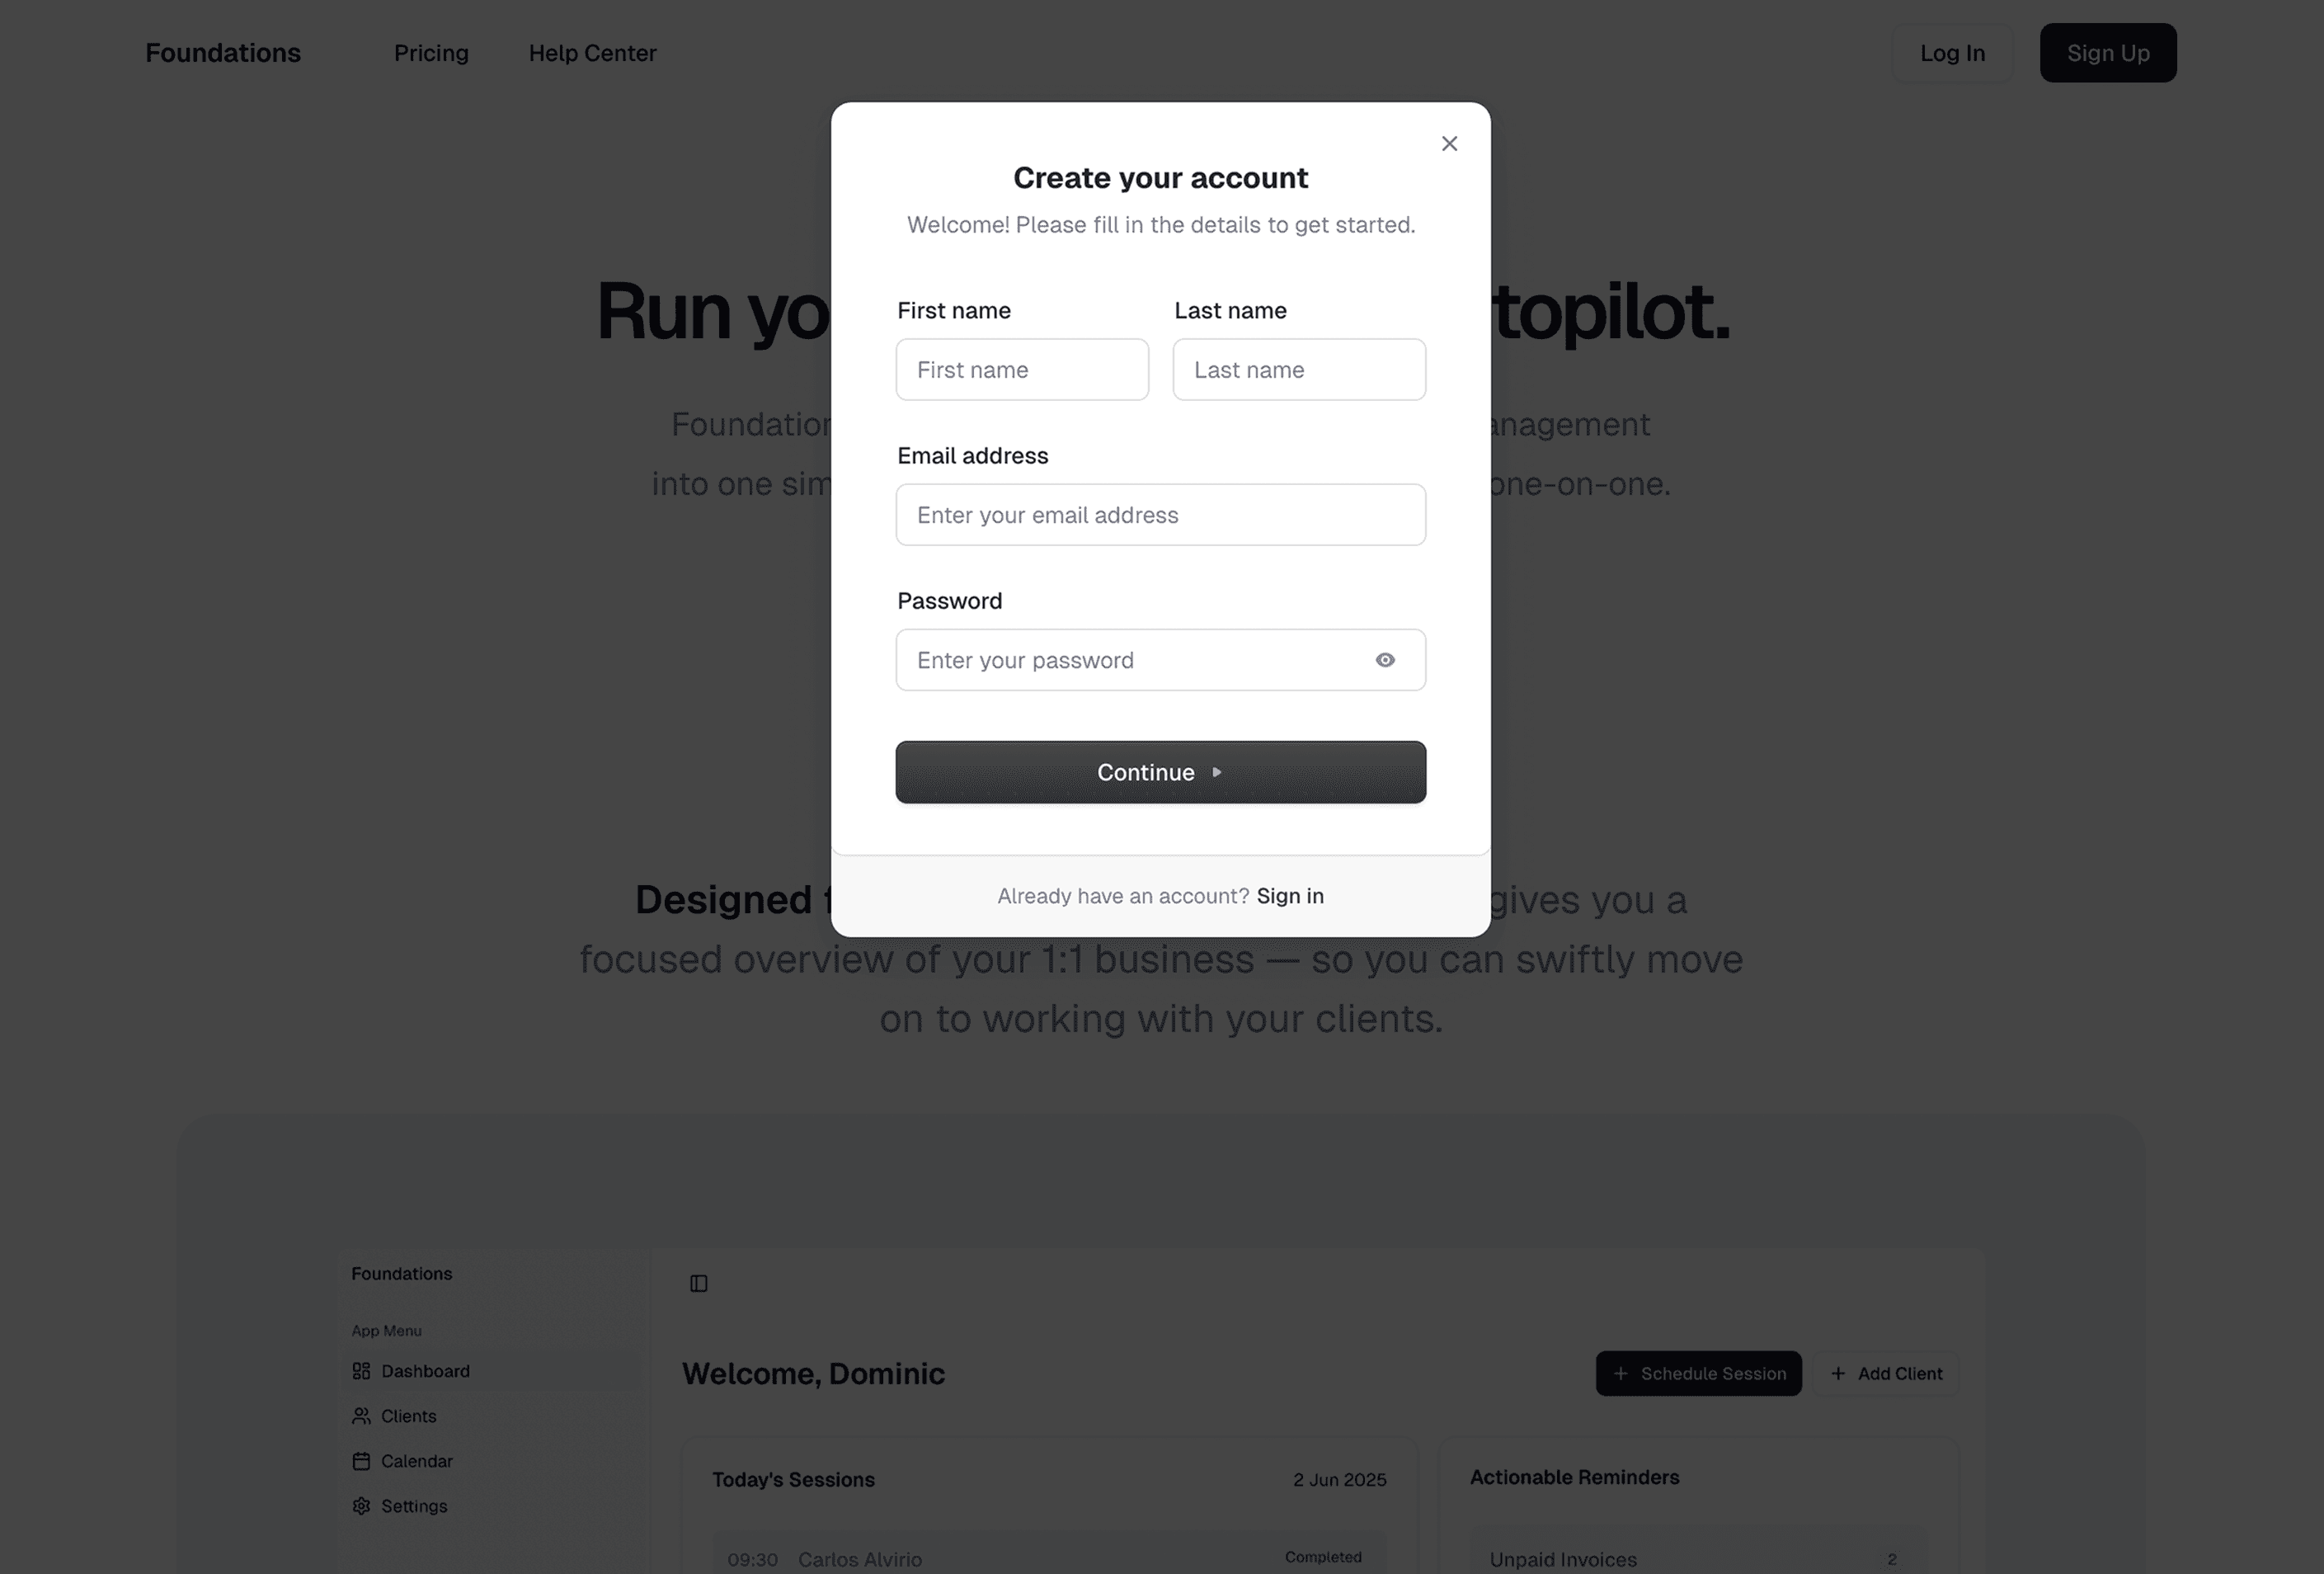
You will be directed to a form where you can enter your name, email address, and password. We ask for your first and last names because we use them in emails and invoices sent to your clients.
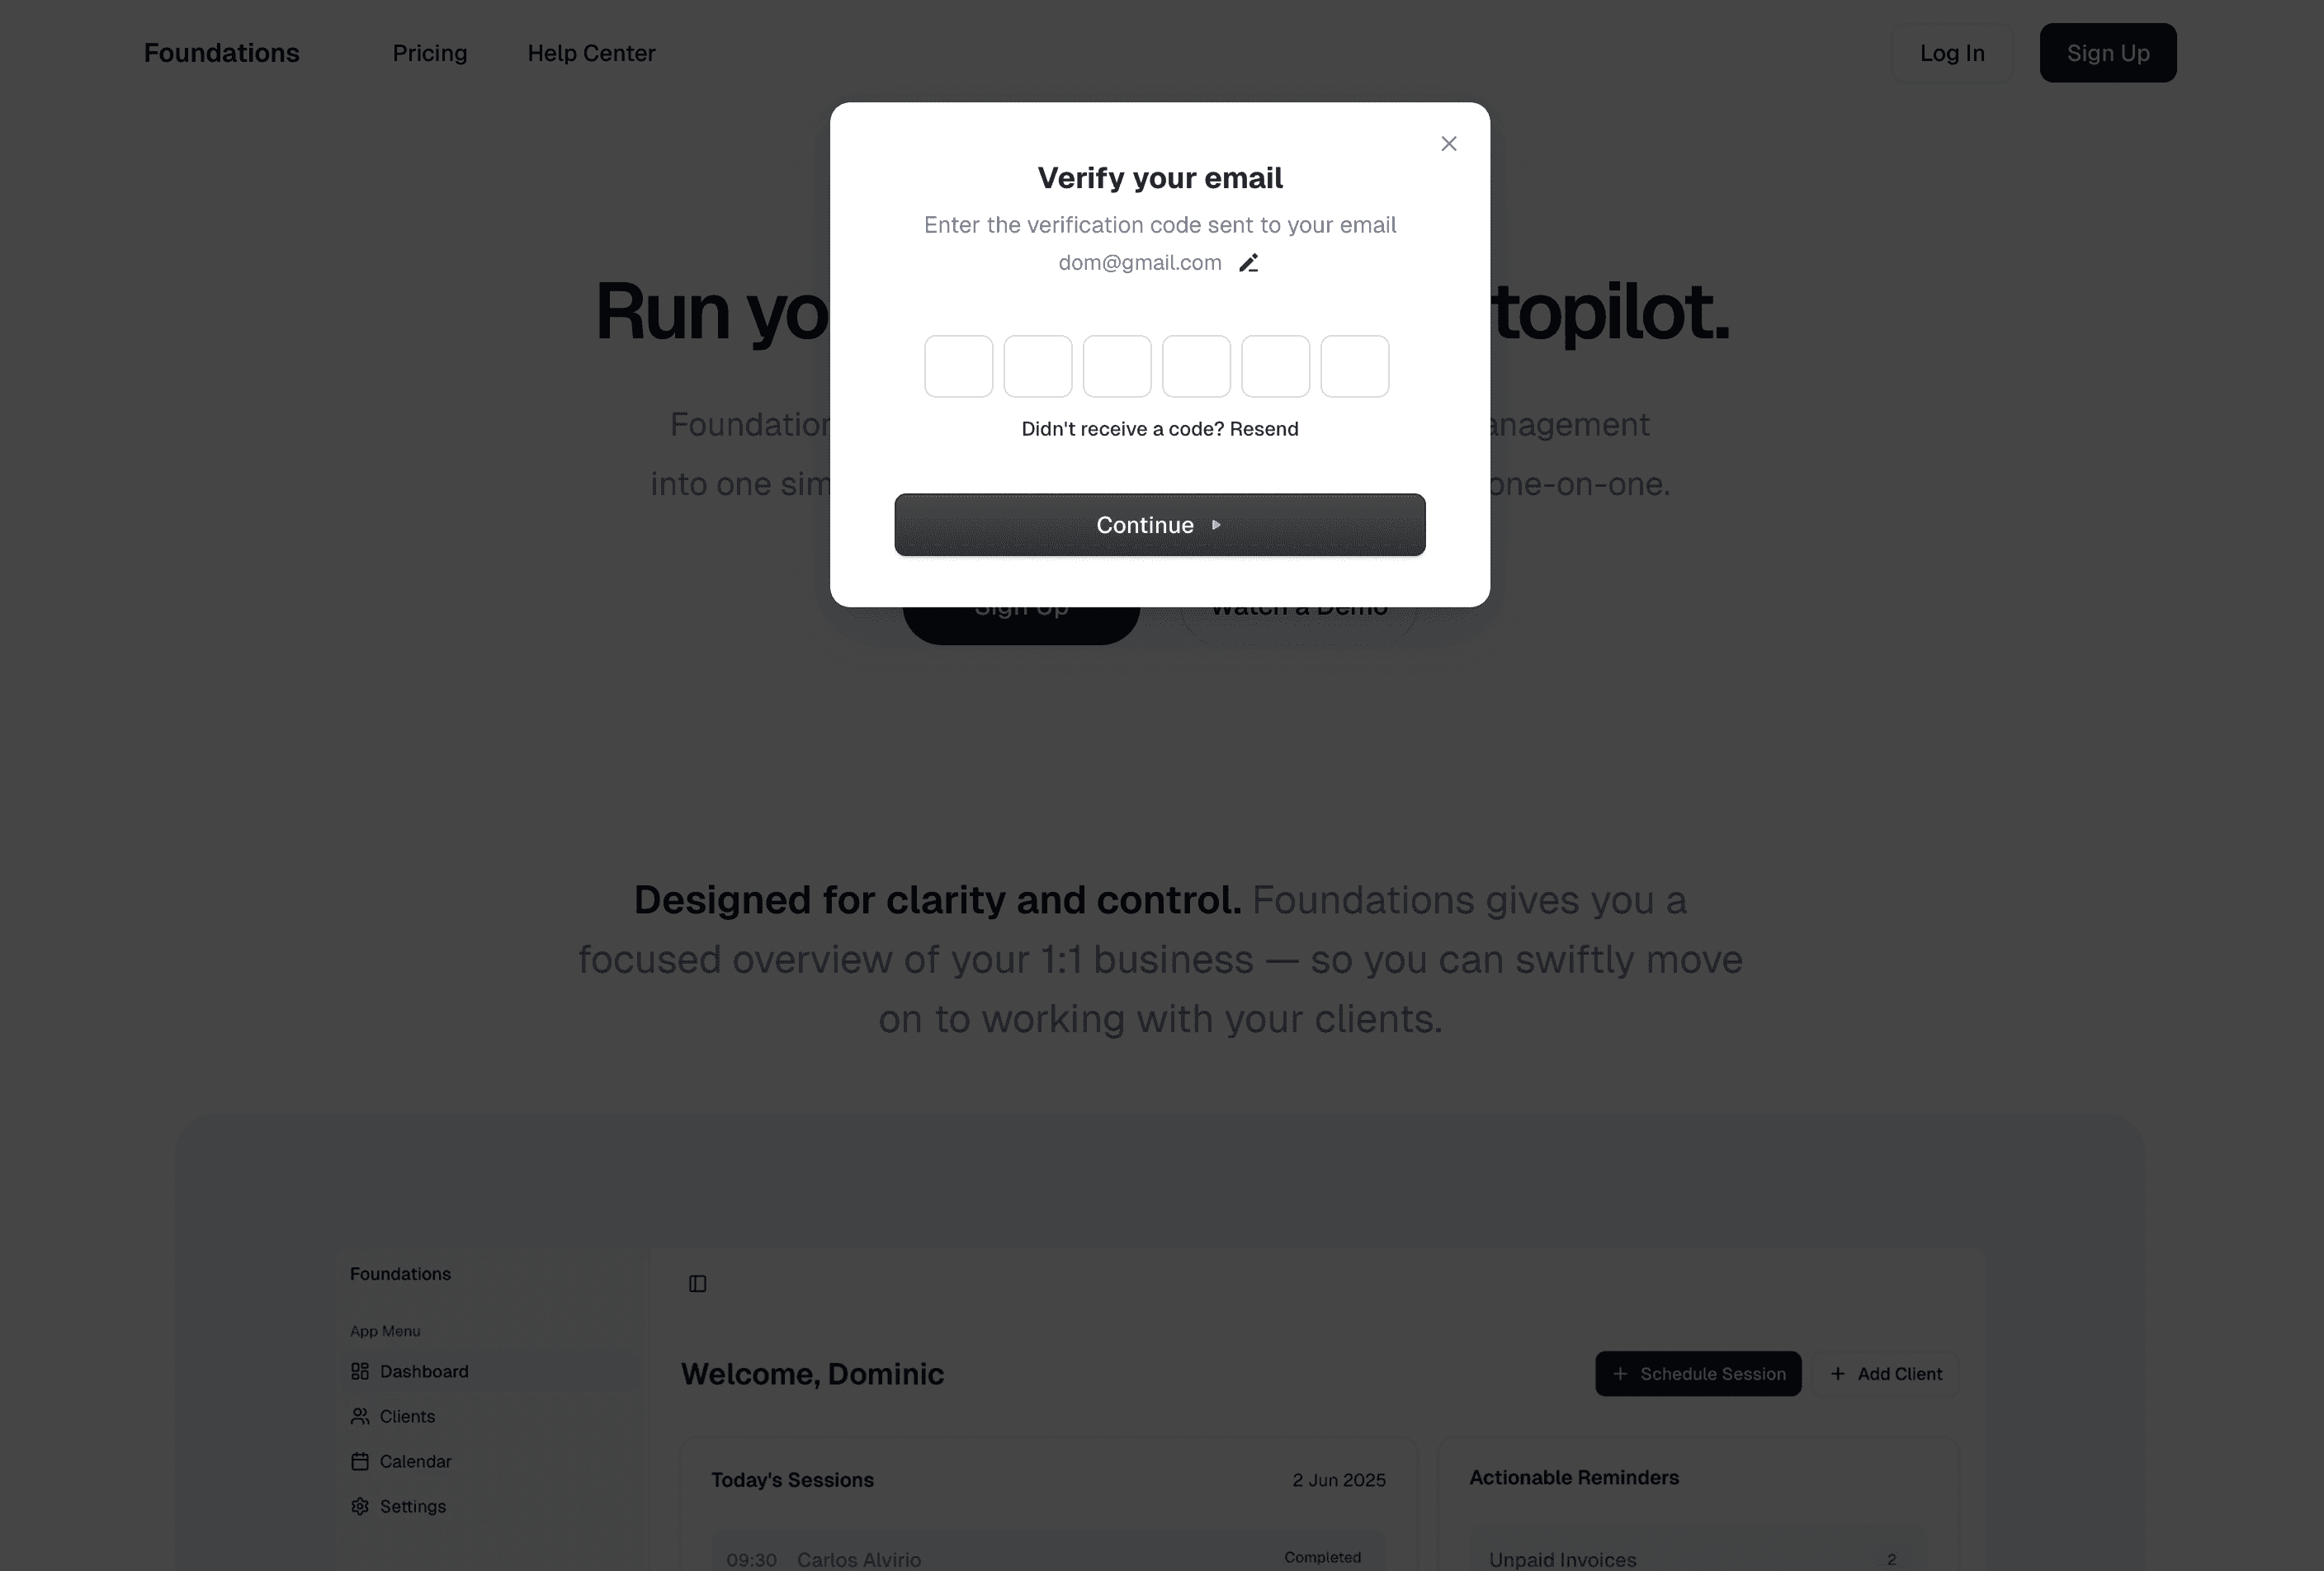
You will then receive a code via email to verify your email address. Enter the code in the form to complete the signup process.
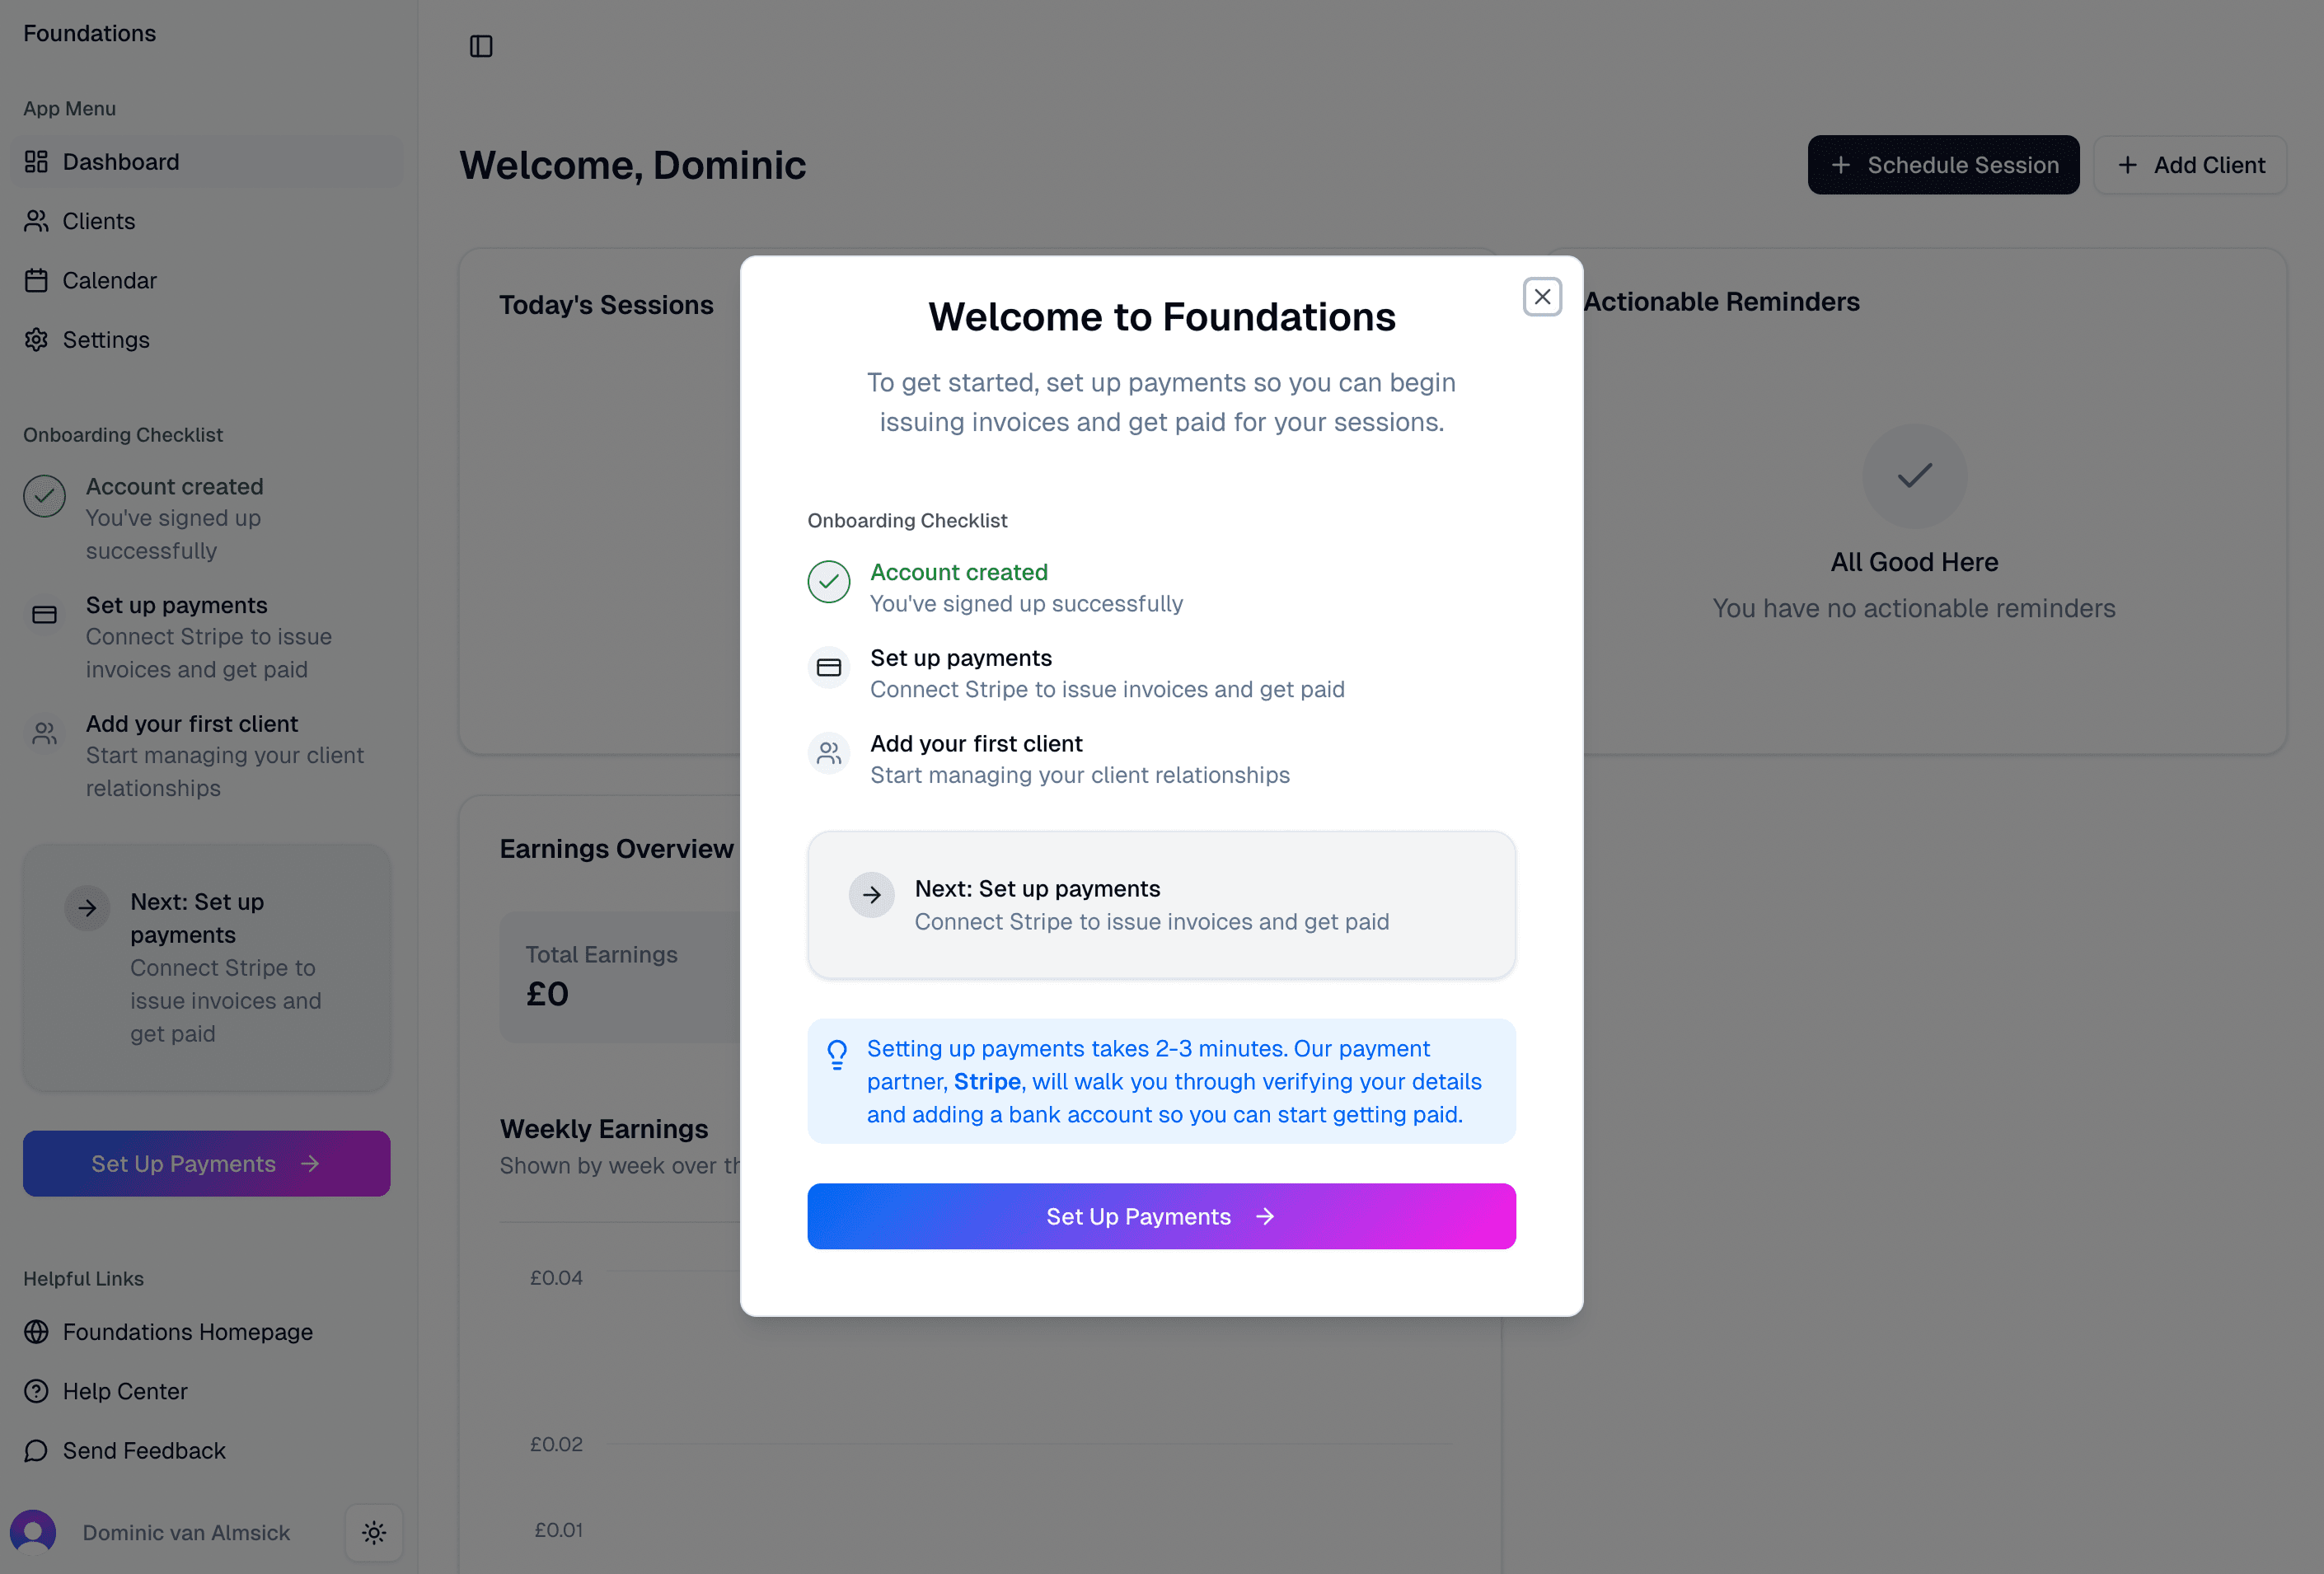
That's it in terms of creating your account. Next, you will be directed to your Foundations dashboard. A welcome message will be displayed prompting you to set up payments. This is important, as you will not be able to issue invoices until you have set up payments.
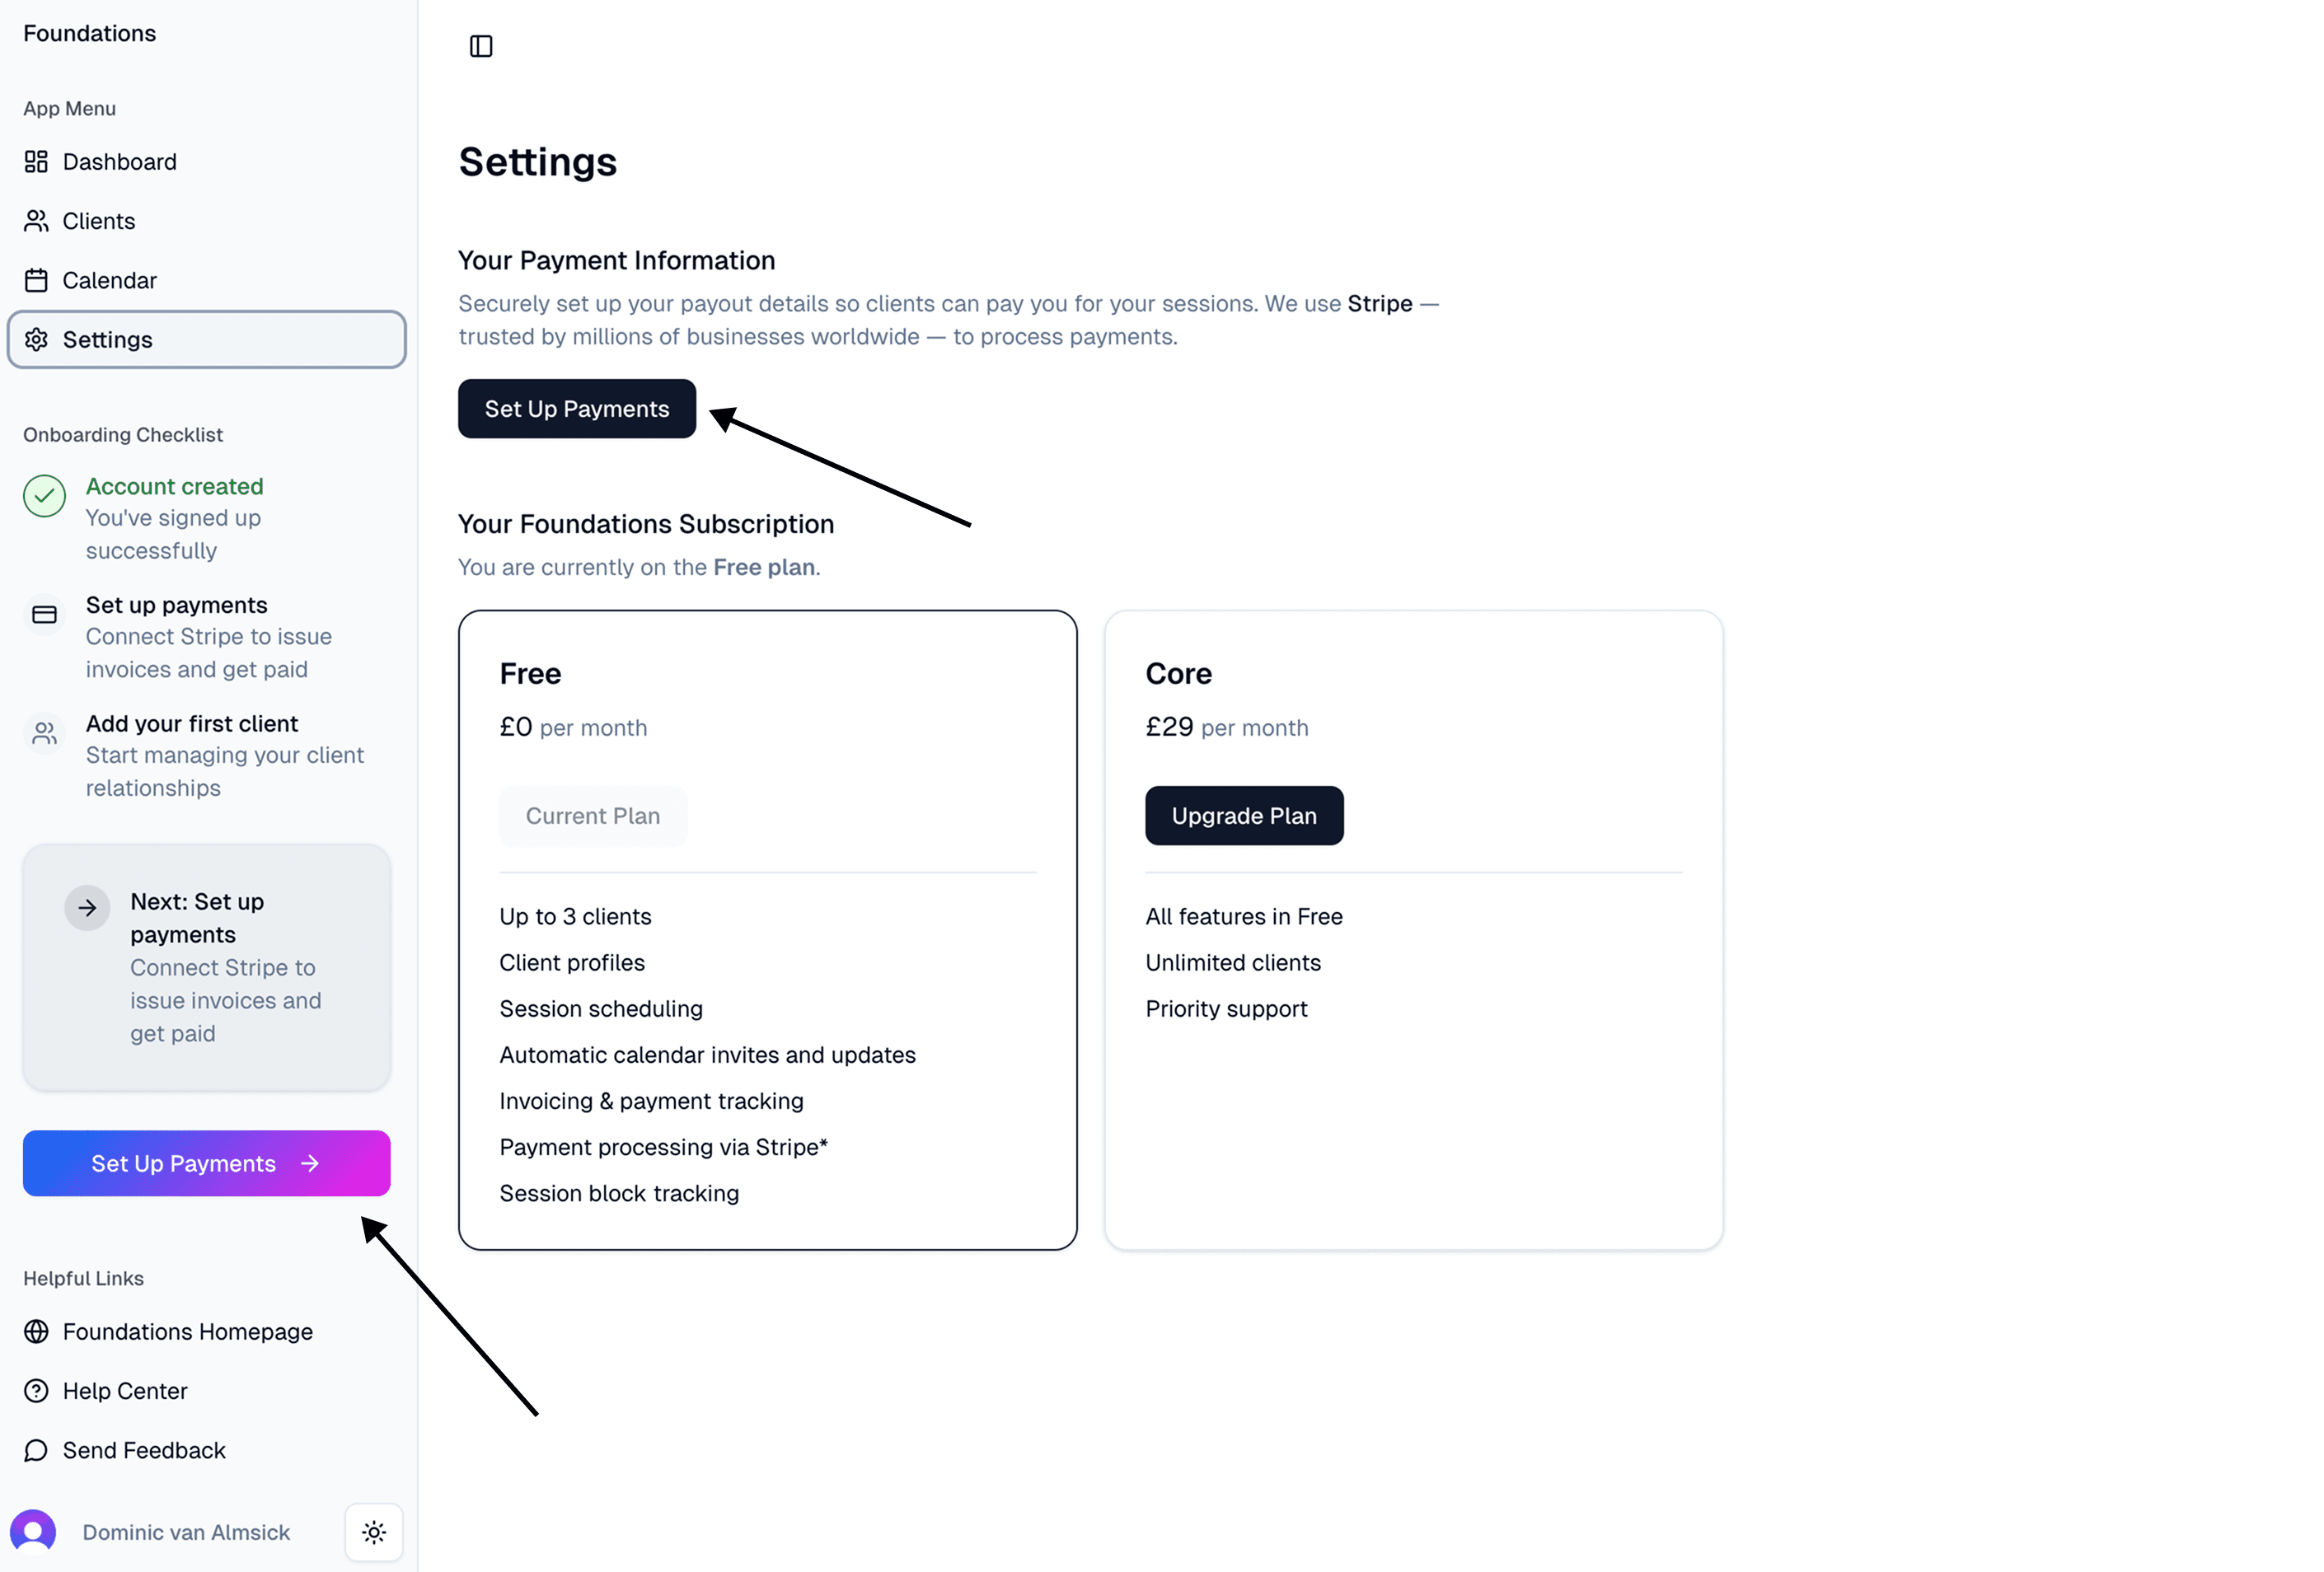
2. Setting Up Payments
Foundations partners with Stripe for payment processing. Stripe is the gold standard in security and reliability when it comes to online payments, and is trusted by millions of businesses across the world.
If you didn't click Set Up Payments in the welcome message, you can still do so from two places:
- From the Onboarding Checklist that remains visible in the sidebar.
- From the Settings page, under Your Payment Information.
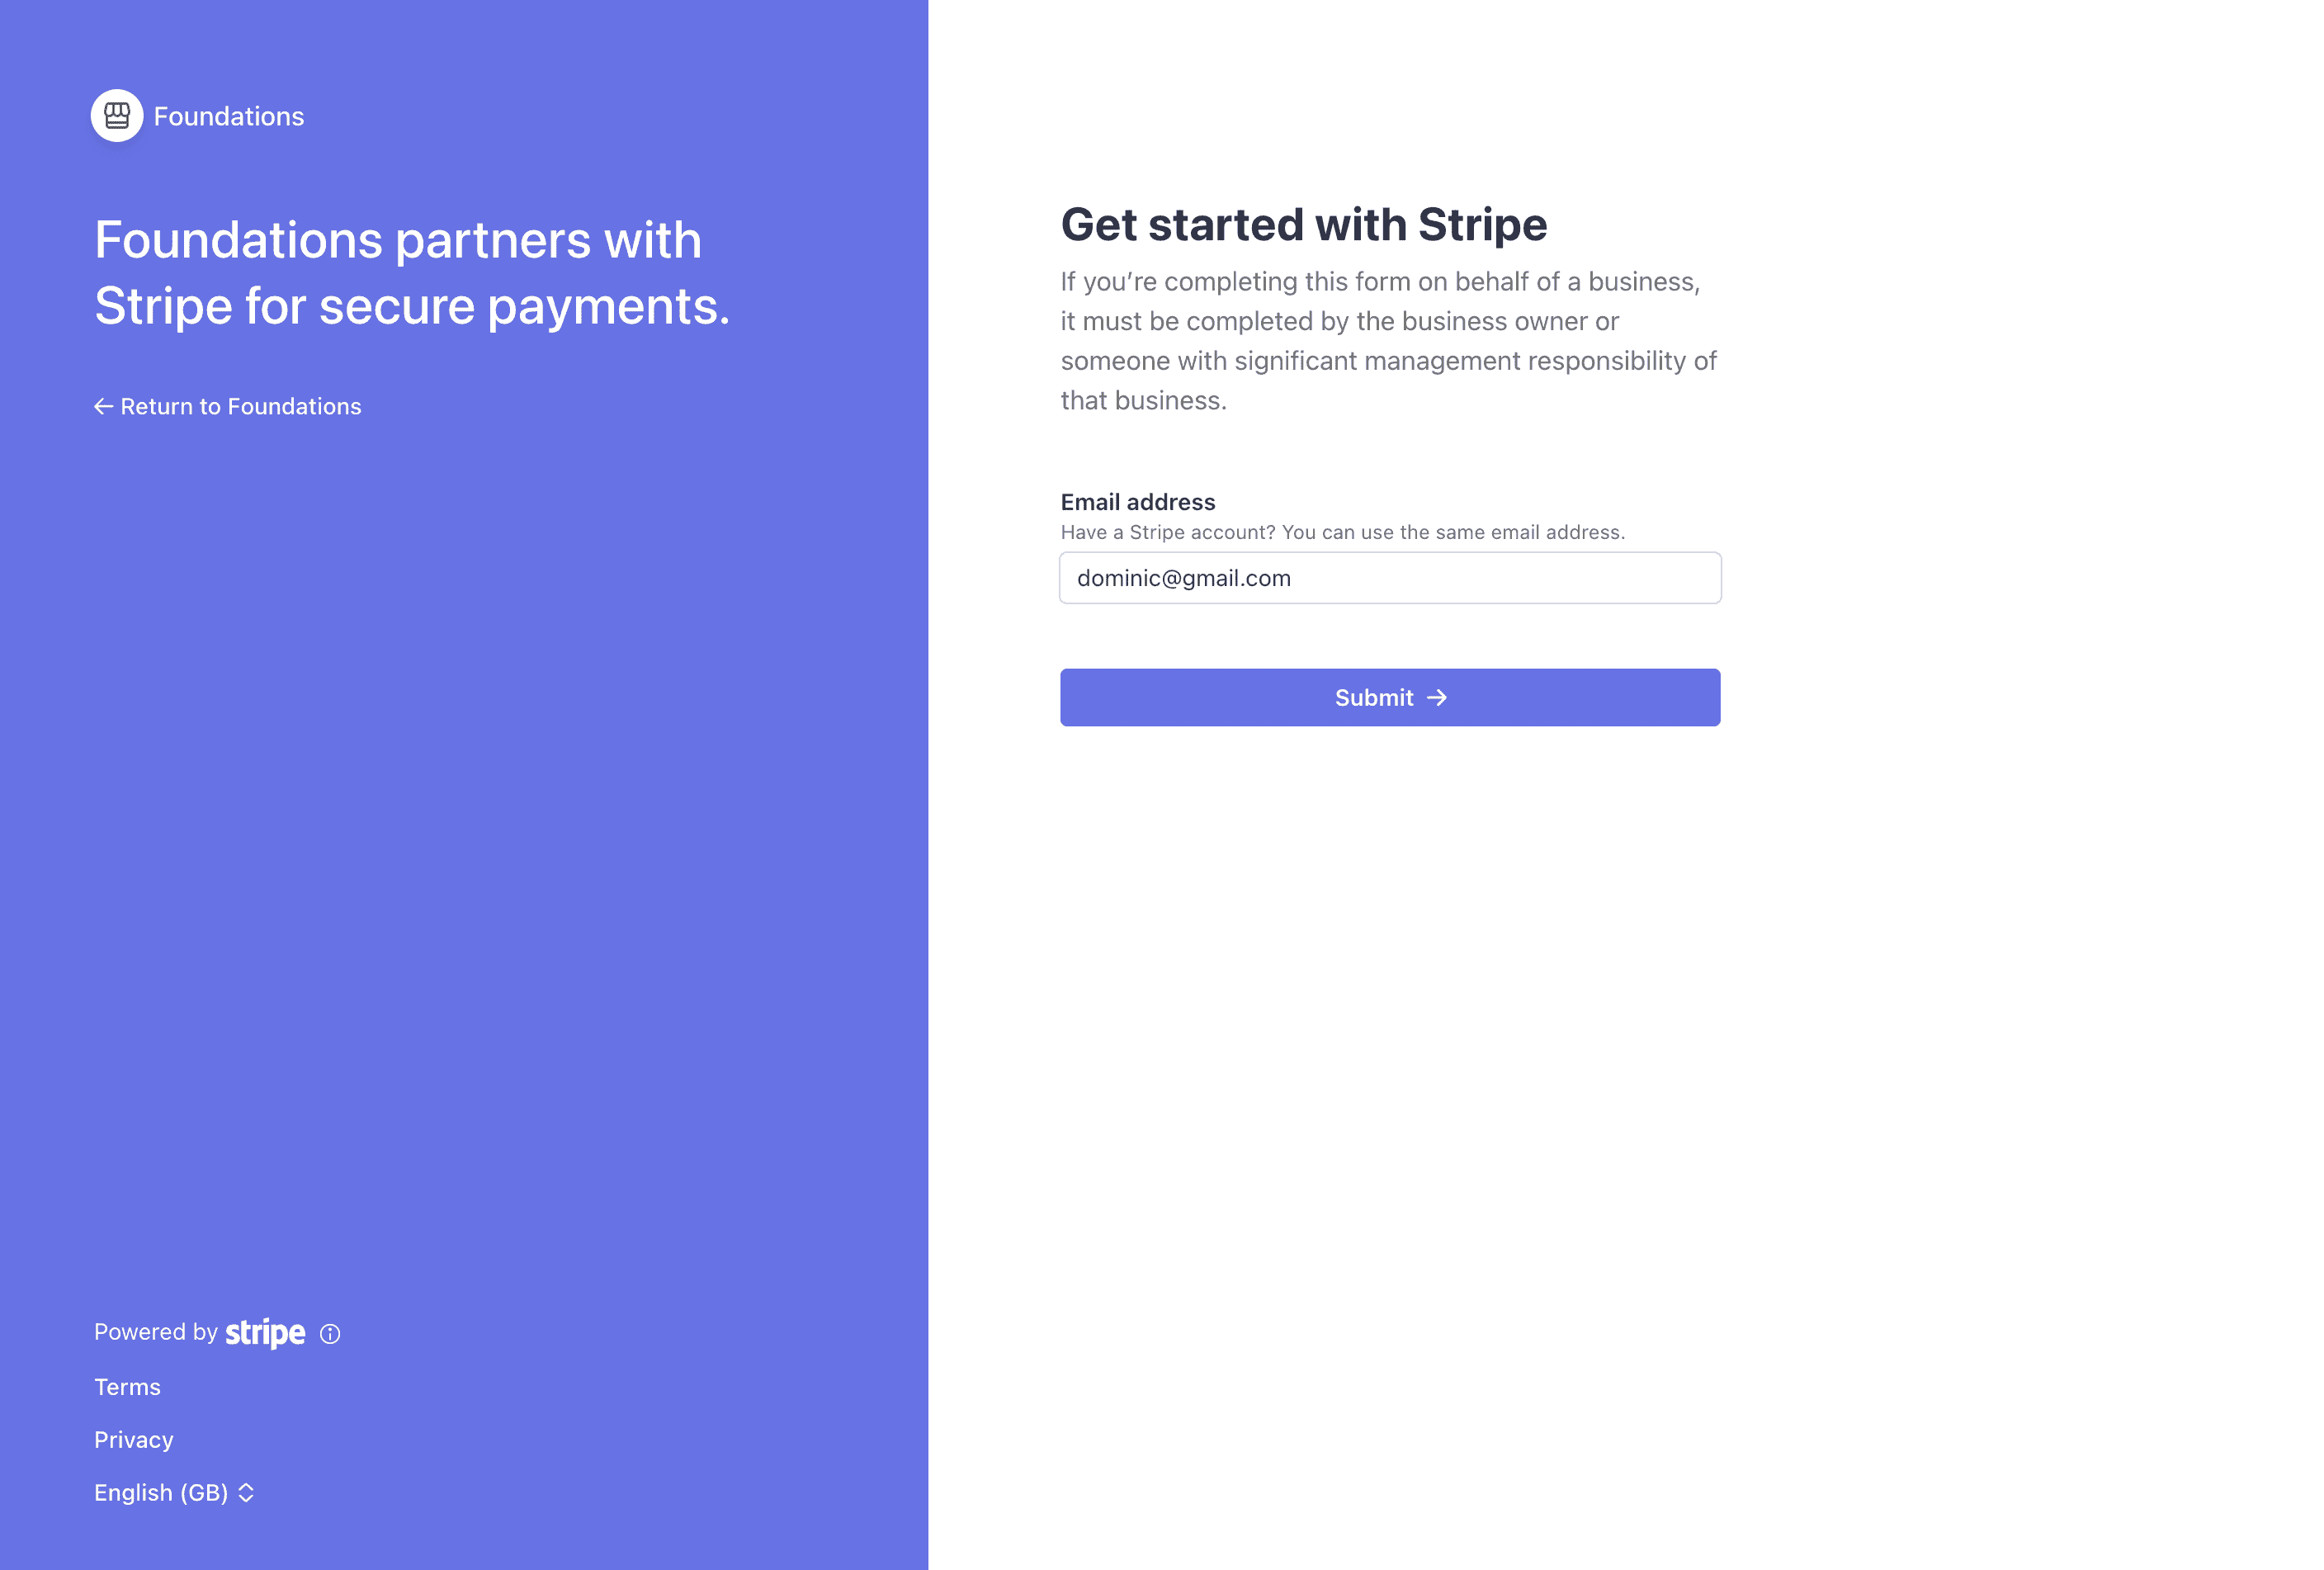
This will take you to a Stripe-hosted page (it might take a brief moment to load), where you will provide basic personal information including your bank details so you can receive payouts from payments made by your clients. The whole process takes less than 5 minutes.
Having the following to hand will help speed things up:
- Your bank account details
- The (free) Google Authenticator app downloaded – Stripe uses this for enhanced security
- A link to your website or social media profile
Please note that Stripe handles identity checks and bank-account verification for you. We never see your sensitive information.
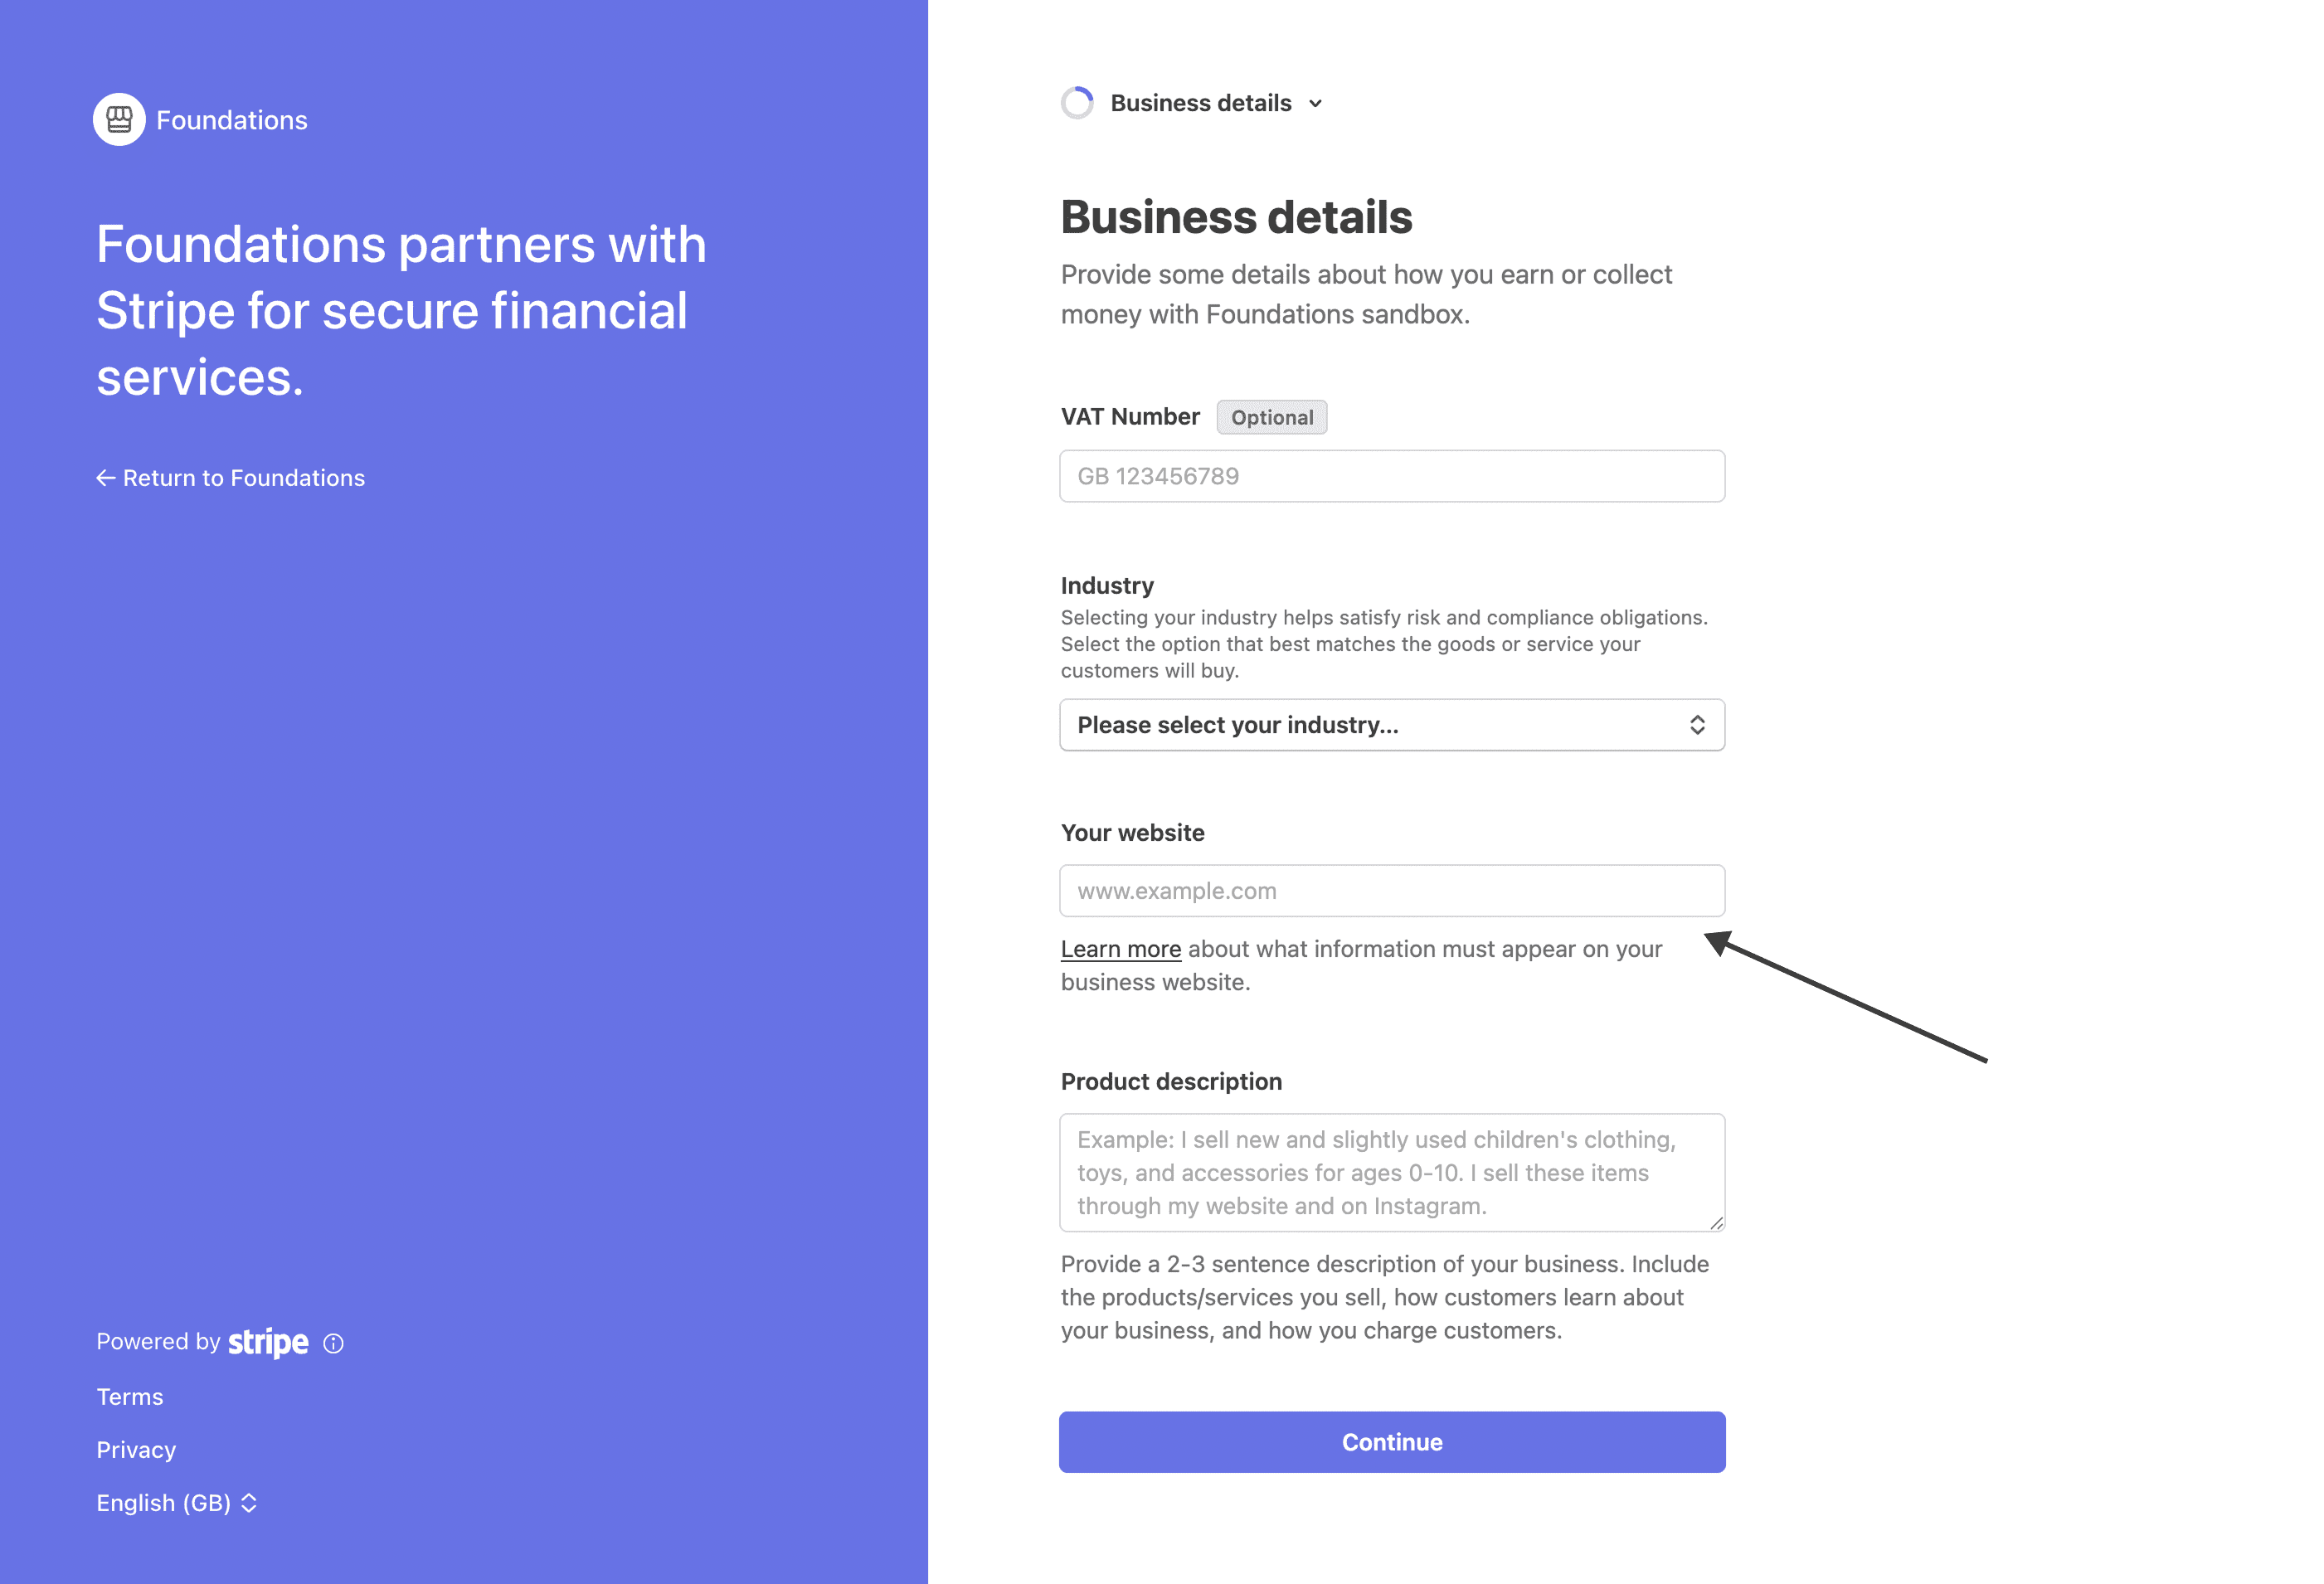
In the Business details step, Stripe asks for a link to your website. If you don't have one, a link to one of your social media profiles will do. Stripe requires that your profile include a description of the services you offer. Learn more about these requirements here.
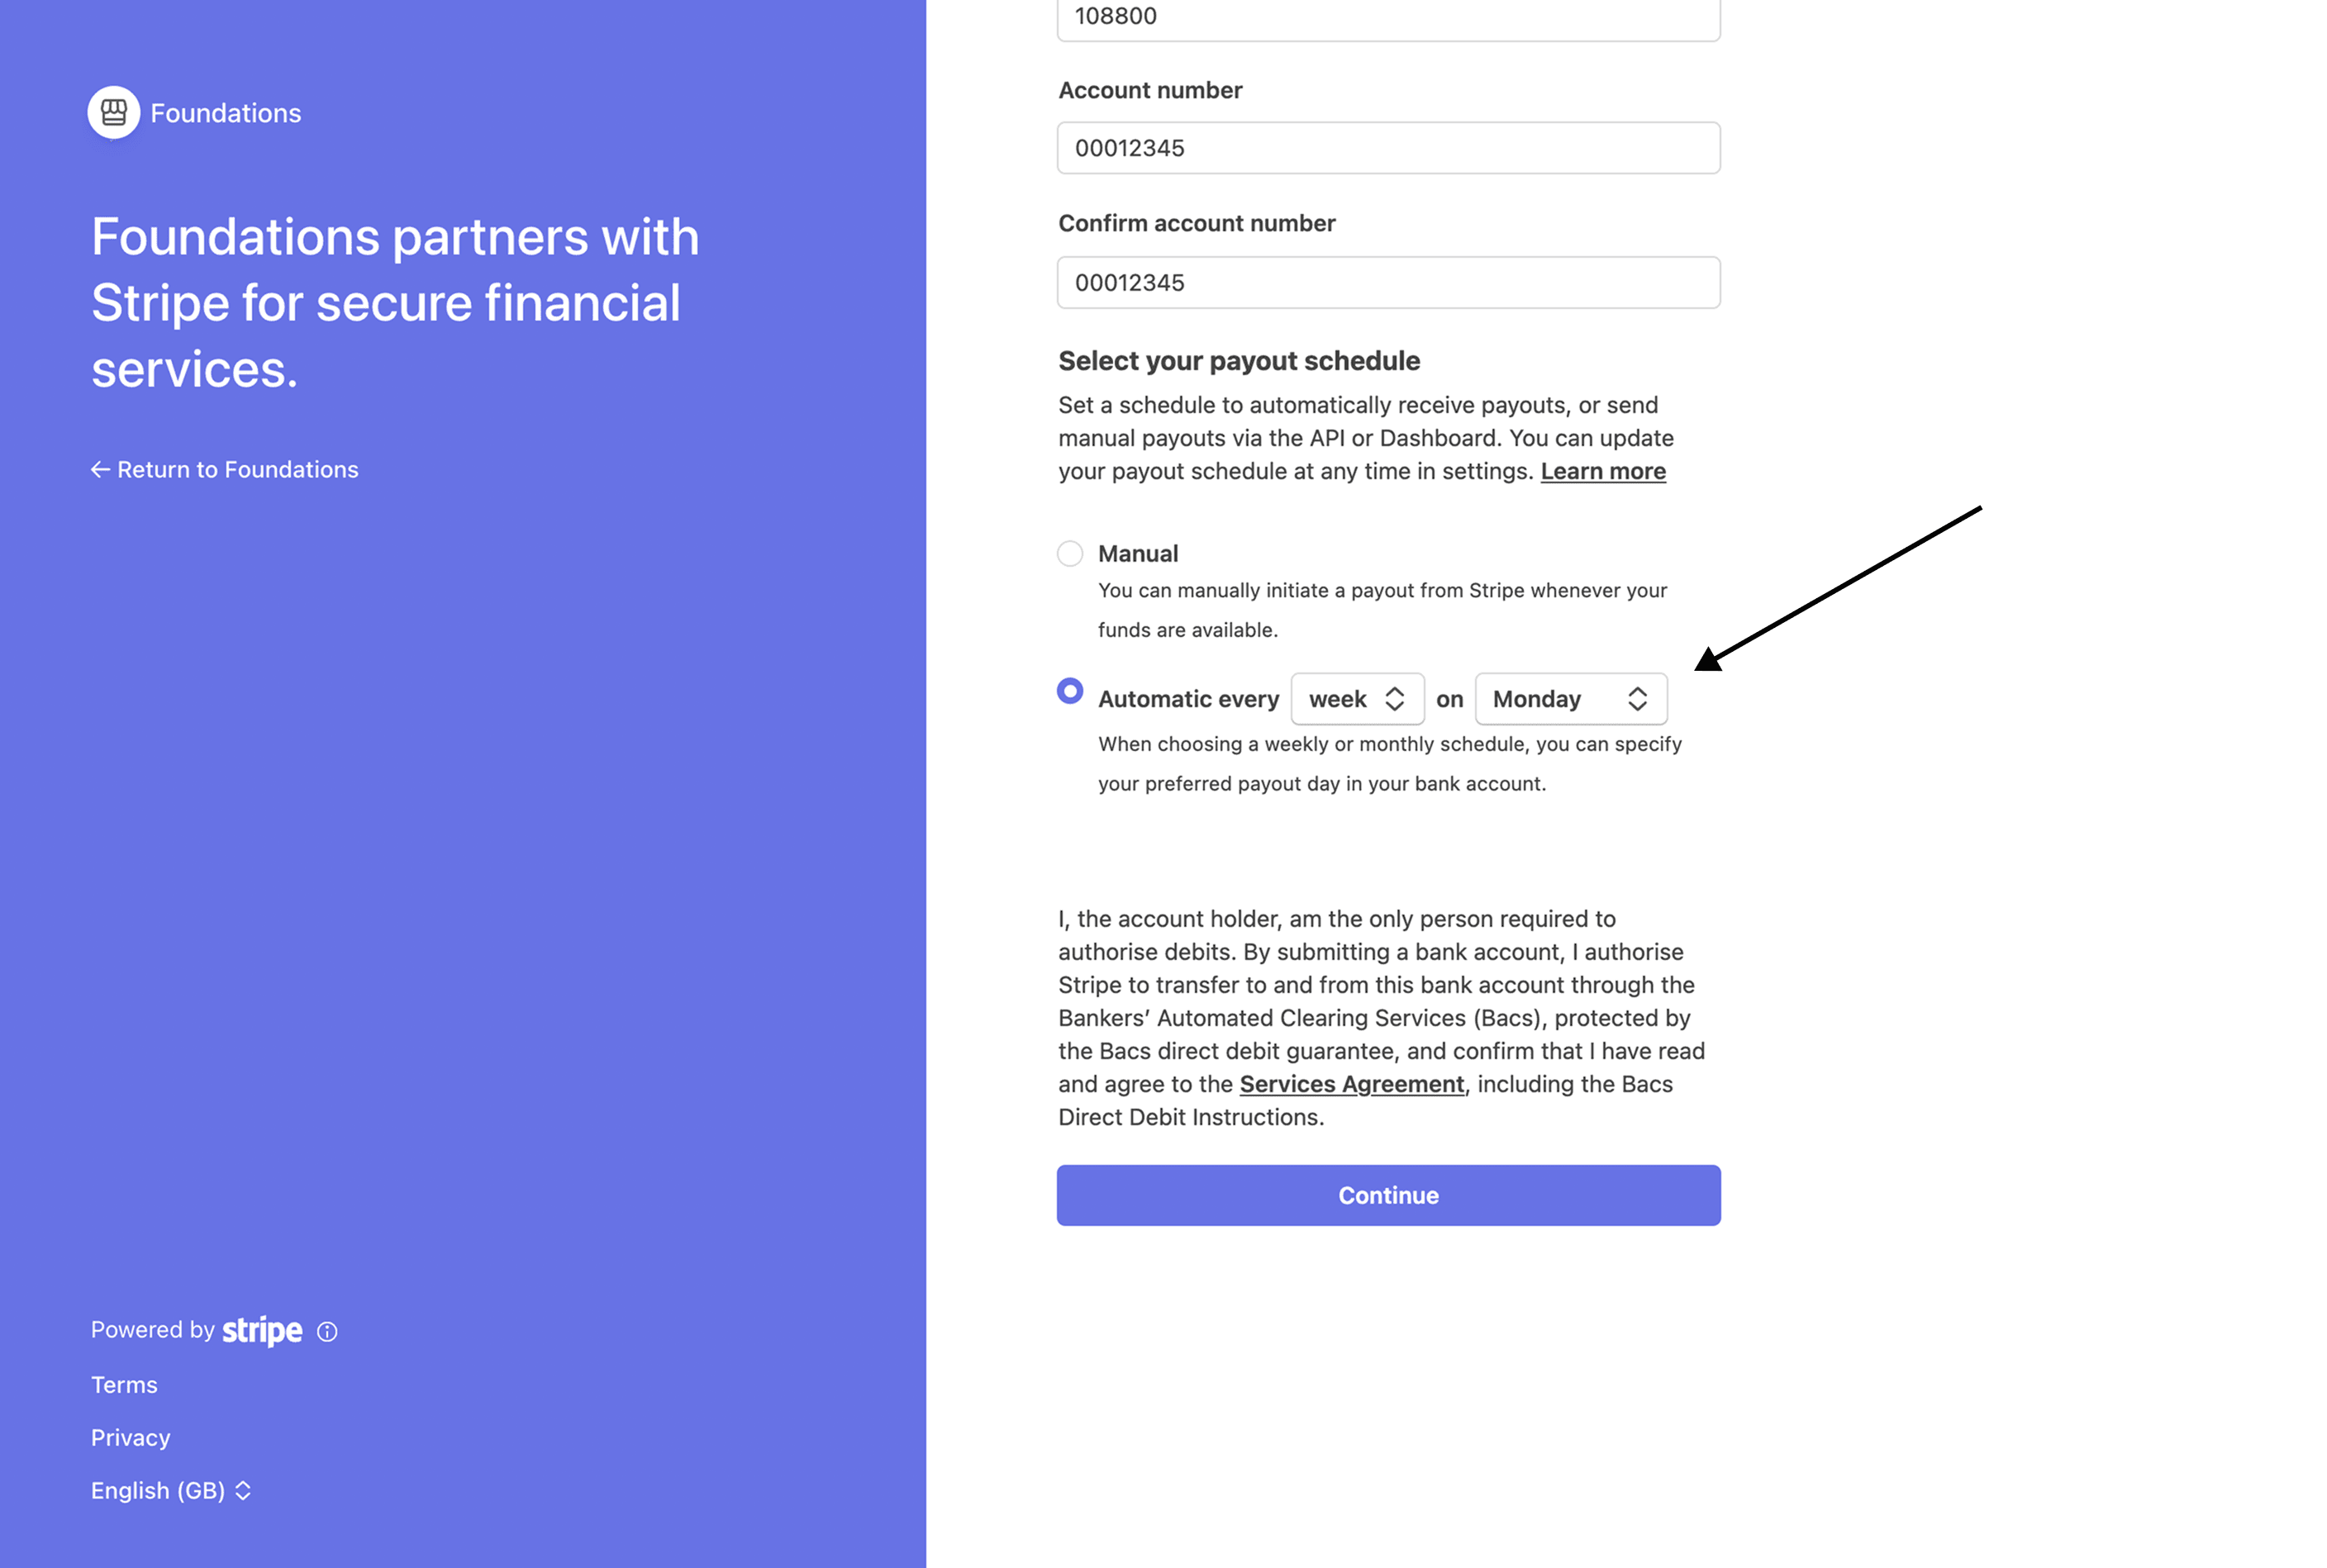
In the step where you provide your bank details, you also tell Stripe when you would like payments to be paid out to your bank account. We suggest you set this to Automatic every day or week, so that you don't need to manage this manually.
Once you complete the process, you will be redirected back to the Settings page within Foundations. Another message will be displayed confirming that you have set up payments and prompting you to complete the last step of the onboarding process: adding your first client.

3. Adding Your First Client
You can simply use the Add Client button in the Onboarding Checklist. Otherwise, navigate to the Clients page via the left-hand sidebar. Since you don't have any clients yet, it will look something like this.
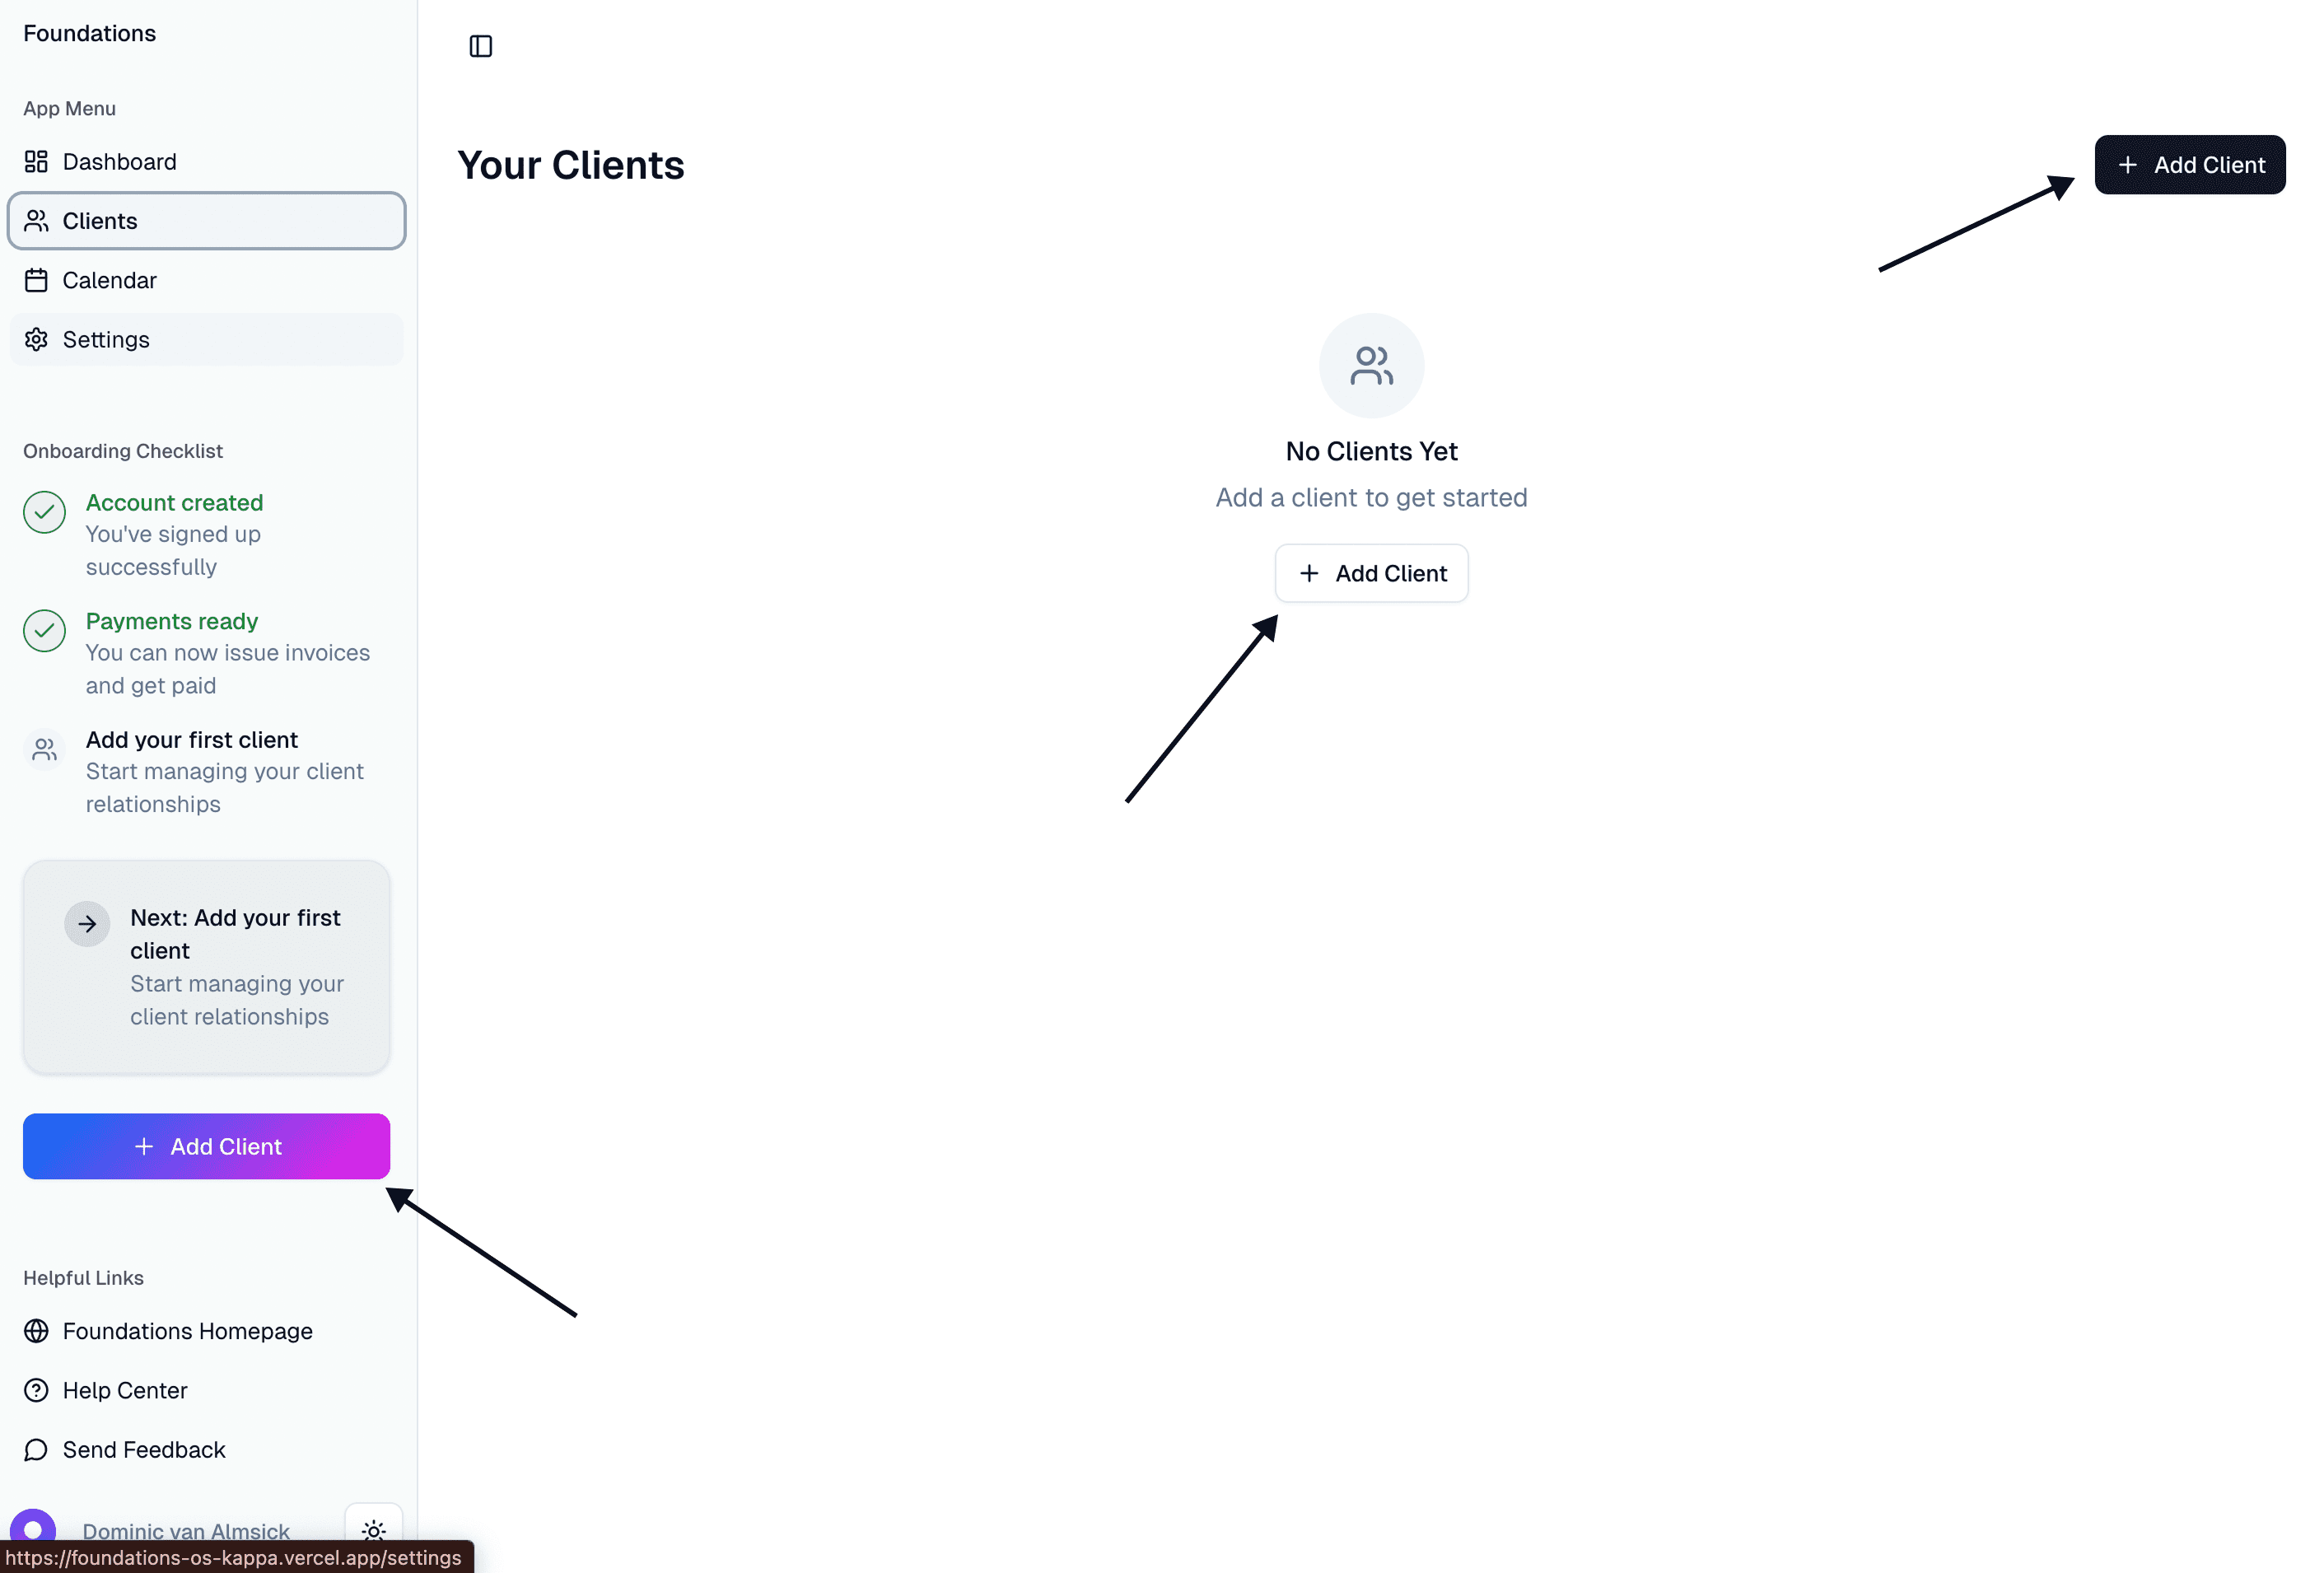
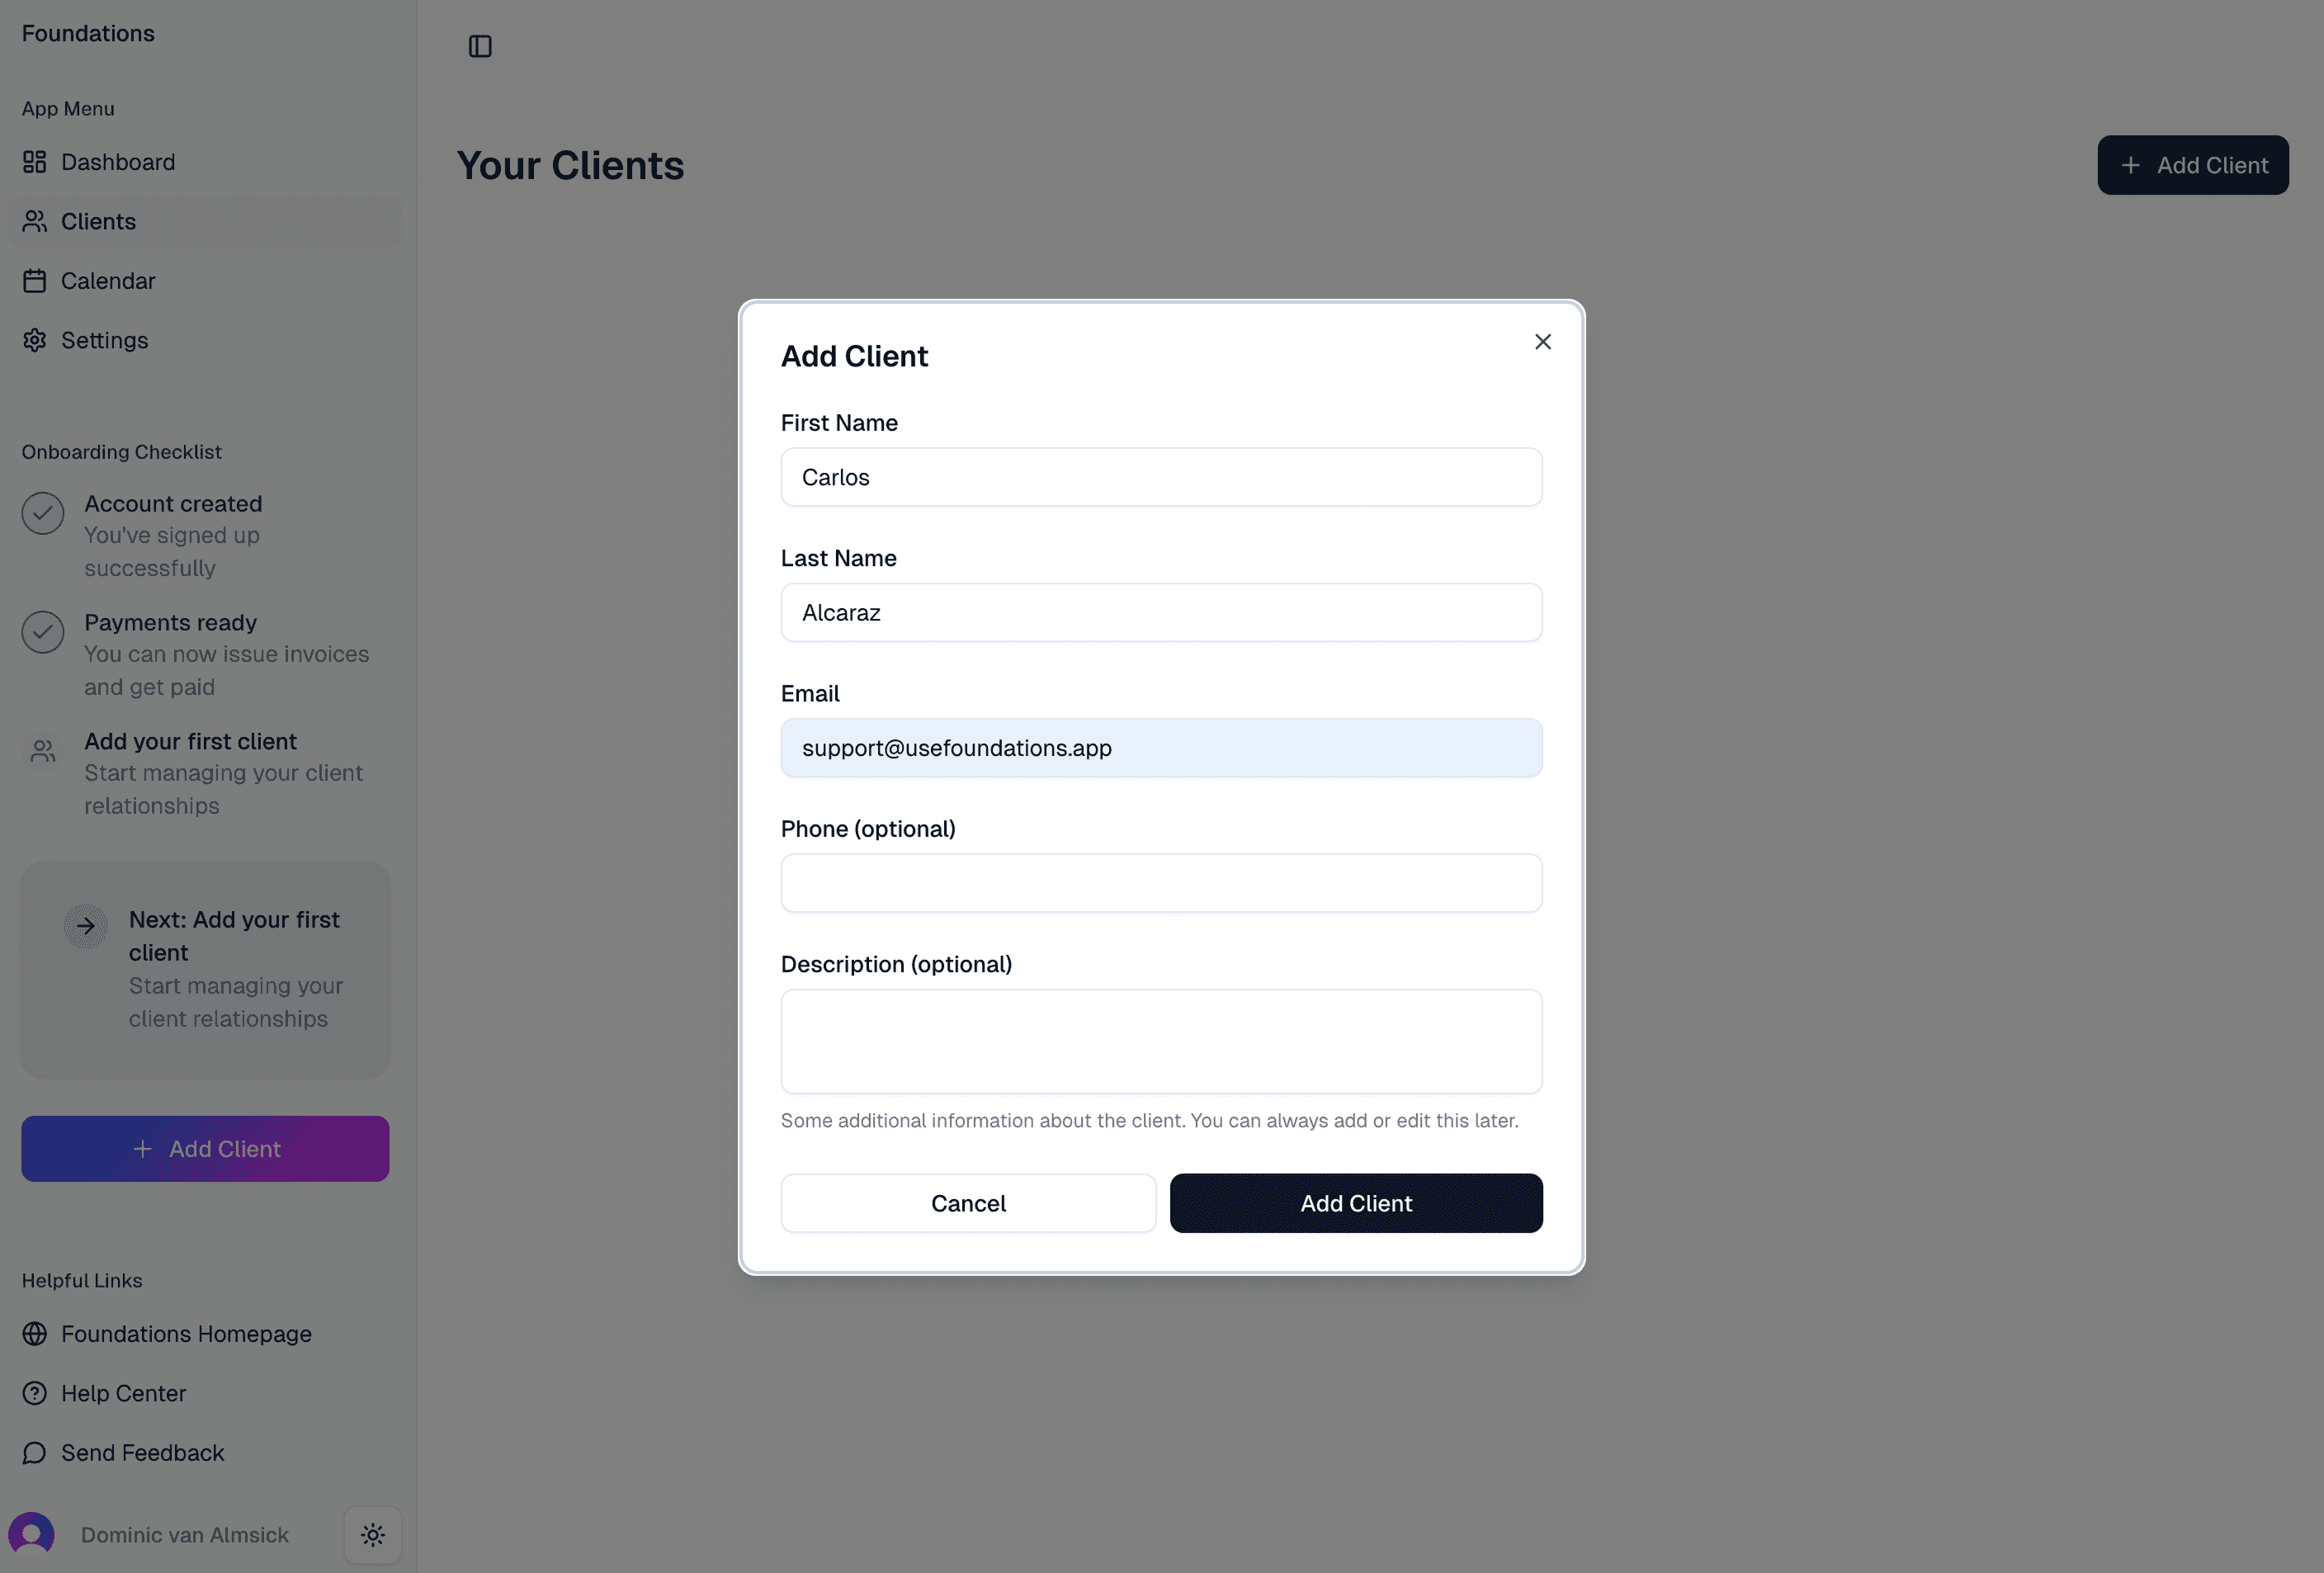
Click any of the visible Add Client buttons, either in the top-right or center of the page. This will open a form where you can input basic client information. First name, last name, and email are required.
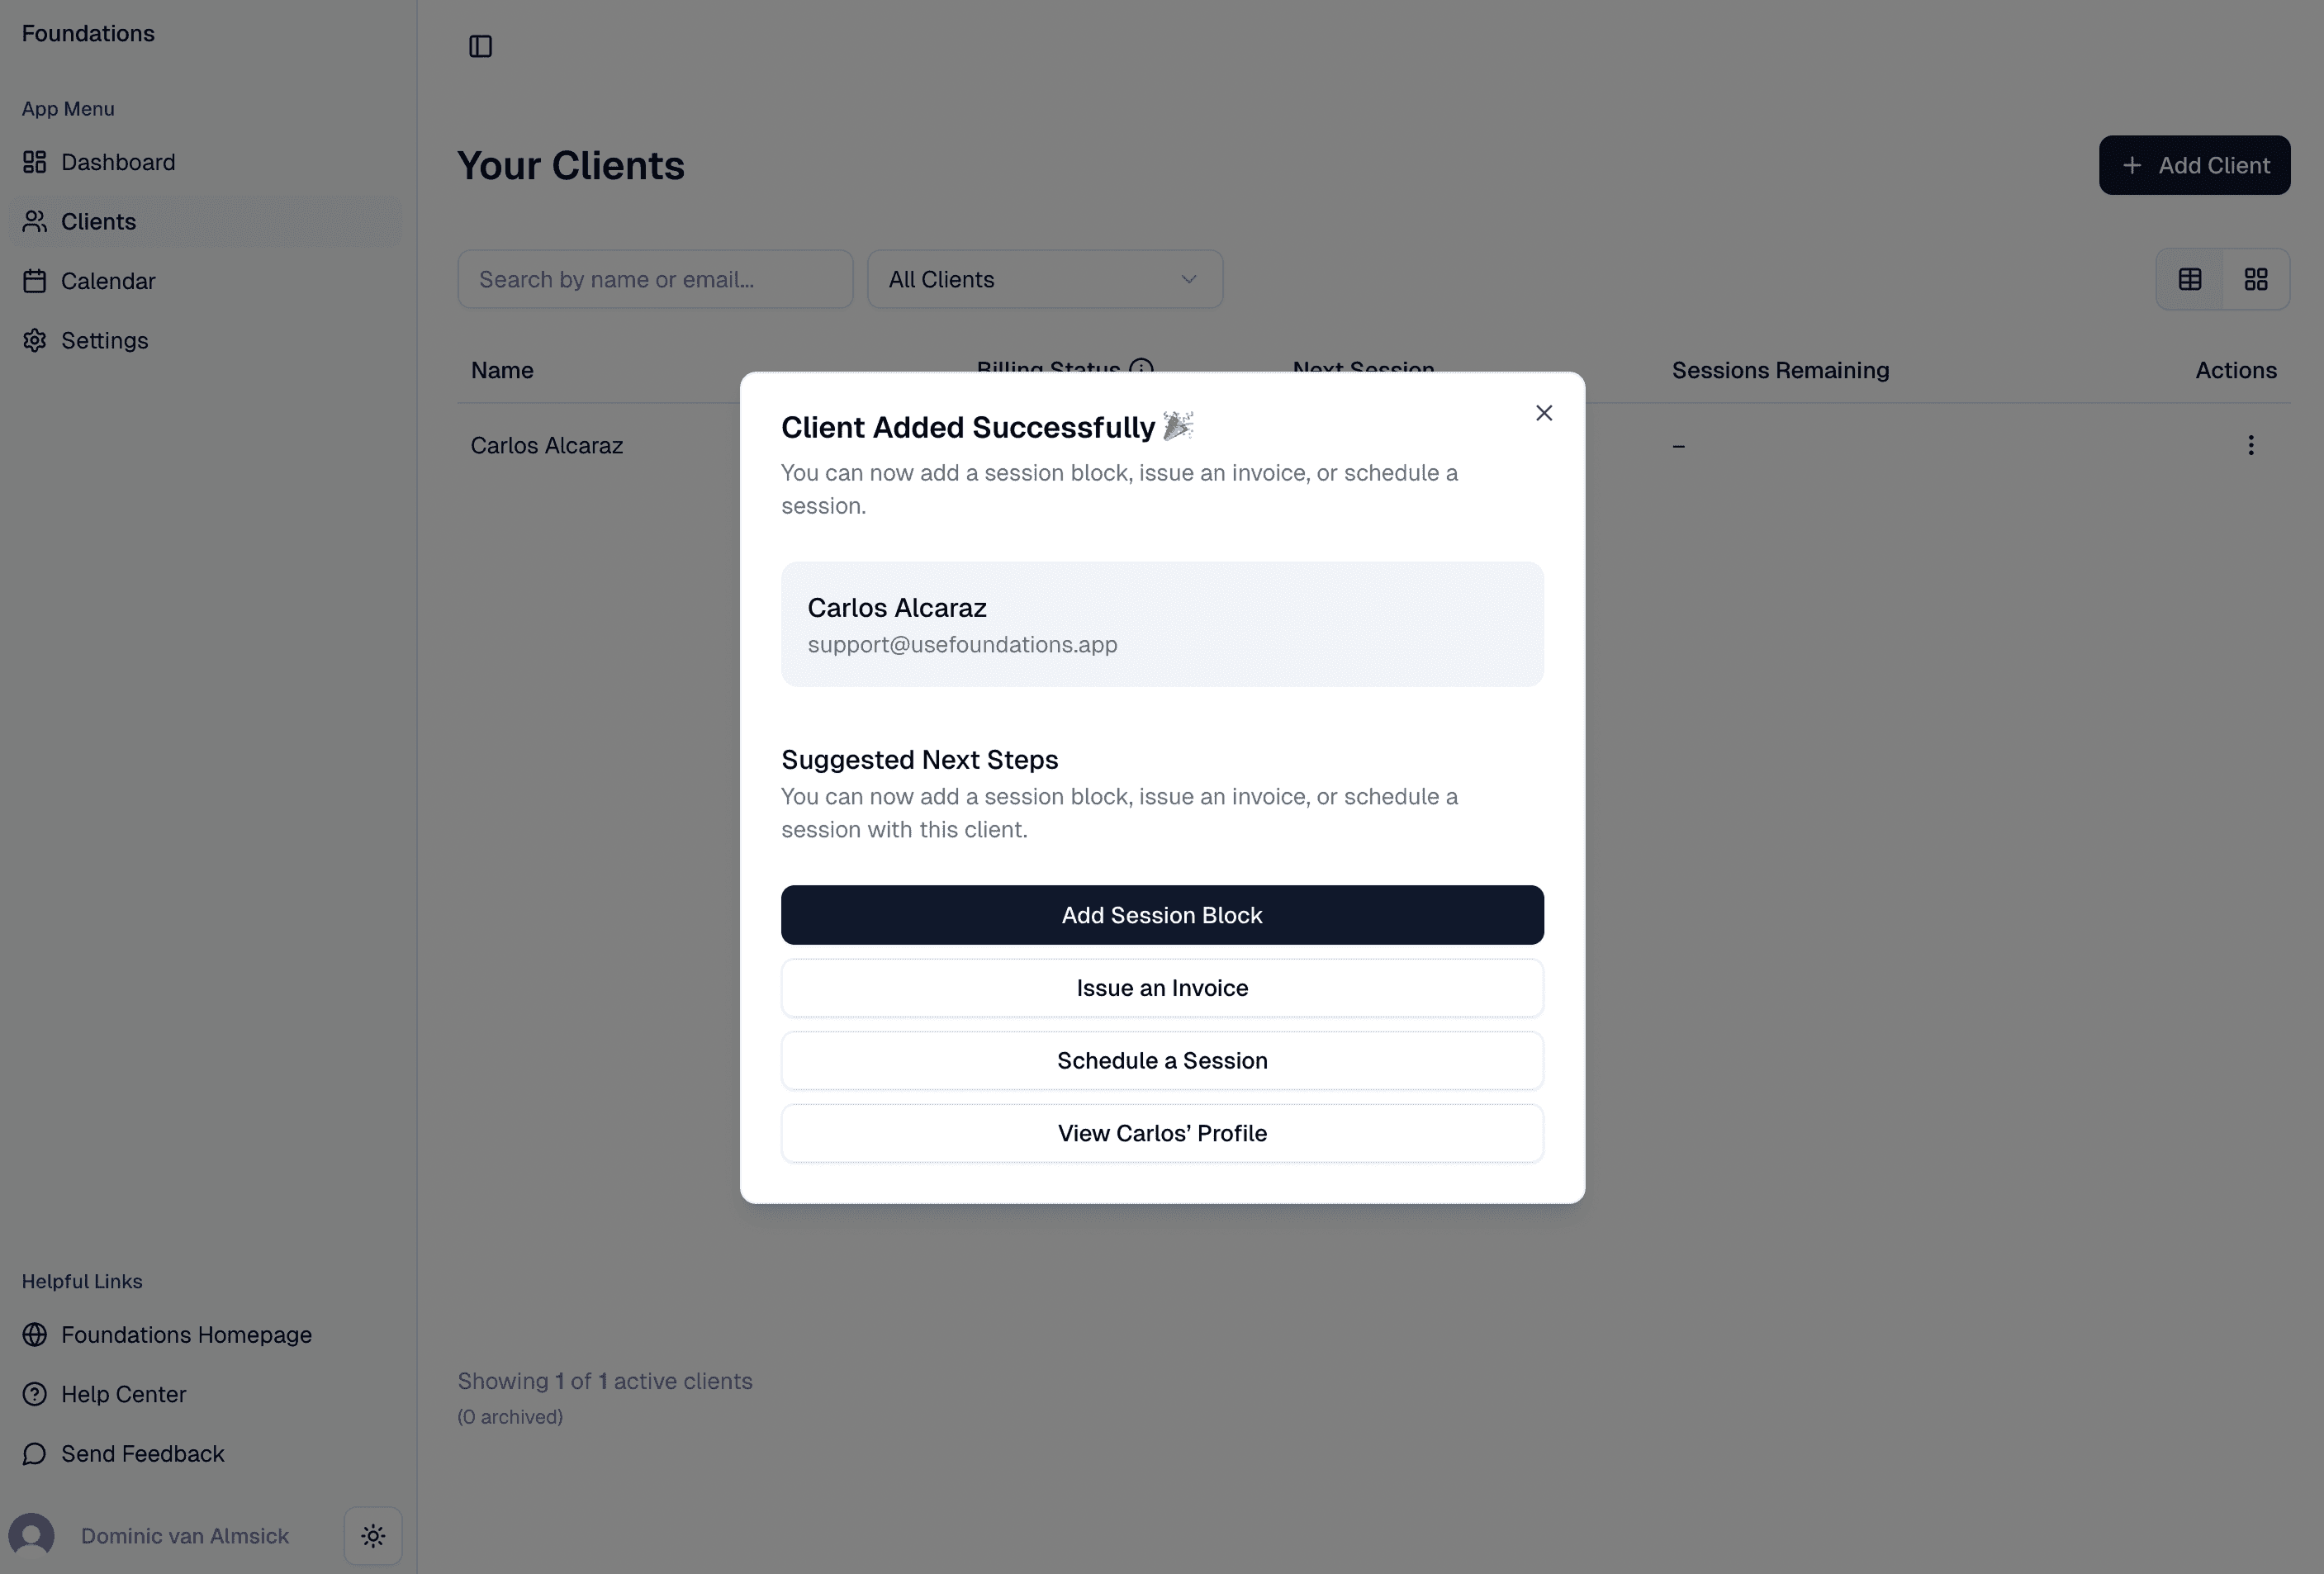
And that’s it! You’ve added your first client and are ready to schedule sessions with them, issue invoices, and more.
4. Schedule a Session and Issue an Invoice
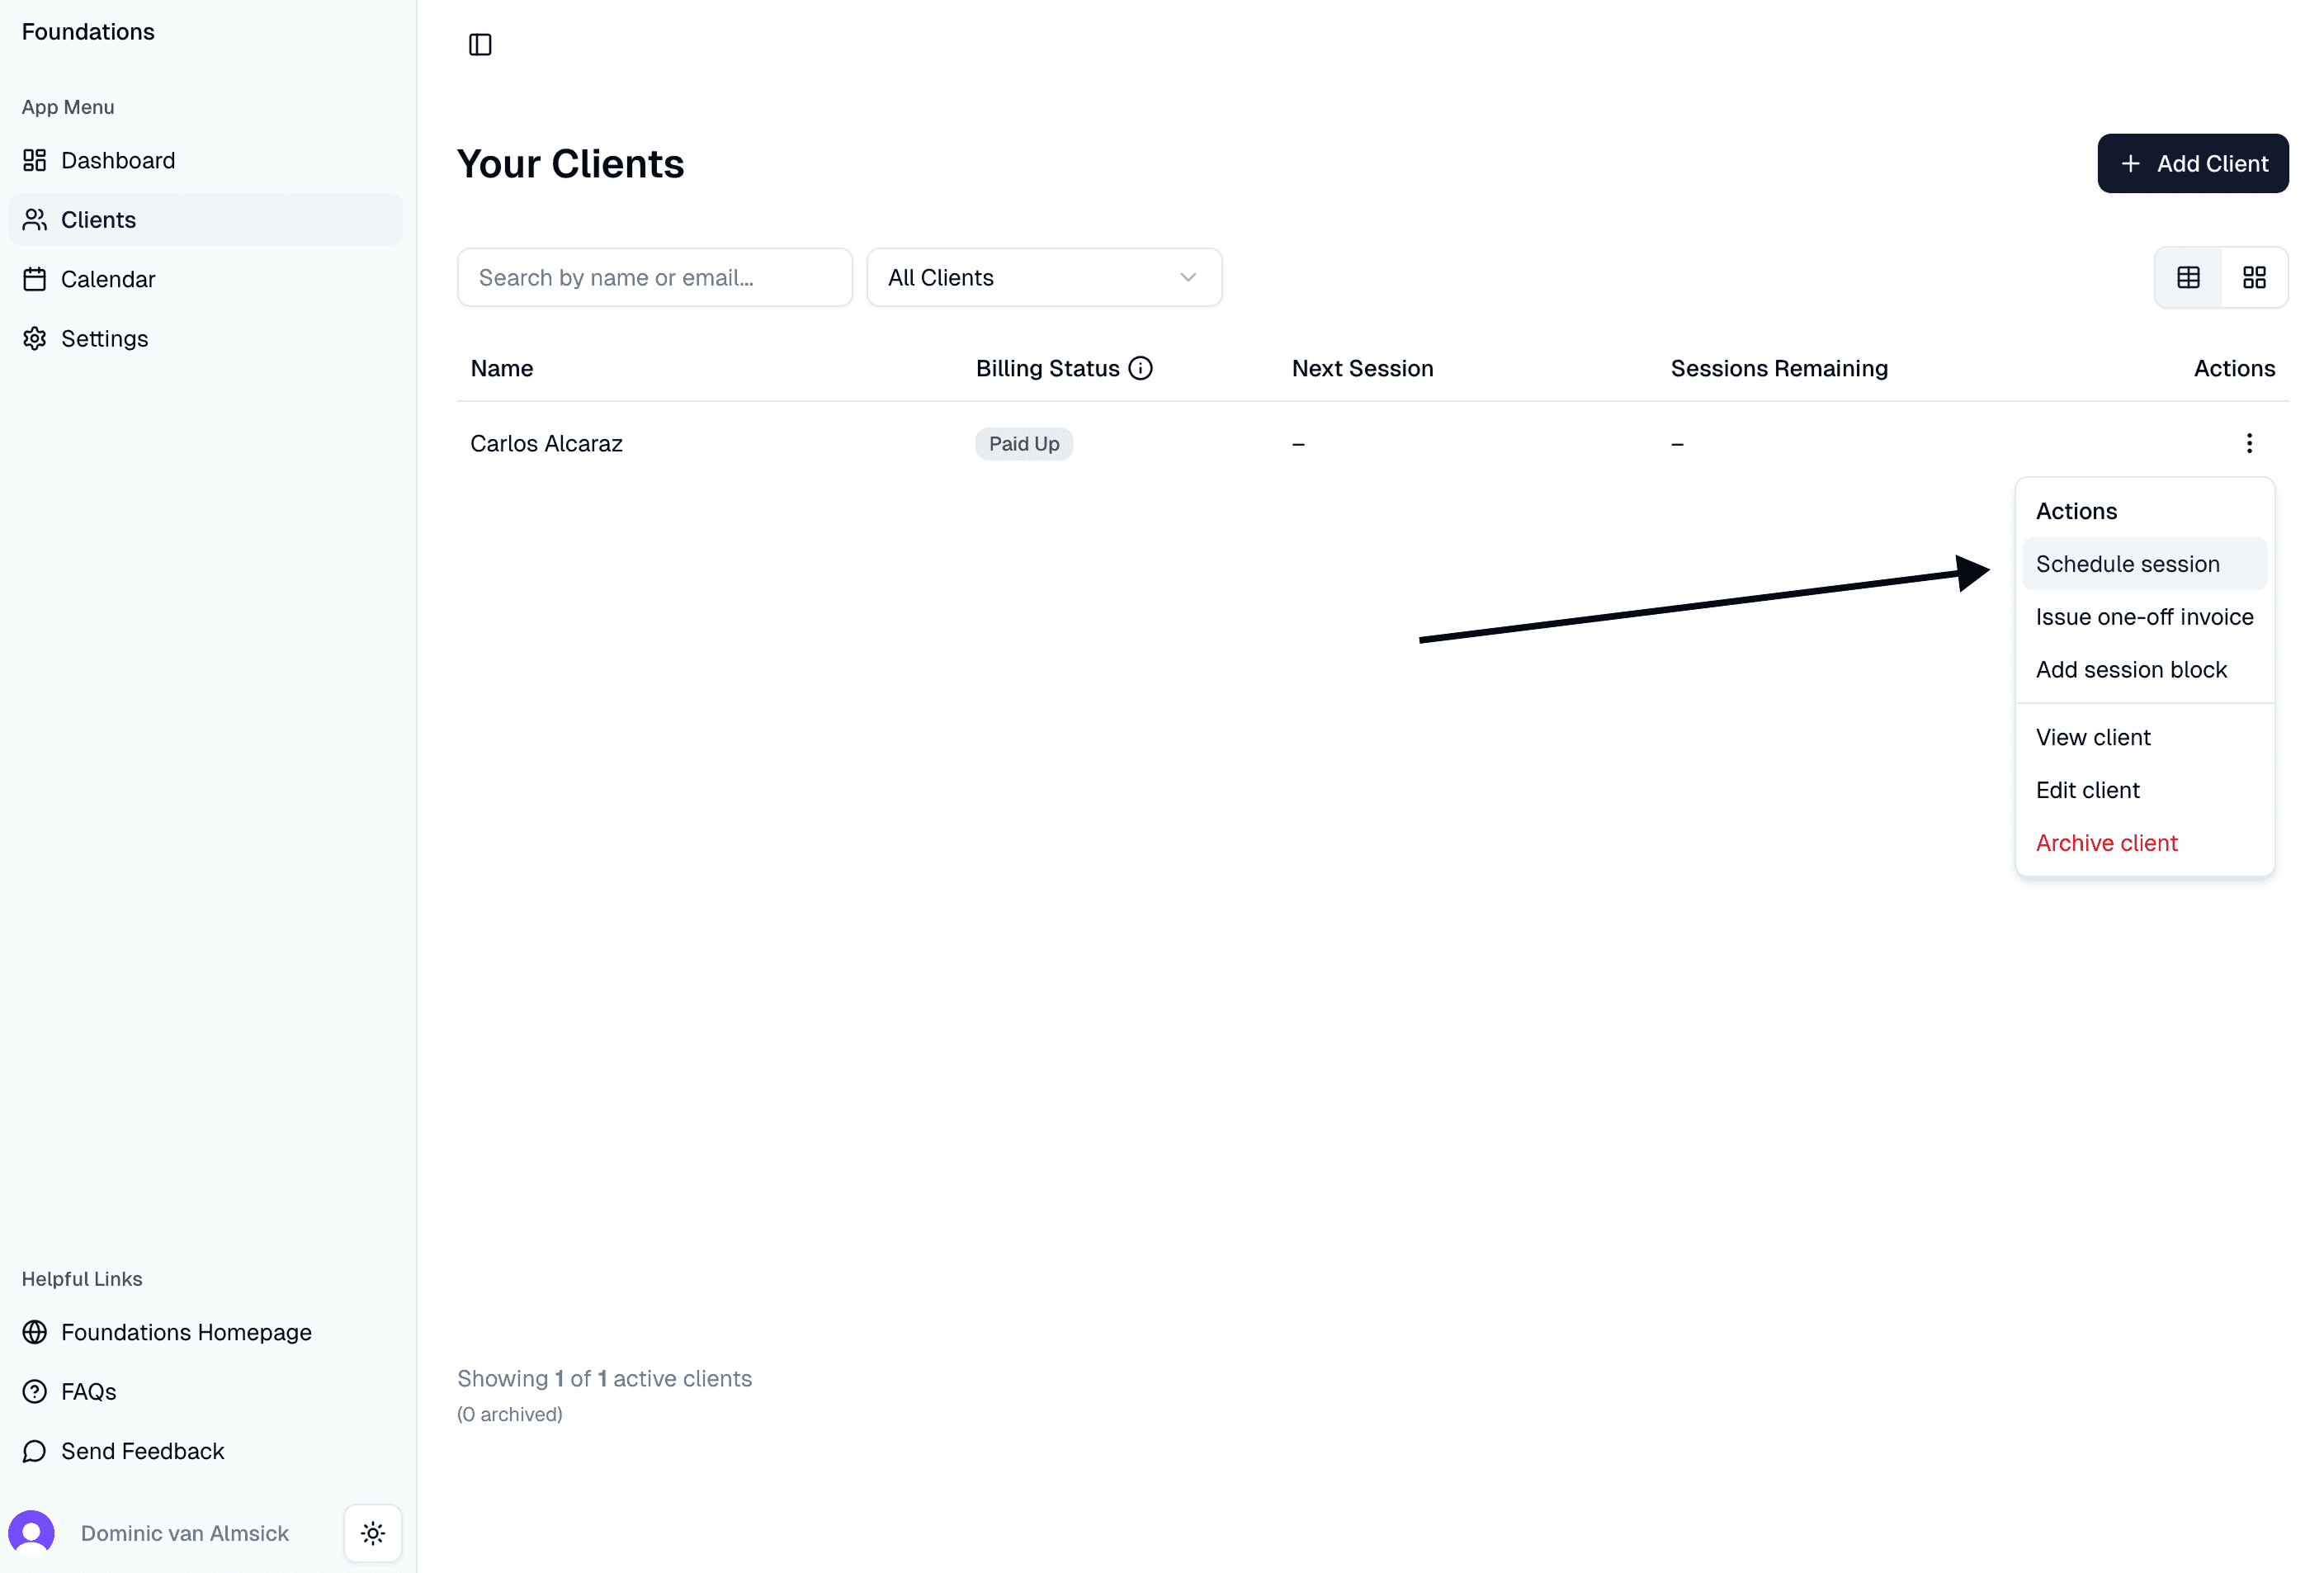
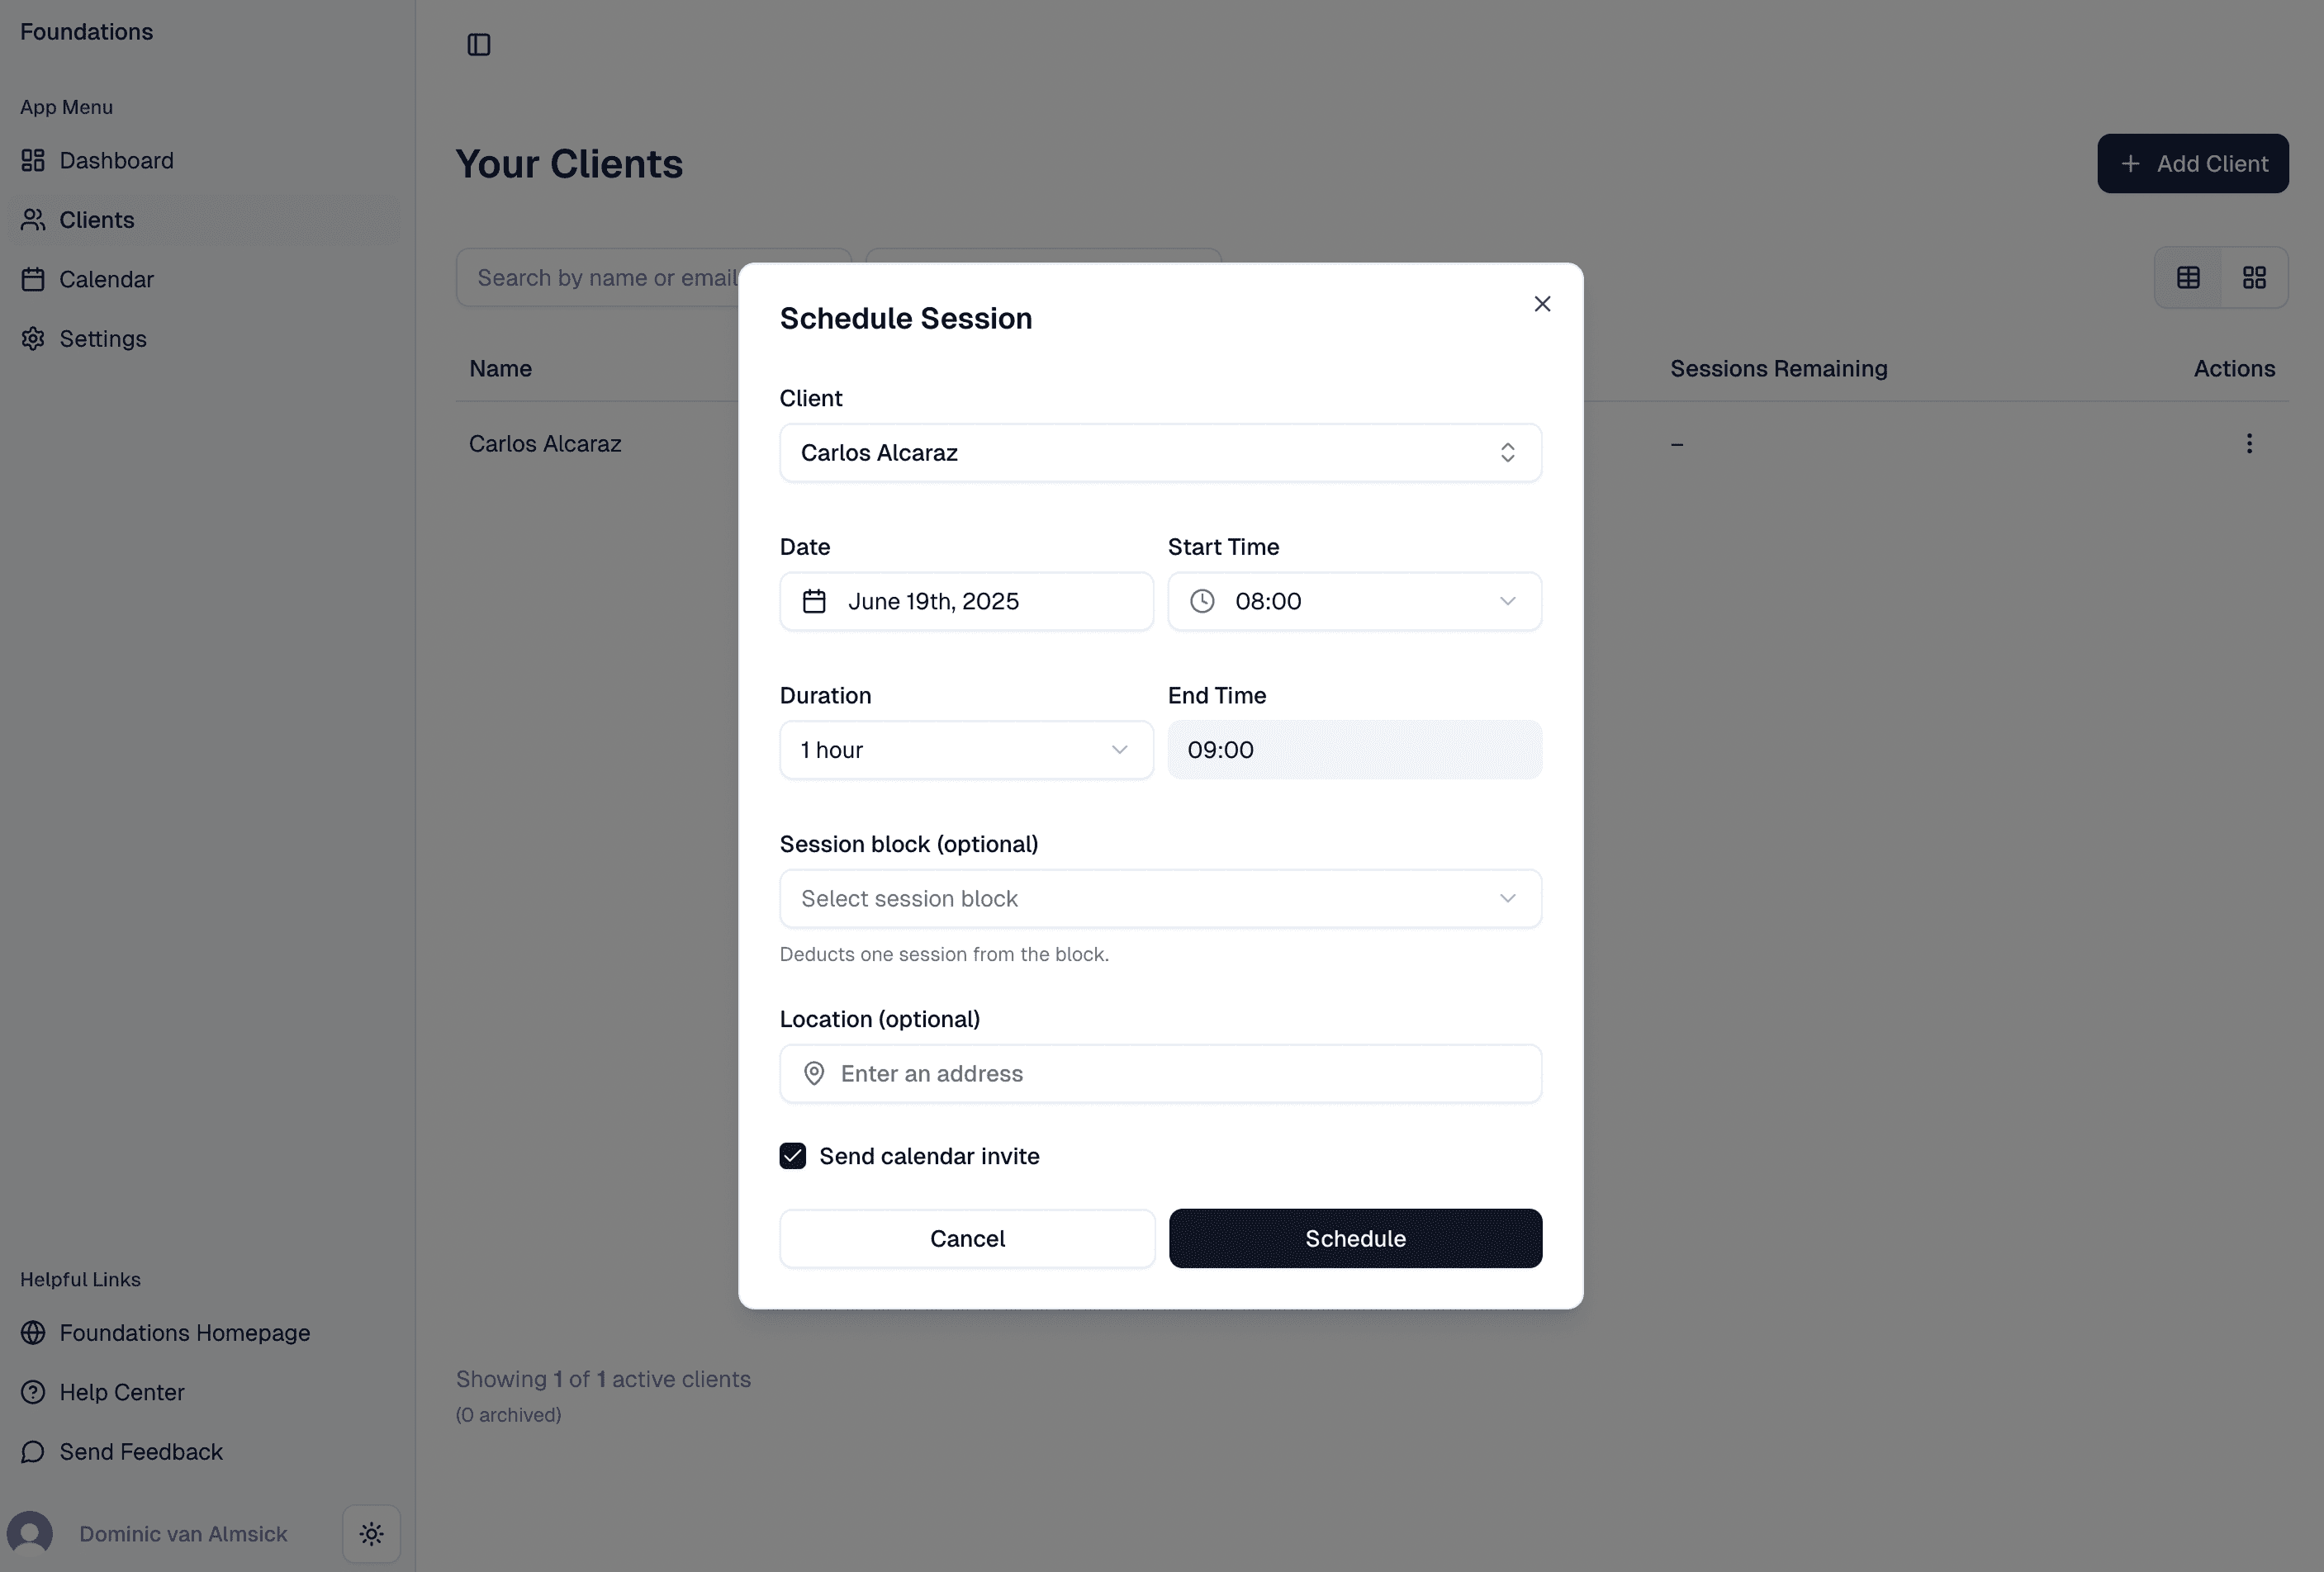
Start by clicking the three-dots for your new client in the Actions column of the clients table, then click Schedule session in the dropdown menu.
Complete the form with the session’s details.
You can ignore the Session block field, as we haven't discussed session blocks (prepaid bundles of sessions). We cover them in another article.
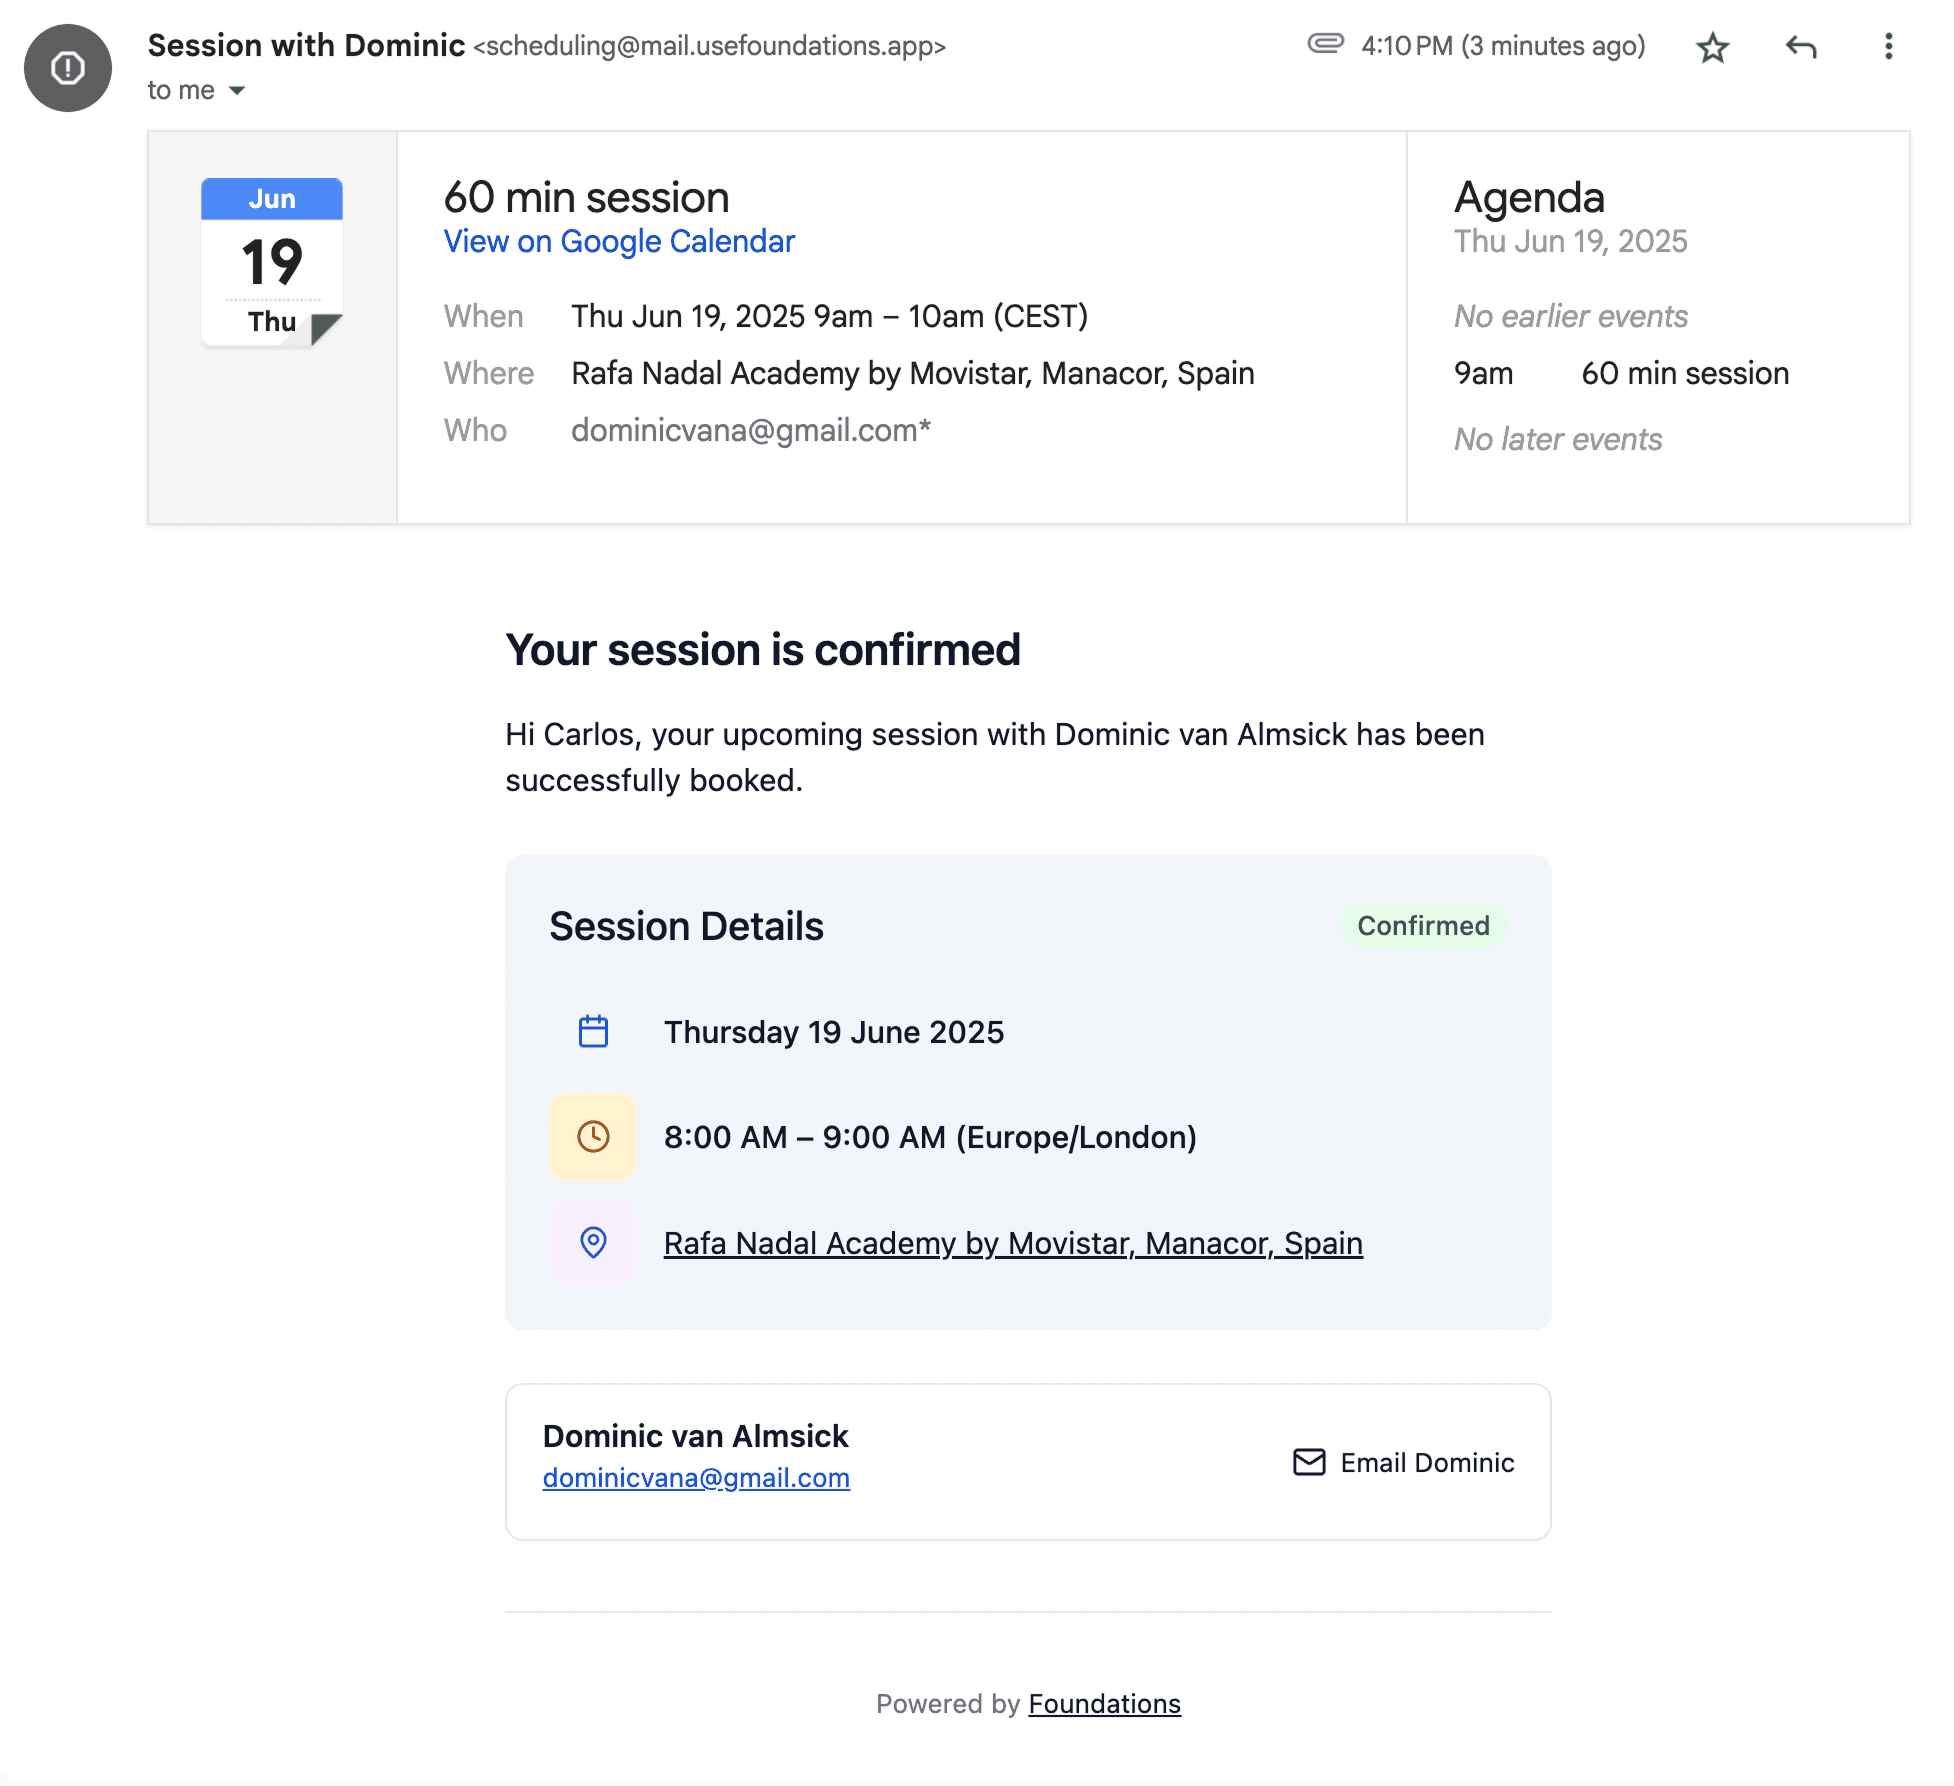
Leave the Send calendar invite checkbox checked. This ensures your client receives an email confirmation and calendar invite for the session.
After you click Schedule, you'll see the success page showing a summary of the session you just scheduled, along with the suggested next step of issuing an invoice for it.
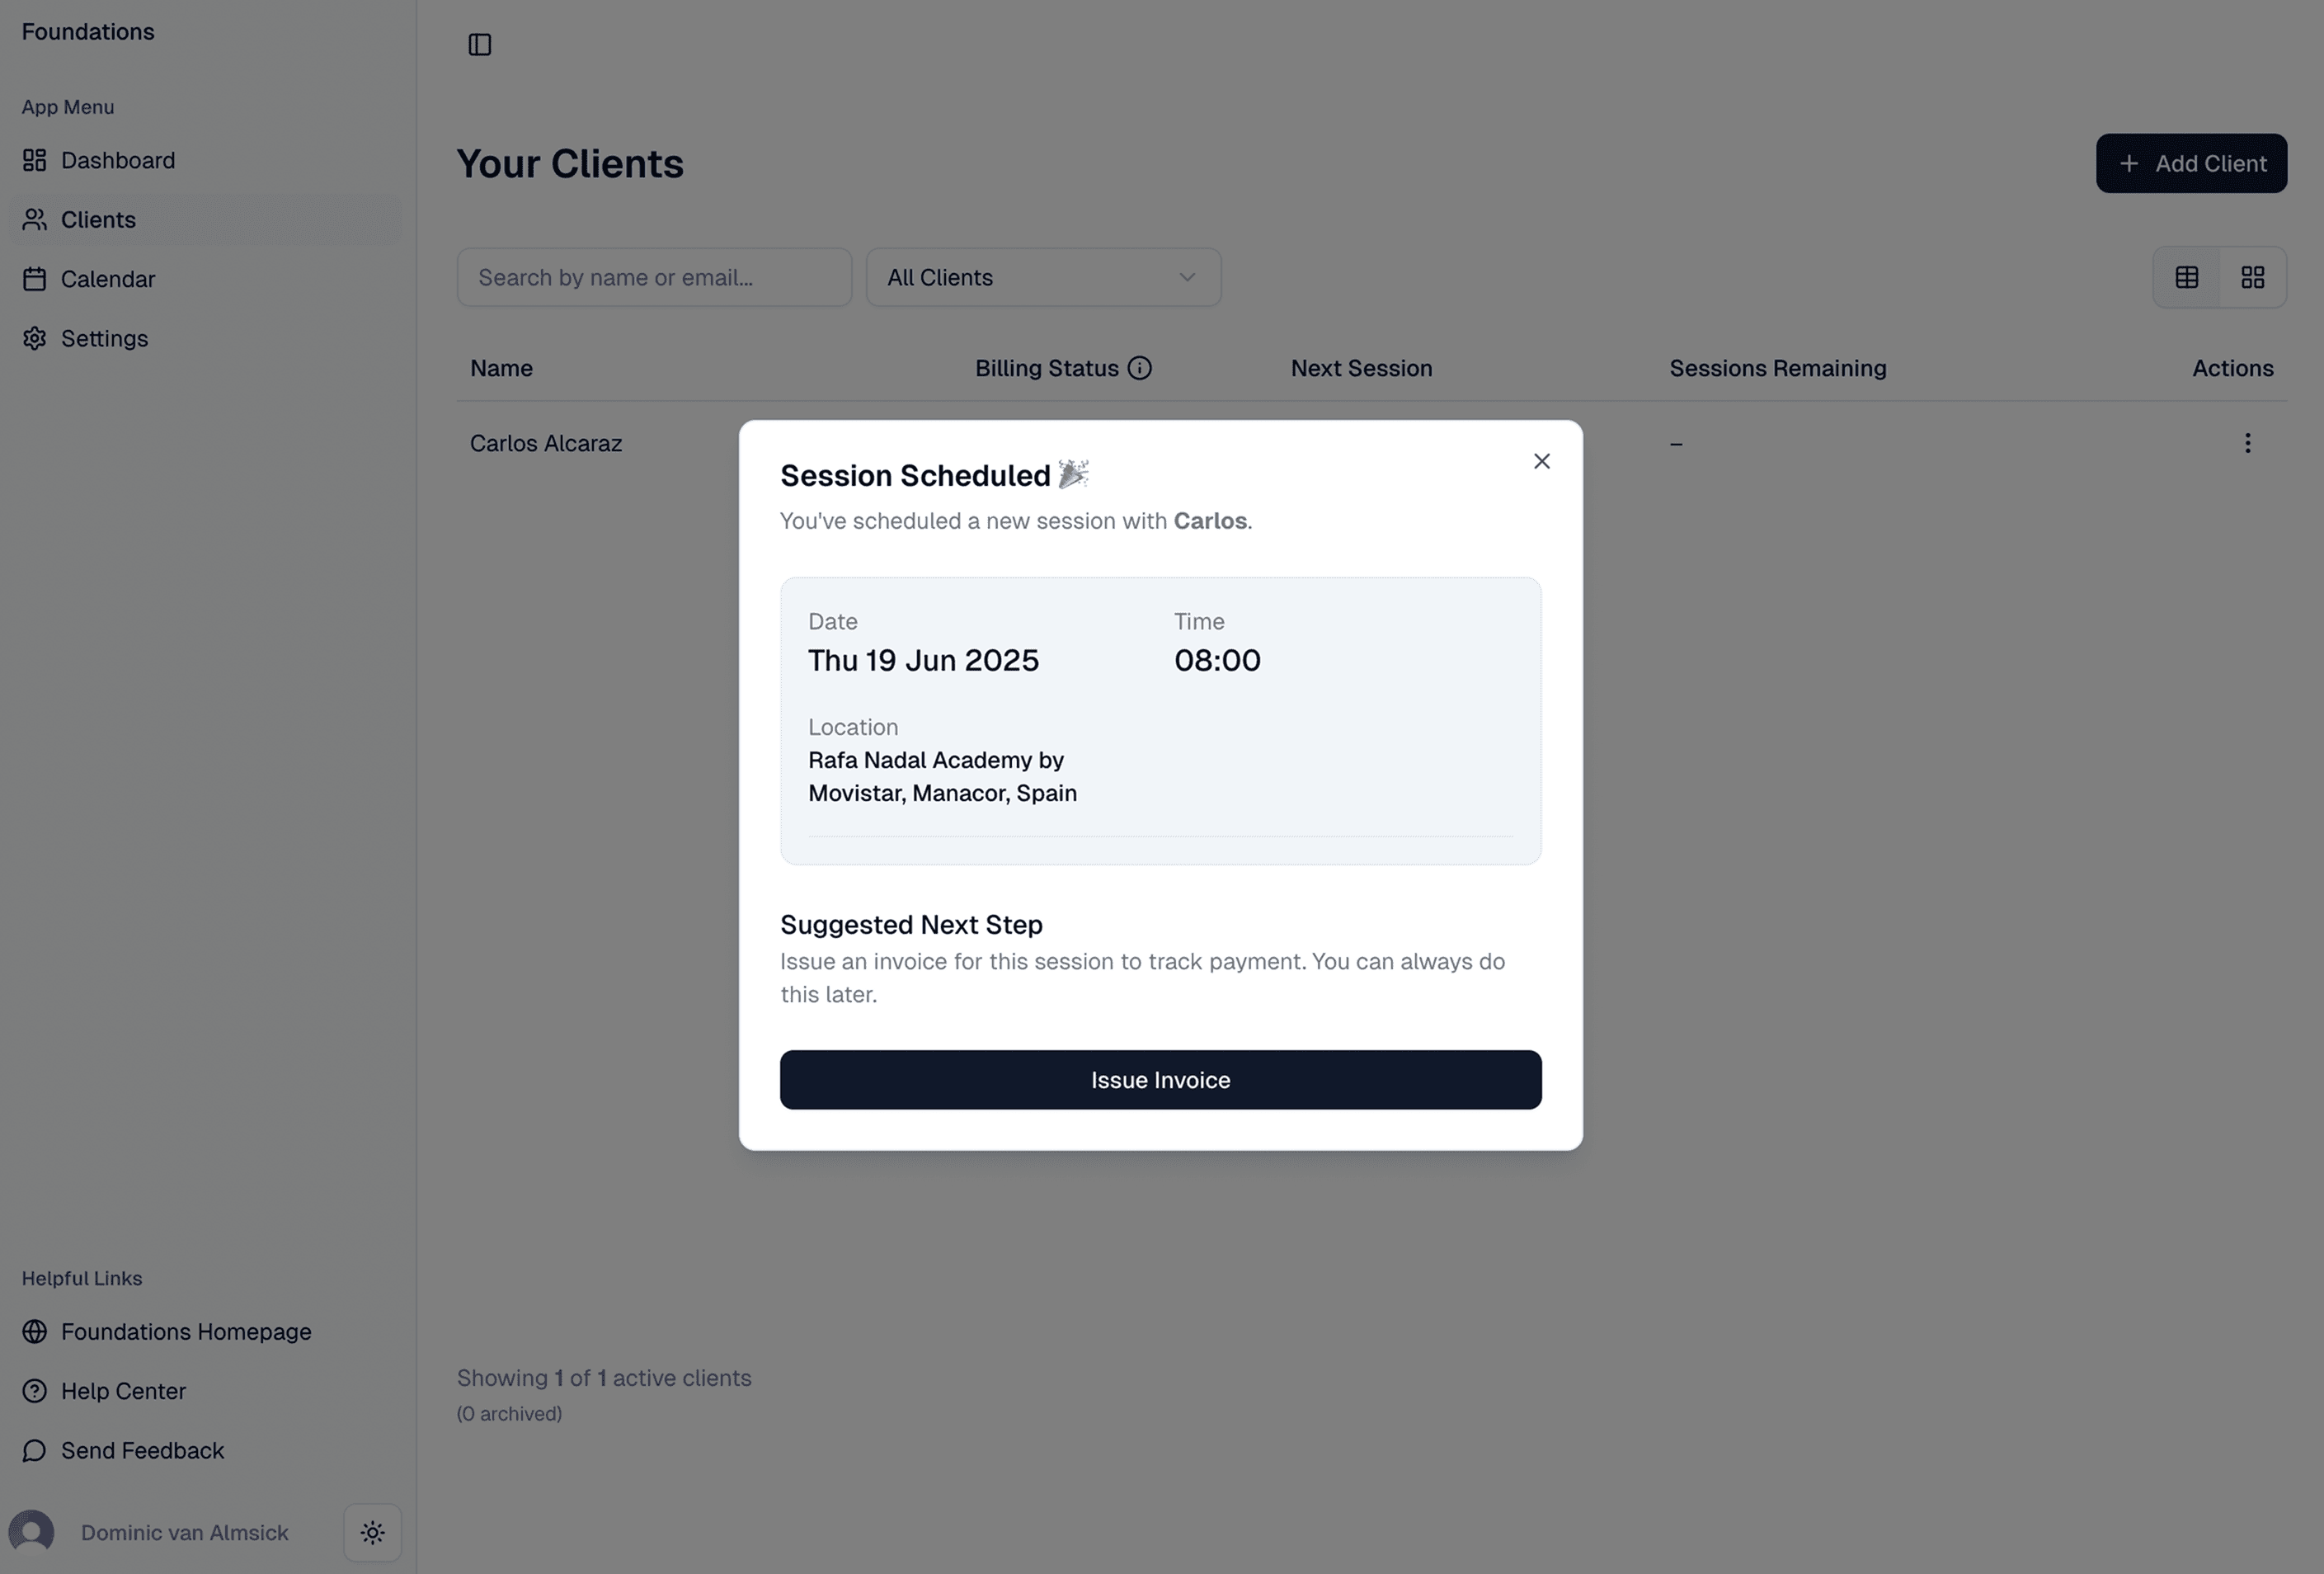
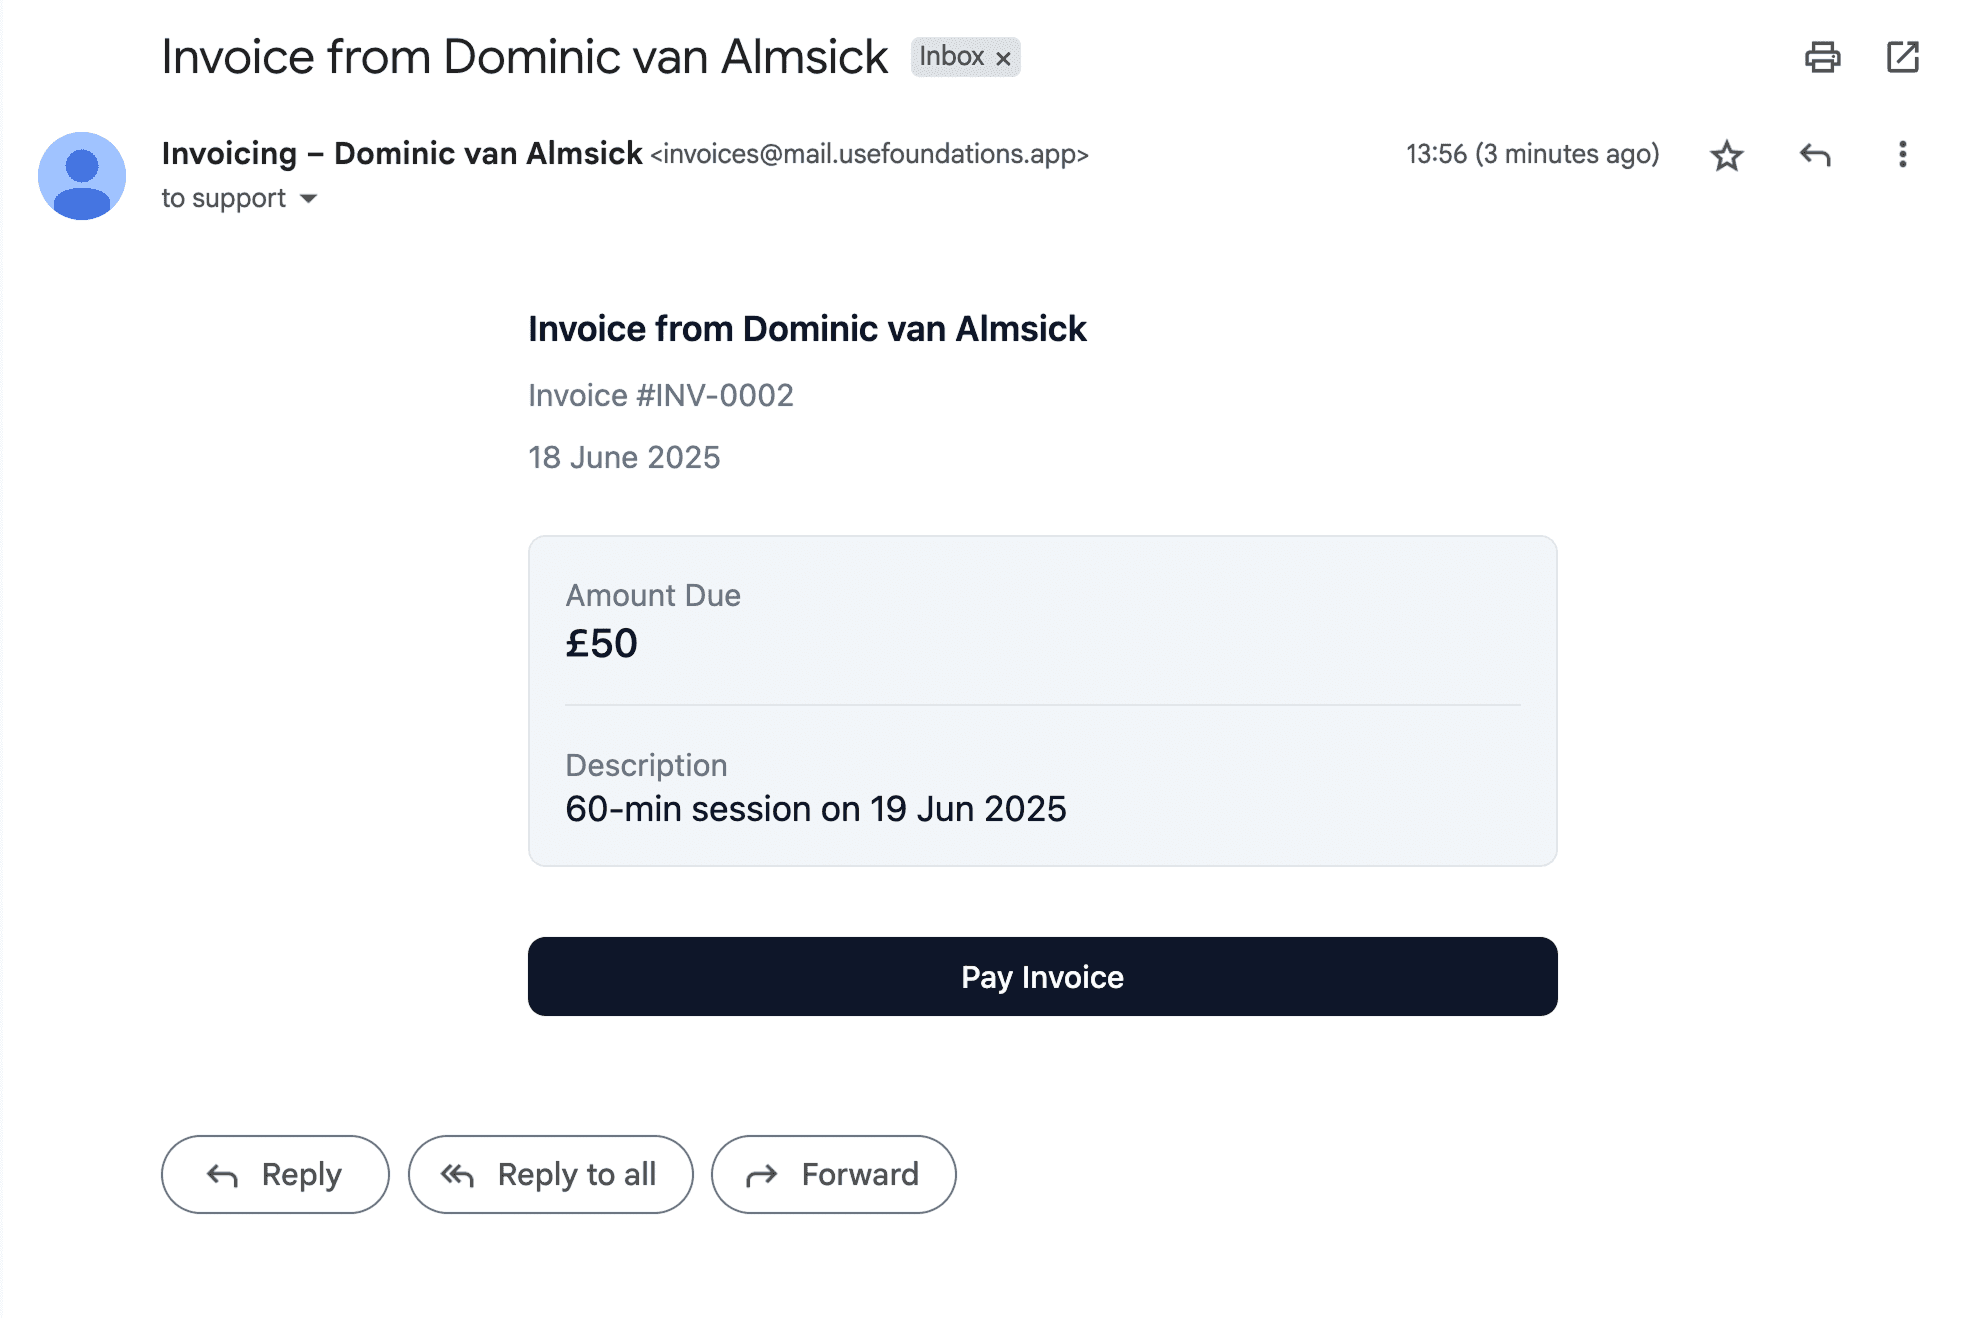
If you click the Issue Invoice button, you'll be taken to the invoice email builder. You can input the amount to charge for the session, as well as an additional message for your client.
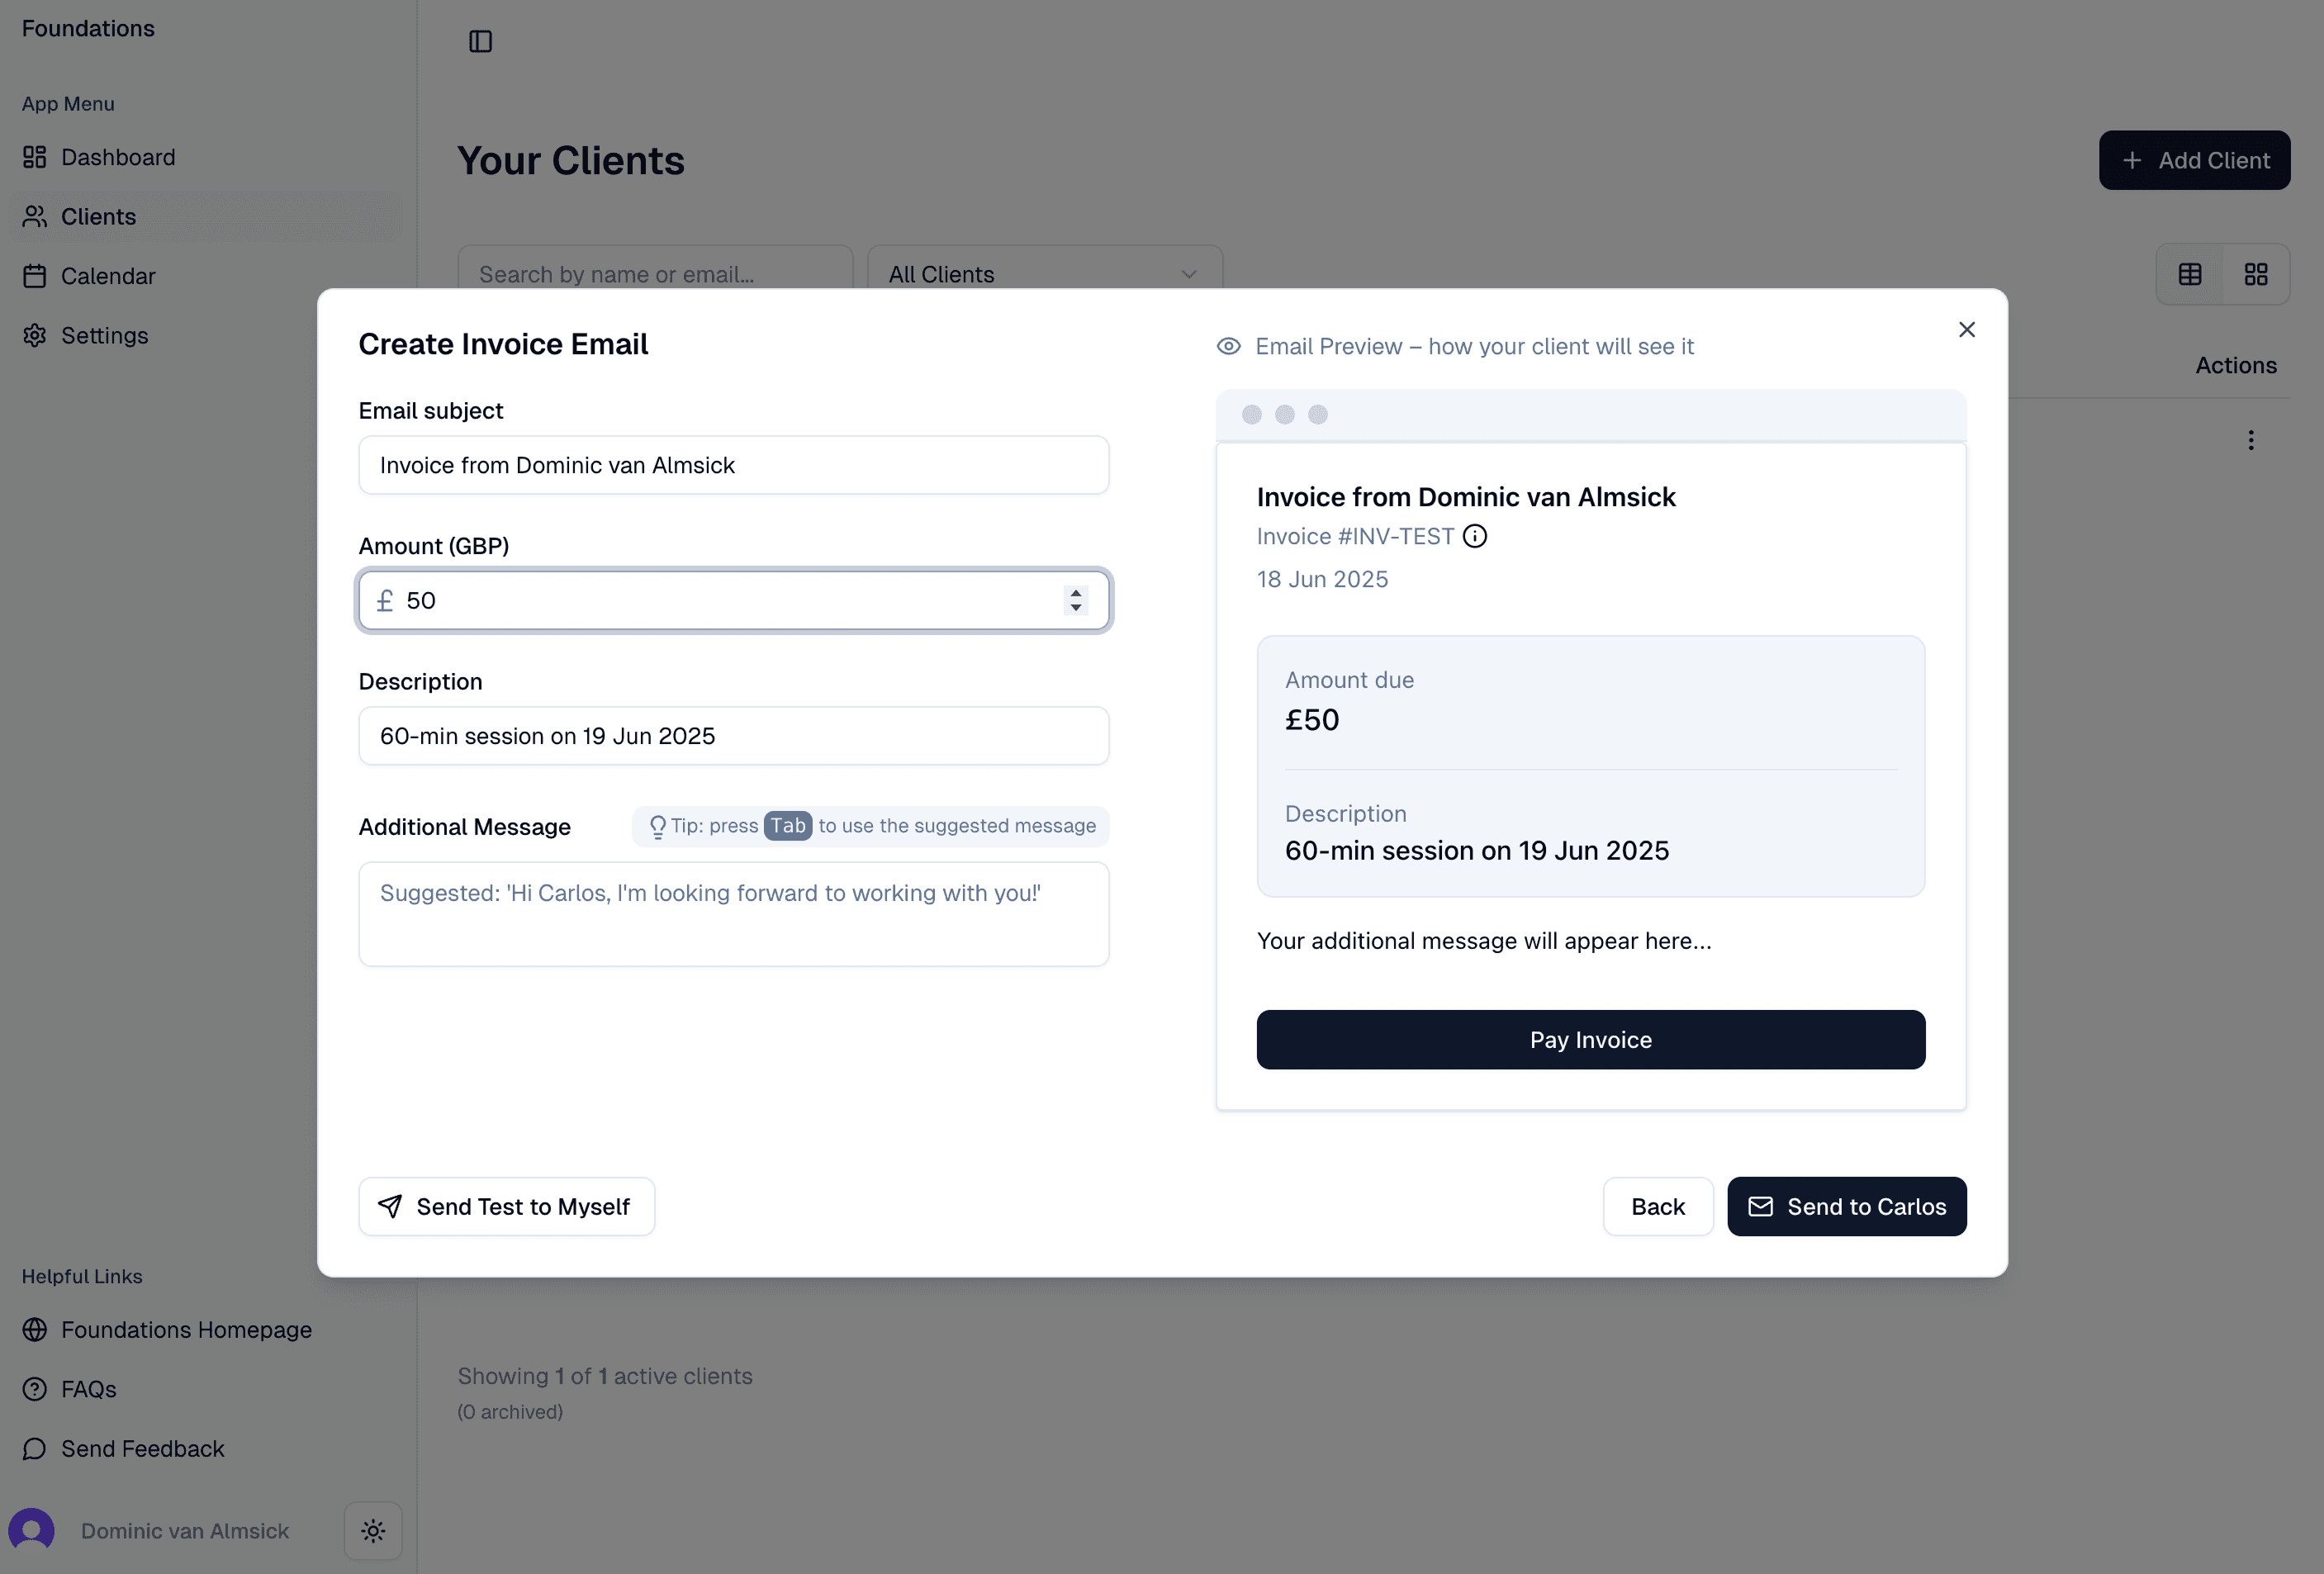
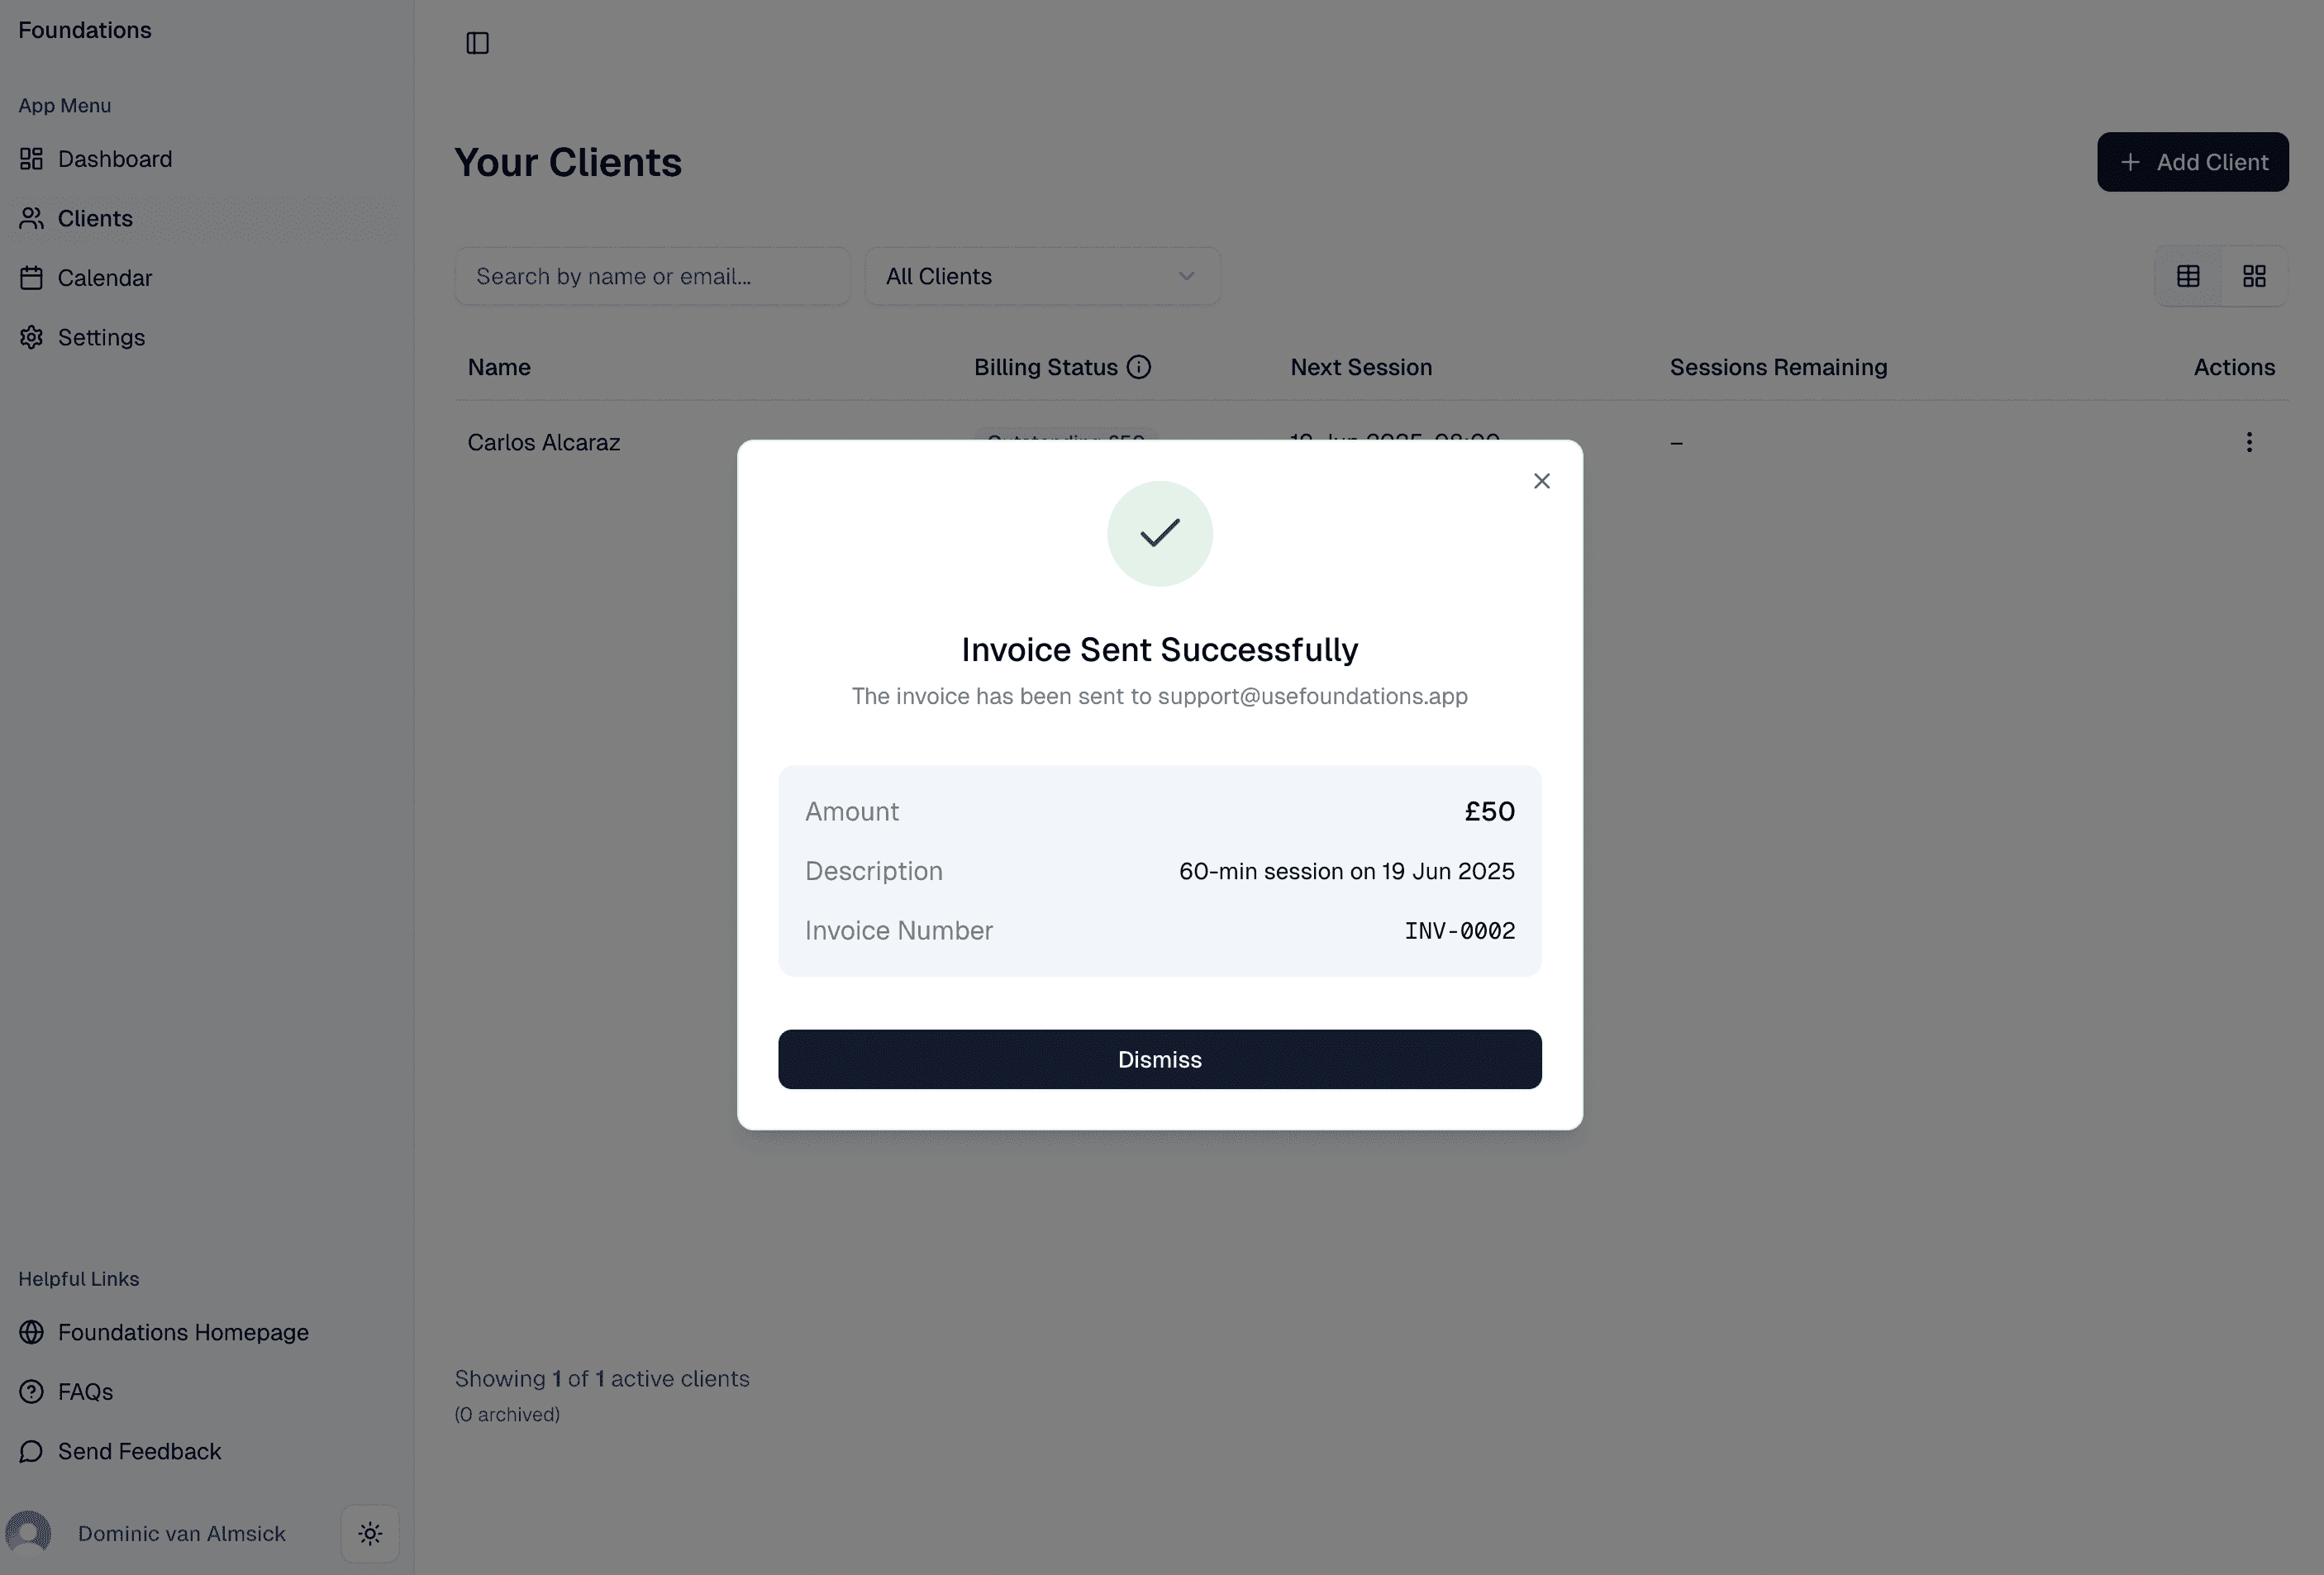
Once you're happy, click Send to… to send the invoice. You'll then see a confirmation that the invoice was sent successfully.
In the meantime, your client will have received two emails:
- A session confirmation email, which includes a calendar invite.
- The invoice itself. Clicking the Pay Invoice button takes them to a secure Stripe payment page. If they open it on their mobile device they will see convenient options like paying with Apple or Google Pay.

And that's it! You've successfully set up your account, added a client, scheduled a session, and issued an invoice.